
To get the best possible quality out of any 3D printing material it’s important to match the slicer settings with the material which is used. On this page we’ll run through the most important settings and suggest good starting values for various printers. If your machine isn’t in our list use the general recommended settings.
In the table below you can quickly find values for your machine, scroll a bit further down to read more about each settings.
[table id=9 /]
Heated Platform
nGen is best printed on a heated build platform. You want to be near the heat resistance temperature of 85C. Therefor most 3D printers will do fine with 75C/85C platform temperature.
If your machine doesn’t feature a heated platform, then you can look into using accessories such as BuildTak, 3Deeze and 3DLac. For small to medium sized parts the accessories can work, but for large parts covering the entire build platform it most likely will show warping on the bottom of the print.
Printing Temperature
The temperature we set when starting a print really depends on the chosen layerheight and print speed.
Flow of material in mm3/s = (layerheight*nozzle width)*print speed
When considering normal settings such as 0.2mm layerheight and 50 mm/s speed we recommend for most machines a processing temperature of 220C / 240C.
When settings are much different then a regular setup, for instance 0.05mm and 50 mm/s print speed the set temperature could be adjusted. In this case it’s likely that you won’t need as high temperature as in Case 1, because the mm/3 s is 4x less.
Cooling
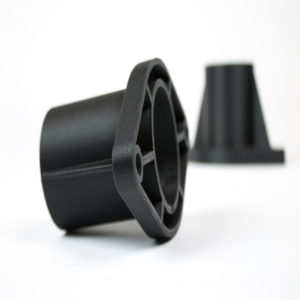
nGen is a highly efficient material, with elevated glass temperature of 85C but a processing temperature of 220C/240C meaning less heat to dissipate to cool down below glass temperature. It performs great on overhangs, as long as they are still attached to the main model.
If you’re used to setting a 100% fan speed all the time, you might want to experiment with less cooling if you notice layer adhesion or part strength could be better. If a layer cools down too much it will adhere less to the next layer.
We also like the option of only activating layer cooling for the perimeter lines, the infill is not cooled and therefore should maintain best possible layer adhesion.
Bridging
Most slicers will allow users to set special settings when a bridge is printed in a model. Usually we can set bridging speed, bridging cooling and sometimes also bridging perimeter width (or flow).
We recommend slower printing on bridges, since there’s no material to support the printed line we don’t want to ‘break the melt’ by moving too fast. Slowing down the speed when bridging helps retain the melt strength and also allows the printed line to cool down in mid-air.
Cooling can be set at 100% to help the cool down of the first printed lines.
If you can still see the melt break when printing a bridge, try and increase the flow or bridge perimeter width.
Retraction
Before you start tweaking the retraction values make sure you’ve found the sweet spot in terms of printing temperature and speed for your machine.
PLA retraction values should be a good starting value for most machines. One can expect slightly higher values of retraction speed and retraction length.
Coasting is a nice option included in Simplify. This is the act of stopping the extrusion just before a travel move is triggered, this helps get rid of the pressure in the hot-end and therefor also making a retraction move more effective.
We also like the option of only activating layer cooling for the perimeter lines, the infill is not cooled and therefore should maintain best possible layer adhesion.
Minimal layertime
If you’re familiar with the minimal layer time setting then you’ll know this is what causes a printer to slow down when printing fine features on a model. Slowing down the print allows each layer to cool down a minimum amount of time. This is of course different for each material, because it depends on how fast a material can dissipate heat and how much heat needs to be dissipated.
For nGen we reckon you should be able to lower this value compared to your standard PLA value. How much exactly is hard to tell as it depends on the printers cooling efficiency.


46 Comments
Question regarding stringing with nGen. I’m getting a lot of it on my Creality CR-M4 (Creality Slicer 4.8 if that matters). I read through the other comments here and tried suggestions I found. No luck. The latest attempt was to increase retraction distance from 4mm to 5.5mm basked on Håkan’s report. I also enabled Z-Hop and set it to 0.5mm. Stringing is worse than the default settings. Print temp is 230°, Flow 100%. Print speed 50mm/s, Travel speed 120mm/s, Print cooling enabled with fan at 30%, Regular fan speed at height 0.7mm, and Min layer time 10s.
FWIW, I read somewhere that stringing could be due to moisture in the filament. I was also getting a lot of popping noise while printing so I got a filament dryer. I ran the spool through two 6 hour cycles at 50°C. No more popping but it didn’t solve the stringing.
I wonder if you can make suggestions to help me get rid of the stringing.
Thank you
Not sticking to my Ultimaker bed… Tried printing as PLA Plus and ABS…
i cant setup this with cura and Ultimaker S3.
I get error No profiles for this material.
Any suggestions?
Hello everyone,
Just tried to print a few models with nGen and got this outcome.
https://ibb.co/T0vZ2jD
https://ibb.co/n8hnQ48
Printed on Anycubic i3 Mega-s, params:
0.2mm
40mm/s
230/220C
bed 85C
flow 95%
fan 40%
retract 4.5mm/25mm/s
Question: could the outcome be considered as a suitable one in general or could be improved somehow?
Thank you
I would like to use Ngen to make the 3Dlabprint.com models.
Now I make these in PLA, but due to the low glass temp this material is not ideal for use in the summersun.
Does anyone have experience with gluing Ngen or can someone give advice on how to glue Ngen? C.A. what I use with PLA unfortunately doesn’t work.
I think if there is an adhesive to properly bond Ngen, it is a perfect material to use for this purpose. And many rc modellers will choose Ngen over PLA.
Thanks in advance.
Kind regards,
Coen
We’ve seen good results with a 2-component Polyurethane glue.
The filling properties also help to create a better bond between printed parts.
Any plans for introducing more colors? I’m specifically interested in the Lilac available over with PLA.
As far as printing goes, over here, aluminium bed with blue tape at 70°C, 230°C first layer, rest 225°C, a little cooling, at 55mm/s, seems to work all fine on an E3Dv6 0.4mm nozzle. Depending on how large the model is, some relief cuts where possible/invisible to prevent warping are necessary, though.
Thank you for sharing your settings Mario.
No plans to release more colors at the moment I’m afraid.
The last couple of days I have problems with printing. Currently I’m trying to print a model that exists of 4 parts. Somewhere during the print it gets problems. The filament is not being pushed through. I see grinding marks on the filament. I’m using ngen for filament and slic3r for prusa as slicer. See the link for images. http://imgur.com/a/tEbrL Every part is from a seperate print run (so I did 3 times the 4 prints). Though I like the material, I’m kind off lost what is going on here..
Without more specifics about your settings etc. it’s hard to say something about why this is happening.
Please contact us at support@colorfabb.com with what you’ve tried so far, the results, the .stl file and the slic3r settings used so we can take a closer look.
If you’re using the Prusa i3 MK2 (as your Prusa slic3r suggests) than normally we use pretty much their default profiles for nGen.
Though looking at the highest print you might need a bit more temperature for some reason on this one.
Amazing to print with. I used PET ordered from Prusa before and I have done many hours of calibration. Prints with Prusa-PET was ok, But this nGen and the HT is fantastic, really good bridging and bonding. We are printing end user parts with this and a Prusa mk2 and it works great! Keep up the good work!
Just started using nGen.. My driving factor was the glass temperature for a few parts for my plane.. I tried for 3 days with ABS and could not get a single print to come out..
I did a bit of research and came up to nGen and thought I would give it a try.. Did a couple of small test prints to try and work out basic settings.. Prints were good right off the bat.. I needed to print a replacement xAxis for my printer so that was my 3rd print.. Turned out beautiful and strong.. I am now printing a 5″ x 4″ cowl vent which is looking amazing.. Absolutely no warping issues like ABS and I have not really had any bed sticking problems. In any case that is my 2 cents and so far am really happy with this filament..
I have a cheap Sunhokey Prusa I3 it is in my basement which is warm but not ‘room’ temperature.. I am printing at 225C and bed is at 75C I have an aluminum bed with generic glue stick and autolevel… I am using cura for a slicer.. I print quite slow at 30mm/s and 15mm/s for the wall speed. .2mm layer height with no cooling fan.. Retraction is set at 3mm but I think that needs to be tweaked to help with a bit of stringing.
I’m not liking NGEN at all. I can get something like ninja flex to print because I can interpret the problem when I’m using a bad profile. WIth NGEN, I have no clue what’s causing what I’m seeing. For example, whenever one layer line crosses another like on infil, the material goes down looking bad. If there’s even the smallest gap that this material has to traverse you can forget about it. I can see tuning for bridges but what about a solid layer over low infill? I need twice as many layers as PLA to get a half way decent surface finish. There are almost 0 examples on youtube of anyone describing their NGEN settings. I have an e3D v6 in a Prusa Mk2. Which of the “example” profiles above is applicable to me? I don’t know anyone who owns a ultimaker. How about some settings for us RepRappers.
We understand that the examples here will not work for every printer on the market.
It’s simply impossible for us to test all of the printers, especially the RepRappers like you mention.
There are simply so many different configurations possible with RepRap machines, including a lot of one-off / DYI solutions.
I found this post on the Prusa forum (for the original hotend) as well: colorFabb nGen settings.
From our experience with the E3Dv6 you should have a decent enough starting point with the general settings posted here.
We’d be happy to take a look if we can offer advice if you’d send us some pictures and your slicer settings to support@colorfabb.com
Cura 15.04 (and proprietary slicers based on this Cura) will cross infill every layer when using infill <25% I believe.
25% or above will do one direction (angle) per layer, meaning that there are no cross-sections which the filament can snag behind.
Other slicers will offer more tweak-ability in this aspect.
I’ve had good luck on the Ultimaker 2+ by using most of the settings listed on this website. I almost eliminated the hairy prints by raising the retraction distance to 5.1mm
However my Ultimaker Original is a bit tougher to sort out. I am printing at 230C and 80C bed. I have a dual-fan shroud add on and I suspect I am cooling too much? I have it set to 40% fan and while my prints look gorgeous, they “crunch” and sound like Styrofoam. The break apart with little effort. Should I bring the fan down to 30% or lower? All I can think of is adhesion needs less air?
Thanks!
Hi Paul,
Definitely sounds like over-cooling. Cooling the material down too fast will not allow time for proper adhesion.
So I would definitely try less cooling, or no cooling at all if the print allows it.
A bit higher hotend temperature could maybe also help if you keep experiencing this.
Thanks for that tip
Using no fan at all, I am getting stronger prints but PLA is proving to be stronger! Is there a better infill pattern I can use (in Cura)? I appreciate the tips.
I’m having some success with this material on an Ultimaker 2+ The Cura settings you posted work well, especially the retraction values. 230C seems to be perfect, bed temp 75C and so on. However, I have some “hairs” that show up and while easy to remove after printing, they do get tangled up into the print nozzle, making for some burnt gunk forming on the print head.
Any tips on how to reduce that?
Hi Paul,
You can definitely try and up the retraction length a little (say 5,0mm) and reduce retraction speed to 25mm/s to see if this improves the result.
Also ensure that the combing feature in Cura is on as this will also help to reduce the effect.
Printer-wise please make sure that there is nothing hindering or reducing the effect of the retraction: feeder pressure properly set, minimal play in the bowden tube connections, free movement inside the bowden tube without sharp bends. If your UM2+ has a lot of printing hours it could also be that your teflon coupler is starting to wear down.
Hi, I was wondering how the clear NGen compares with the colored, do you need to change settings much to get a transparent/clear print?
Thanks.
Hi Dale,
There may be slight variations necessary depending on your specific printer.
If this is the case, I would say a small temperature adjustment for the extruder is needed.
But in general you will most likely not notice any differences.
Hi I was chatting you a week or so ago about insoles I was planning on Printing in Ngen. All was good printed Very well and cleaned up great. And done there job in the shoes until They got wet in cold water and broke apart ih to a lot of small pieces. Should this if happened and if this is so Which of your products would you suggest using instead. If it should of not happened your thoughts
Kind regards Mark.
Hi Mark,
Like most plastics nGen will suffer a very small loss of strength due to colder temperatures.
But especially above 0°c this should have no noticeable effect!
The nature of a nGen break is more to break into many smaller pieces indeed, whereas our other co-polyesters will break more in a ductile way.
For more mechanical strength as well as a ductile nature of breaking I would recommend the _XT co-polyester.
Cheers Jos
Love using the Ngen. Will try _xt I was going to use ABS but XT much eaiser to work with
Hi love this stuff on the second roll now. Need todo a bit of cleaning up on it as im using it for insoles. What is the best way to clean it up and maybe sand? any help would be great
You can sand and post-process the material as you can most other plastics.
Due to the relatively high glass transition temperature you do not have to worry as much about heat as you’d do with a PLA.
If there’s anything specific you are looking for just let me know.
Hi Jos
Yes I have scanned if some custom infills and recreated them in Rapidworks and converted them to stl for print. Using Cura the supports on the bottom have left the finish Very rough, so i need to some the NGen there. What would you suggest so I would get a smooth finish.
The top side of them are perfect.
Please keep in mind I’m new to the post process of plastic
Hi Mark, sounds like an interesting project.
Personally I would start with a small knife and tweezers to break and cut away the bigger parts of the support.
After that start with a metal file if the surface is very rough. When the surface is smooth enough for sandpaper you can switch to that, starting out around 120 grit.
Work your way up through 400 grit and even 600 grit or 1200 grit depending the type of finish that you desire.
If you want to bring the shine back into the print you can decide to use a clear lacquer coating or polish the dull surfaces like described here for our metal-filled materials: https://learn.colorfabb.com/post-processing-gcreates-rocket-ship/
Good luck!
Cheers Jos
You are a star.
I’m having very mixed results with nGen. On my Taz 5 with .35mm nozzle, it prints fantastic. Very clean and strong prints. I also have a bowden based Makeit pro, which is giving me super hairy prints. Simplify3d being used for both printers. I’m also working with the Makeit team to try to figure this out as I bought a roll of the ngen for the Make it because of how well the parts are coming off the Taz.
Hi Dorian,
If you could send us some more details to support@colorfabb.com we could take a look as well.
The results on our Lulzbot Mini are also really good, but we have no experience with the MakeIt Pro.
Dorian, would you share the fff settings for the Taz 5 in simplify3D? I have the flexydually and still trying to get a good quality print with NGen. Thank you
Hi David,
Have you also checked the Lulzbot’s standard profiles for nGen?
They should give some good prints.
If you continue to have issues we’d also be happy to take a look as well: support@colorfabb.com
Is there a way to chemically finish the print? Like vapor acetone processing to really smooth out the lines?
Given the chemical resistance properties of the Amphora™ grades, we can not recommend a method of chemical finishing for this material.
You can use dichloromethane. https://en.wikipedia.org/wiki/Dichloromethane
We use it to glue ABS & PET parts.
Note that dichloromethane is proven carcinogenic.
Hi @Jos
The bridging problem is caused by Simplify3D known bug. It does not print the bridging area perimeters as it should and that causes the bridging quality to be bad, no matter what filament.
I was able to get Ngen tuned in nicely and got to say that it’s by far the best filament I’ve used. It’s reliable, strong and has nice colors. The dark grey metallic is my favourite.
I know it’s been months, but is that known bug in Simplify3D resolved yet? I’d like to know if I need to use something else for good bridging.
Also, how would I find out about similar known bugs in S3D? It’s my slicer of choice.
Thanks!
Just wanted to post my experience with Ngen.
After a day of struggle with the settings I managed to get good results. It still prints overhangs a lot worse than PLA though.
I use Finnish made Minifactory 3 which is a direct drive printer. Slicer is Simplify.
Nozzle 0,5
Layer widht 0,5
Multiplier 1
Retraction 0,6mm
Extra lenght after retraction 0,02
Speed 45mms
Temp 220
Fan 50 / 100. 100 when bridging and doing overhangs
Infill 20%
With these settings the quality is very good and smooth. My only problem is that prints fail when doing overhangs. Everything else is spot on.
Hi Mika,
Overhangs should definitely be possible with the nGen material, as you can see in the opening picture of this page.
Please contact us at support@colorfabb.com if you want us to take a look with you.
I’m having serious problems too.
Settings and results are documented here:
http://marcuswolschon.blogspot.com/2015/12/testing-ngen-filament.html
This is an Ultimaker II with an Olsson Block and a new 0.4mm nozzle.
Hi Marcus,
I see at the end of your (updated?) post that you have been more successful since your first attempt?
The findings you report at the end seem to correspond to what we’ve published as a starting point for personal testing.
You’re absolutely right that the white PTFE coupler needs to be kept in mind as it will wear down.
It will degrade quicker at higher temperatures as well.
We find this is often an unknown cause of a lot of printing problems with the UM2’s as a lot of people are unaware of this.
If you have any specific questions or issues please don’t hesitate to contact us at: support@colorfabb.com
I got my first three spools of NGEN last week, and after fiddling around with my printing parameters (and printer) for two days I can finally say that I REALLY like this material 🙂
My first tries ended up as complete and utter failures, and I was almost ready to give up after spending an entire evening trying to get even the smallest and easiest bridges to succeed, or even getting the first layer to stick.
On my Kossel XL, this is what I now do when printing with NGEN:
* First of all, I replaced the nozzle from .4 to .3mm, to minimize the oozing when heating up. I still get ooze, but it’s manageable now.
* I’ve always printed PLA & nylon on glass with a thin layer of gluestick, on 60° heatbed but for NGEN I use blue painters tape, with gluestick on. Heatbed is set to 60° for first layer, then I increase it to 75° for the rest of the print.
* Nozzle temp is set to 230° for first layer, then decreased to 220° for the rest of the print.
* fan is set to work between 0 – 50%, when layer print time is >30 sec.
* for bridges, fan is set to 100%
* I print PLA & Nylon at 90mm/s, but for NGEN I use 60mm/s. I am going to trim this later, but right now I get better resuls when lowering the speed this much.
* Bridges are printed at 20mm/s.
* retraction is set to 6.5mm, at 70mm/s. Z lift is also set to 0.5mm and I get next to no stringing at all now.
In short – it took me a couple of evenings to dial everythin in, but now I absolutely love the results! 🙂
Hi Håkan,
It’s interesting to read what you have been learning, thanks for sharing.
Could you maybe share which hotend you are using on your Kossel XL and how these settings compare to your normal settings (PLA for example)?
This would allow other users to better reference this info to their own printers.
And for the oozing on start-up, maybe you can work on a more advanced start-up routine in which you prime and wipe the nozzle.
A large retraction at the end of your gcode could also help to prevent oozing on the next start-up.
Sure, I can give some more info for you.
I use a E3D-v6 hotend, usually with a 0.3 or 0.4mm nozzle. I find that the 0.3mm nozzle give me slightly less oozing, at least to the point where it doesn’t bother me that much (I get some oozing with PLA as well, and usually just remove it with a tweezer while the printer is heating up). Good idea with the end-code retraction, I will defenitely implement that in my gcode.
For PLA I use a nozzle temp around 205° and for Nylon I usually print at 240°, so NGEN is somewhere in between these materials.
When I print PLA I set the fan to 0 for the first 5-10 layers, then I have it running between 50-100% for the rest of the print. I see that in my previous comment I mentioned using fan when layer time is > 30 sec – what I really meant was the other way around :-/
When layer print time is LESS than 30 sec I turn on the fan between 0-50%.
For nylon I usually leave the fan off, exept for bridges.
For bridges I set the fan to 100%, this is the same as for PLA.
I will experiment with the flow for bridges, to get a little fatter bridge extrusion, but I have not had the time to try this that much yet.
Retraction for PLA is set to 5.5mm at 60mm/s, so I use a little more for NGEN – mainly because it is less brittle than PLA and so far seem to handle this good. Also I get by far less stringing with the more aggressive retraction 🙂
Hope this info can help someone else to get the NGEN working as it should!
Hi Håkan,
Very interesting to read, thank you!
For us we are having to use higher temperature than average on our E3D-v6 while you are using a lower than average temperature.
Just goes to show how different some printers can be I guess 🙂