
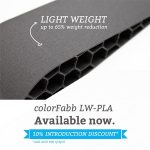
colorFabb LW-PLA is available in our webshop
How to print with LW-PLA
At colorFabb material development never stops. We’re starting 2019 with a fascinating new material, first of its kind in FFF 3D printing materials.
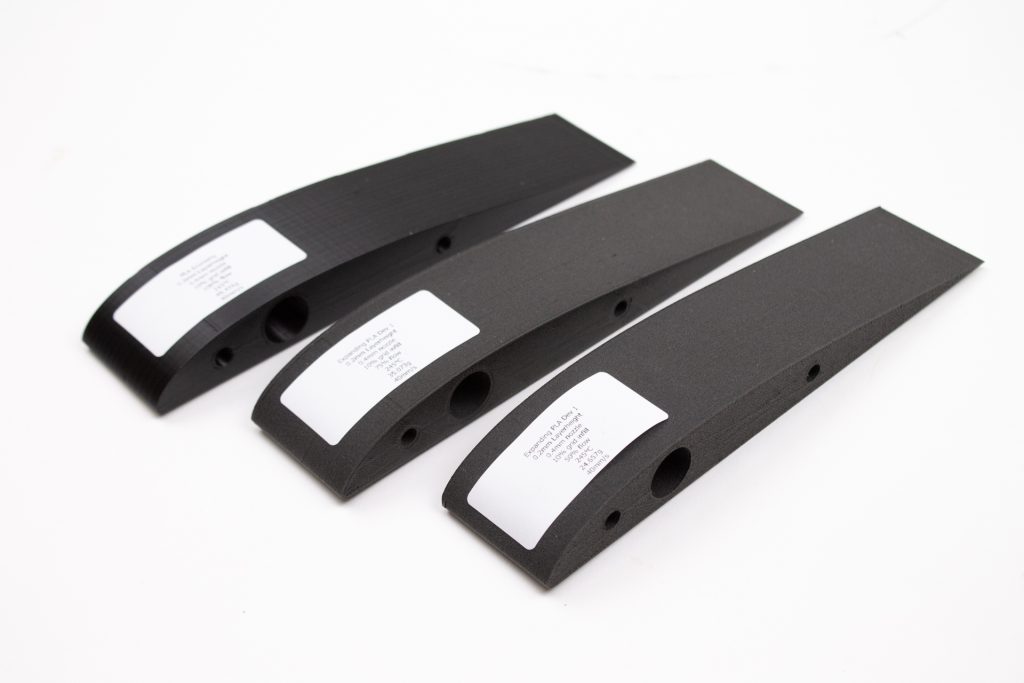
We’re proud to announce, colorFabb LW-PLA. This filament uses an active foaming technology which is triggered by temperature. At it’s peak the filament will expand nearly 3x it’s volume, meaning users can decrease flow by 65% to obtain lightweight parts, or use the expanding properties to speed up print time by using big layer heights or single extra thick perimeters.
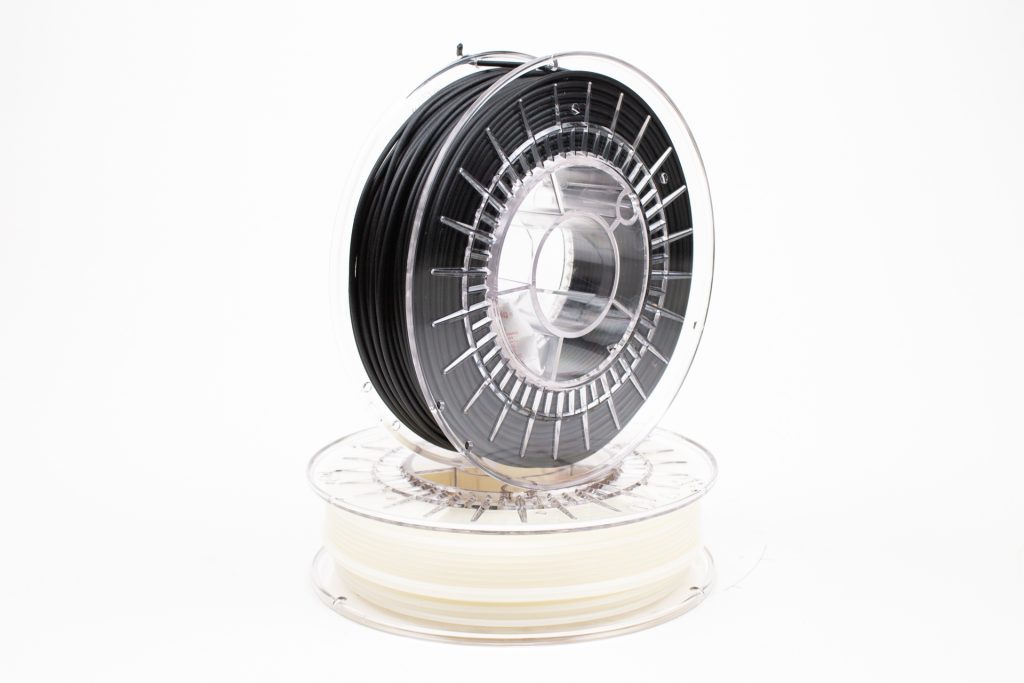
colorFabb LW-PLA is available in two colors, natural and black. The foaming also gives printed parts a rough matte surface finish, which makes parts look very appealing.
How does it work?
Input variables
For the filament to expand it is necessary to put a certain amount of energy into the filament. The amount of energy a filament can absorb during printing depends on the length of the hot-zone and the time it takes for the filament to pass through the hot-zone. The longer a filament will reside inside the hot-end, the more energy it can absorb which will increase the amount of expansion.
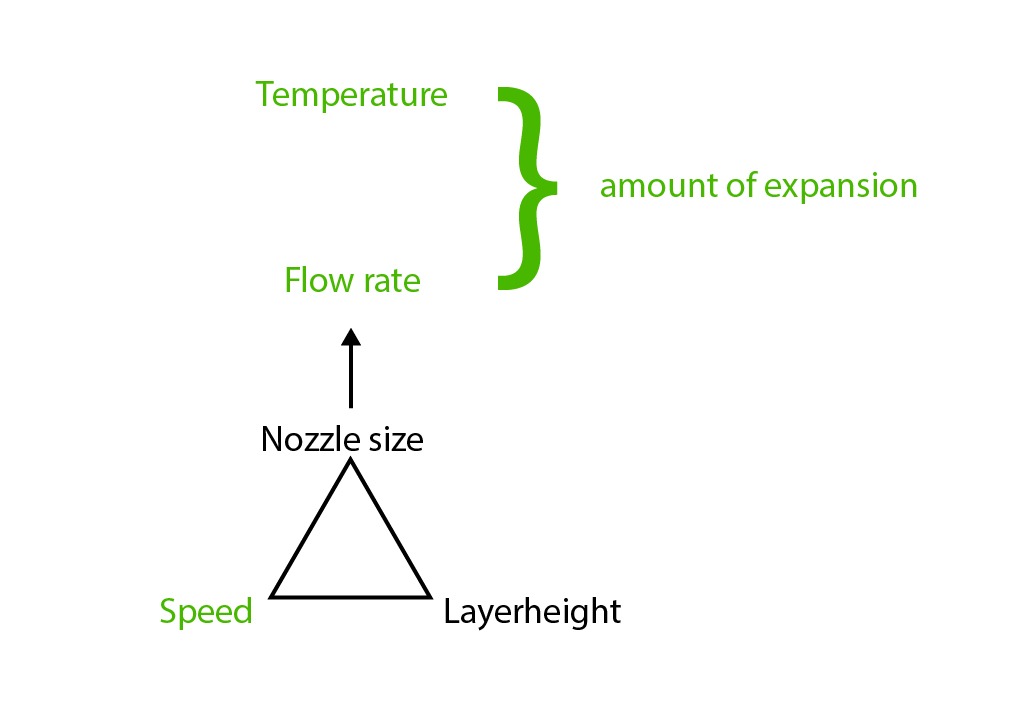 Assuming nozzle size and layerheight are fixed, our main input variables are Temperature, speed and flow to determine the amount of expansion.
How to determine the expansion of the filament
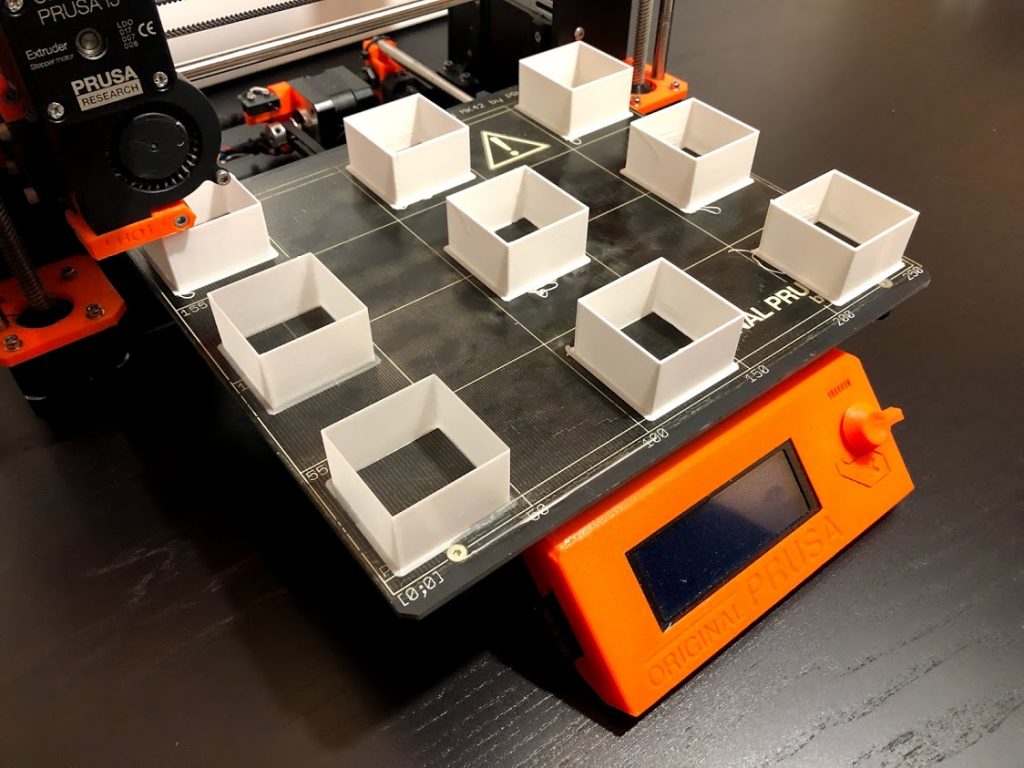
If you want to print lightweight parts which are dimensonally accurate, it’s important to first determine the possible expansion of the material. This can be done by printing single perimeter test cubes without top and bottom layers. We use the following 4 step process to determine the maximum expansion at a certain speed, temperature and flow.
-
Print cubes at a set speed in temperatures varying from 200°C up to 280°C
-
Measure perimeter thickness of each cube, note temperature with highest expansion.
-
Print cubes with decreasing steps of flow, using temperature found in step 2.
-
Find the cube at which perimeter thickness equals nozzle size.
Example – Prusa I3 MK2S
Print speed – 25mm/s
Part cooling – 0%
Printing temperature – 200°C to 280°C in steps of 10°C.
Layer height – 0.2mm
Nozzle diameter – 0.4mm
Step 1. Print cubes at a set speed in temperatures varying from 200°C up to 280°C
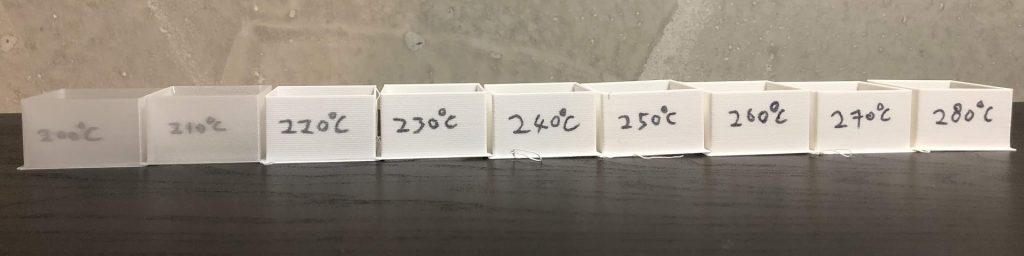
Step 2. Measure perimeter thickness of each cube, note temperature with highest expansion.
Cube at 200C – no expansion of material.
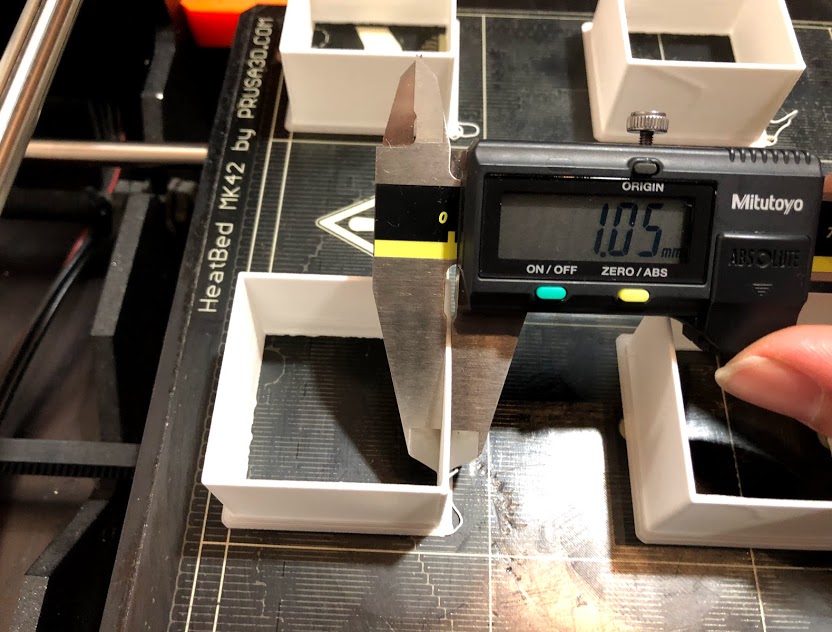
Cube printed at 250C – perimeter measured at 1.05mm, which yields a 260% increase of perimeter thickness. Between 240-250C the expansion of the filament was highest.
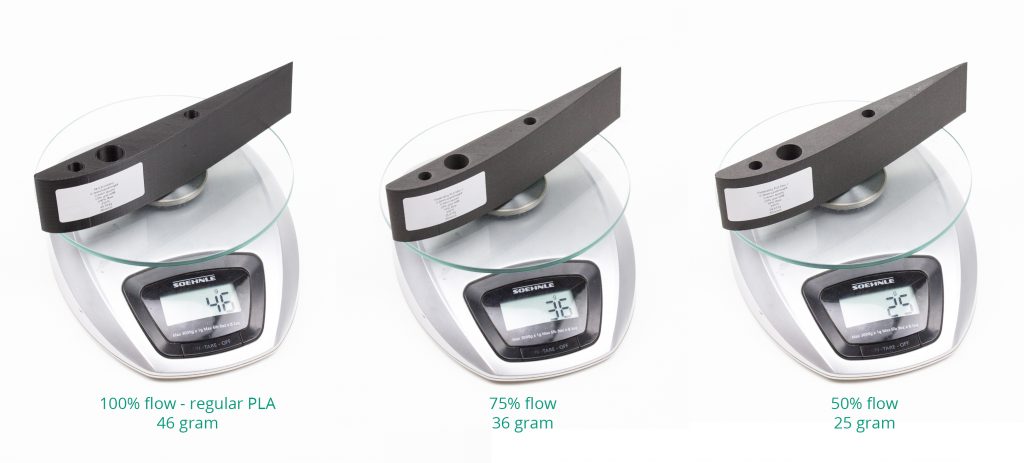
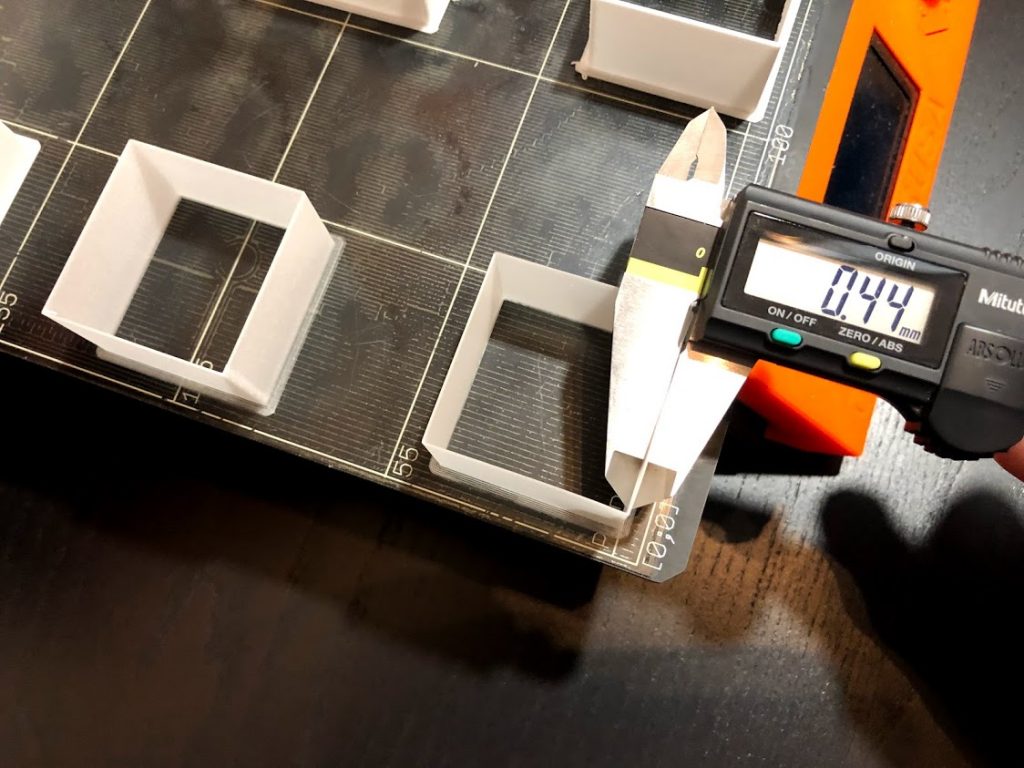
Step 3. Print cubes with decreasing steps of flow, using temperature found in step 2 (in our case 250C).
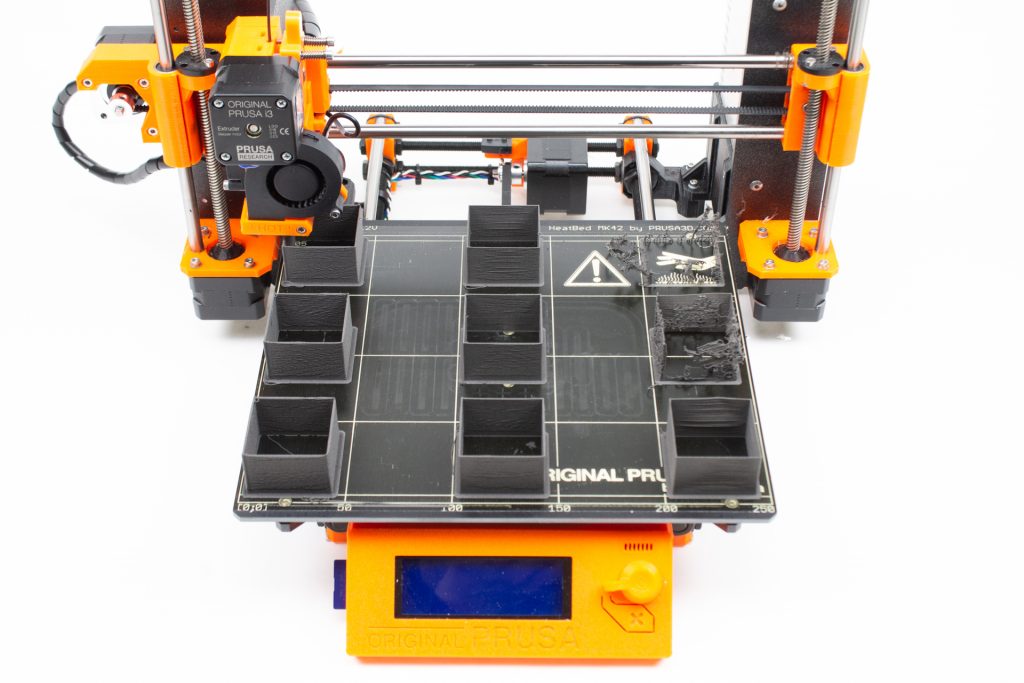
Step 4. The cube with the perimeter that equals the nozzle diameter is the lowest usable flow. Expect flows around 35-50%.
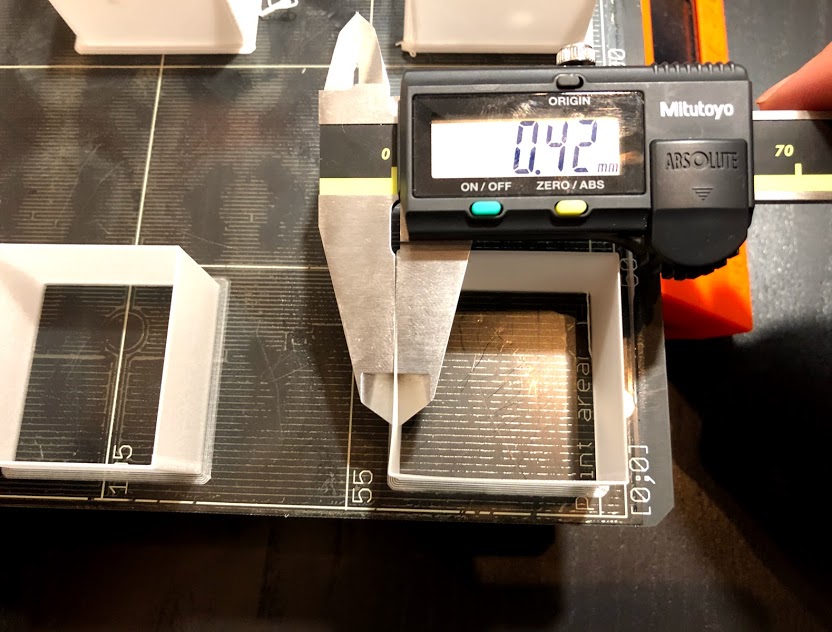
In our case we found the cube with 30% flow to be equal to the nozzle size.
So when printing on our Prusa MK2s at 25 mm/s we can print accurate model using 250C and using 30% flow rate. Increasing the speed will be possible however we need to make sure the filament can absorb enough energy, so to account for the short residence time of the filament in the hotend, the temperature should be increased in order to keep the expansion of material the same.
Applications
Lightweight printing
| Temperature | 245-260°C |
| Flow | Down to 35% |
| Print speed | Up to 40mm/s |
Lightweight printing can be done by using the settings determined in the paragraph above. Keep in mind that if the flow is decreased to low values the hot-end might clog due to the filament expanding before exiting the nozzle.
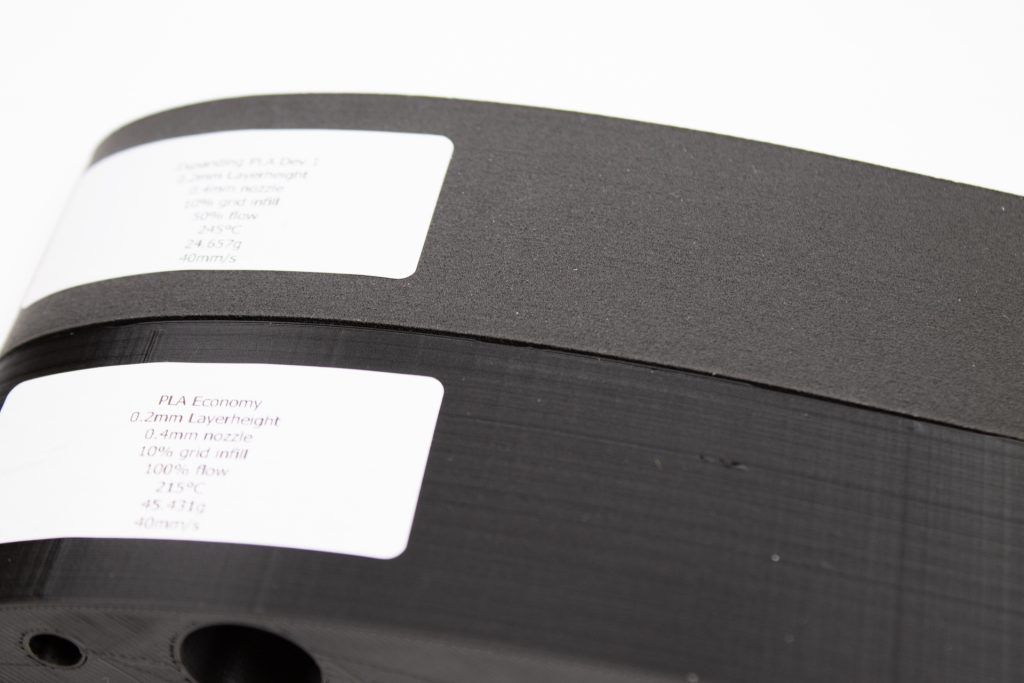
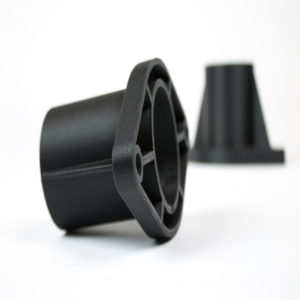
Larger layer heights
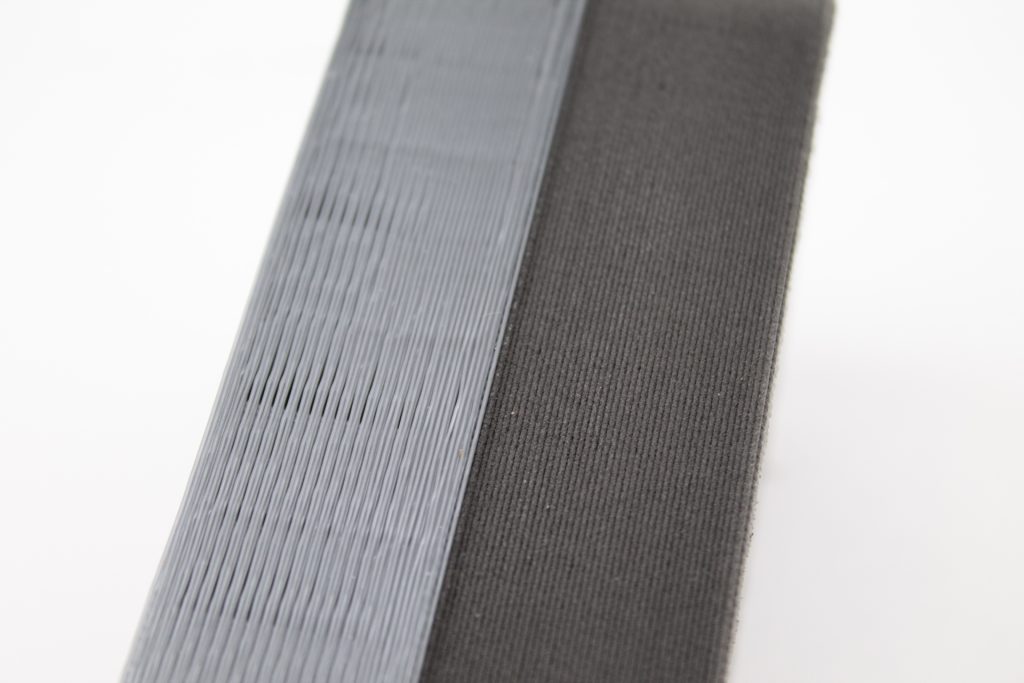
On the left we printed the same gcode using regular PLA, on the right our colorFabb LW-PLA showing the expanding properties enabling 0.6mm layerheight from a 0.4mm nozzle.
| Temperature | Up to 260+°C |
| Flow | 50% |
| Print speed | 30-50mm/s |
| Max layerheight with 0.4mm nozzle | 0.6mm |
Due to the expanding behavior of the material it is possible to 3D print with larger layer heights the nozzle itself, this means short build times for quick draft models.


30 Comments
Is it possible to print OPEN POROSITY FOAMS? I would like to generate these to perform infiltration of low viscosity liquids into the printed part.
Thanks,
Alex Lukacs
Hi team!
Testing your LW-PLA and have issues with foaming, material not expanding
Setup:
Ultimaker 2 Extended+
0.4 nozzle
Printing test cube with single wall.
Print settings:
0.2 layer height, extrusion multiplier 1, speed 25mm/s
240 degrees – wall thickness only 0.5
250 degrees – wall thickness only 0.5
So it’s not foaming well for some reason
Could you suggest what could be the problem – material or printer HE?
Facing the same issue, it’s probably because of the 2.75mm filament. I found some parameters to make it 0.9mm line width
Hello,
Thank you for the article. I feel like I am missing an easy step, however, could you tell me how you print all of those cubes, at different temperatures in one print?
Thanks
Each slicer varies, but it’s the same principle as doing temperature towers, you have to set an area of the print volume (the area covering one cube) to a set temperature (200) then repeat for each square. The other thing is to set brim to On, and top and bottom wall count to 0 (this makes it a hollow box).
In your case it maybe easier to print one at a time (brim on, 0 walls top/bottom and temperature required) so the slicer settings can be done at the print level instead of customising sections of the build area.
I think you have to edit g code.
[…] How to print with LW-PLA […]
I am glad to see that people are reading it, and I hope others share their settings and experiences with LW-PLA as well. As for me, I have made more flights with my 3D printed rubber-powered airplane, and I now have trouble keeping in contained in my (somewhat limited) flying field (Here is my latest video: https://www.youtube.com/watch?v=U_MD9a3IsKE)
Thank you for sharing this video. Great inspiration! Maybe you can adapt the rudder angle during flight from the remaining torque of your rubber engine.
Hi there, I just received my first lw-pla roll and are about to start calibrating.
Using a Creality CR10S pro printer.
Do you know anywhere where I can download the specific test cube that you use for your testing (as a *.stl file) ?
Or perhaps even better as a simplify3d factory file.
Best regards
Lars Lindgren
Hi how much lw pla filament is on a spool?
Hello,
I have ordered two rolls of this filament and I was extremely frustrated last night trying to get it to work as described.
I have a 0.4 mm nozzle on a Prusa i3 with a MK8 style direct extruder.
My goal is to make a lightweight airframe so I started at 230C and went up to 250c printing 20mm test cubes with only 1 wall. At 250C my cubes perimeter was only .55 mm thick. My print speed was 25 mm/s. I feel like I am missing something with this filament. Can anyone help?
If I were you, I would try starting at a lower temperature, perhaps 200 C and increase from there in 10 C increments. Also, depending on your slicer, it is possible that even though your nominal speed is at 25 mm/s, your outer wall speed might be slower than that. In Cura, for instance, if I start with a ‘Normal’ print profile and set the print speed to 25 mm/s, it sets the infill speed to 42 mm/s, the outer wall speed to 17 mm/s, the inner wall speed to 34 mm/s, and the top/bottom speed to 13 mm/s. For printing with ‘normal’ PLA, printing different parts of a layer at different speeds is a good thing, since it can result in the best looking and fastest print. However, since LW-PLA foams at different rates at different speeds, the results will be different amounts of expansion for the first layer, the outer layer, the infill, etc. As I describe in my experience below, I think that for LW-PLA, all speeds for actual printing should be set to the same number (such as 25 mm/s). You may find that at a speed of 25 mm/s, you may be getting your optimum expansion at temperatures lower than what you have been testing. If indeed your optimum expansion at 25 mm/s is 220 C, print temperatures higher than 220 C will result in lower expansion.
This LW-PLA is a really great material. Now how about some more colour options. For model aircraft purposes I’d like to see an aluminium colour.
I would like to congratulate and thank the Colorfabb company for creating this game-changing material. I have purchased four spools of it so far, and have already used up one. LW-PLA has allowed me to design and create the first truly flyable 3D-printed rubber powered airplane. (You can see it in action at https://youtu.be/2k9LypU1OJI, and see my design on Thingiverse at https://www.thingiverse.com/thing:4127098.)
You would be interested to know that the LW-PLA settings that I have been successfully using are much different than those you describe in your article. First, I have been printing LW-PLA with an 0.3 mm nozzle. My motivation for doing this was to print thinner walls and save as much weight as possible, but I believe that the smaller nozzle facilitates heat transfer to the filament. Also, most of the parts of my airplane were printed in vase mode at a print speed of 20 mm/s. (In my print settings, 20 mm/s is the speed that the vase mode wall was printed at.) At this low speed, combined with the smaller nozzle, I can print walls that are 0.35 mm thick at a nozzle temperature of 210 C at a flow rate of only 35% with my fan running at 50%. This is a full list of the LW-PLA settings that I used to print my rubber-powered airplane:
(I started with the default ‘Fine’ profile in Cura. The settings listed below are the ones I changed from the ‘Fine’ profile.)
Layer Height: 0.12 mm
Initial Layer Height: 0.24 mm
Line width: 0.3 mm (same as nozzle diameter for most parts; I used 0.4 mm for one part)
Wall Thickness (for non-spiralized parts): 0.6 mm
Top/Bottom Thickness: 0.8 mm.
Infill density: 20%
Infill Before Walls: Off
Print temperature: 210 C
Build Plate Temperature: 60 C (although I have had this as low as 45 C with good results.)
Flow: 35% (This is for wall flow, outer wall flow, and inner wall flow)
Top/Bottom Flow, Infill Flow, Skirt/Brim Flow, Initial Layer Flow: 50%
Retraction: Off (Note: I think this could be left on, but I did not see a need for retraction for any of these parts.)
Print Speed: 20 mm/s (for ALL print speeds: wall, infill, top/bottom, etc.)
Travel Speed: 60 mm/s (for all travel moves)
Print Cooling: On
Fan Speed: 50%
Minimum speed: 7 mm/s
(In addition to these settings, most of the parts were printed with a 6 mm brim.)
My printer is an Anycubic Kossel Linear Plus delta printer that was equipped with a Titan-clone extruder. The hot end is an e3d clone with a Teflon lined heat break.
I believe that your LW-PLA is the most innovative filament that I have seen in the last few years. I hope that you never stop making it. I would be interested to see if you can apply this ‘foaming’ technology to other materials such as ABS or HIPS. These materials are even lighter than PLA, and if you could make LW-ABS or LW-HIPS, it would allow those of us who are making flying models to make them even lighter.
Thanks for sharing your Data it may help a lot!
Good day!
Can you please advise how to choose the best material for 3d prints for investment casting?
can you please deliver your preferred material for this application.
Thank you
Yigal Ringart
CEO
Exact-tec Israel
Former CR casting
How about some preferred settings for the Ultimaker 2/2+/3 etc?
Hi Paul, Depends on what your goal is with the material. In general if you want to go for maximum expansion then you’ll be at the higher range of temperatures, 240-245C. THen you can expect printing with a flow multiplier of around 40%-50% for the Ultimaker systems. Don’t print to fast, it’s best to keep all speeds at 40 mm/s (at 0.2mm layerheight), or slower if you need to transfer more thermal energy to increase expansion / foaming.
Heated bed can be set to 40-60C.
Hello,
I don’t know where to ask my question. Would you please help me?
We bought colorfabb xt-cf20. With PLA we did not have any problem printing but for carbon fiber we have. which nozzle diameter should be used for 0.2 mm height and 0.4 mm width? We changed temp to 260. I use creality cr-10.
Thanks
Does the filament bridge well at full expansion ?
Yes, very well, at least 20mm air gap can be bridged with just a little dropping of the first and second layer.
I have just purchased two rolls of this filament, and I am looking forward to trying it out. I have a few questions about printing with this filament. Should the part cooling fan be on or off when printing with LW-PLA? Also, do you recommend using an enclosure for printing with LW-PLA? And do you have a recommended print bed temperature for this filament? (I am printing on a heated glass bed lined with a thin sheet of PEI.)
The part cooling fan should be turned of if the geometry allows it.
Due too the expanding taking up energy, the fan is not necessary most of the time.
An enclosure is not necessary.
Heated bed temperature of regular PLA: 50-60C should be fine.
Hello,
I am an industrial designer in a french company, and i’m really seduced by this product (LW-PLA).
I would like to know if you could send me the detailed mechanical properties datasheet of this material (especially young modulus; elastic, plastic and breaking limits) ?
Best regards.
Julien PEVROL
We’ll upload an updated technical data sheet soon.
According to the pictures, the surface finish of this filament looks a lot better than regular PLA. It looks like you can hardly identify the layers, can you confirm this?
The layers are indeed less visible and it gives a kind of SLS look to the printed parts.
please give me your LE-PLA safety data sheets
josef kamir tel Aviv University
thank you
israel
yosikk@gmail.com
You can find our data sheets here: https://colorfabb.com/materials-data/