
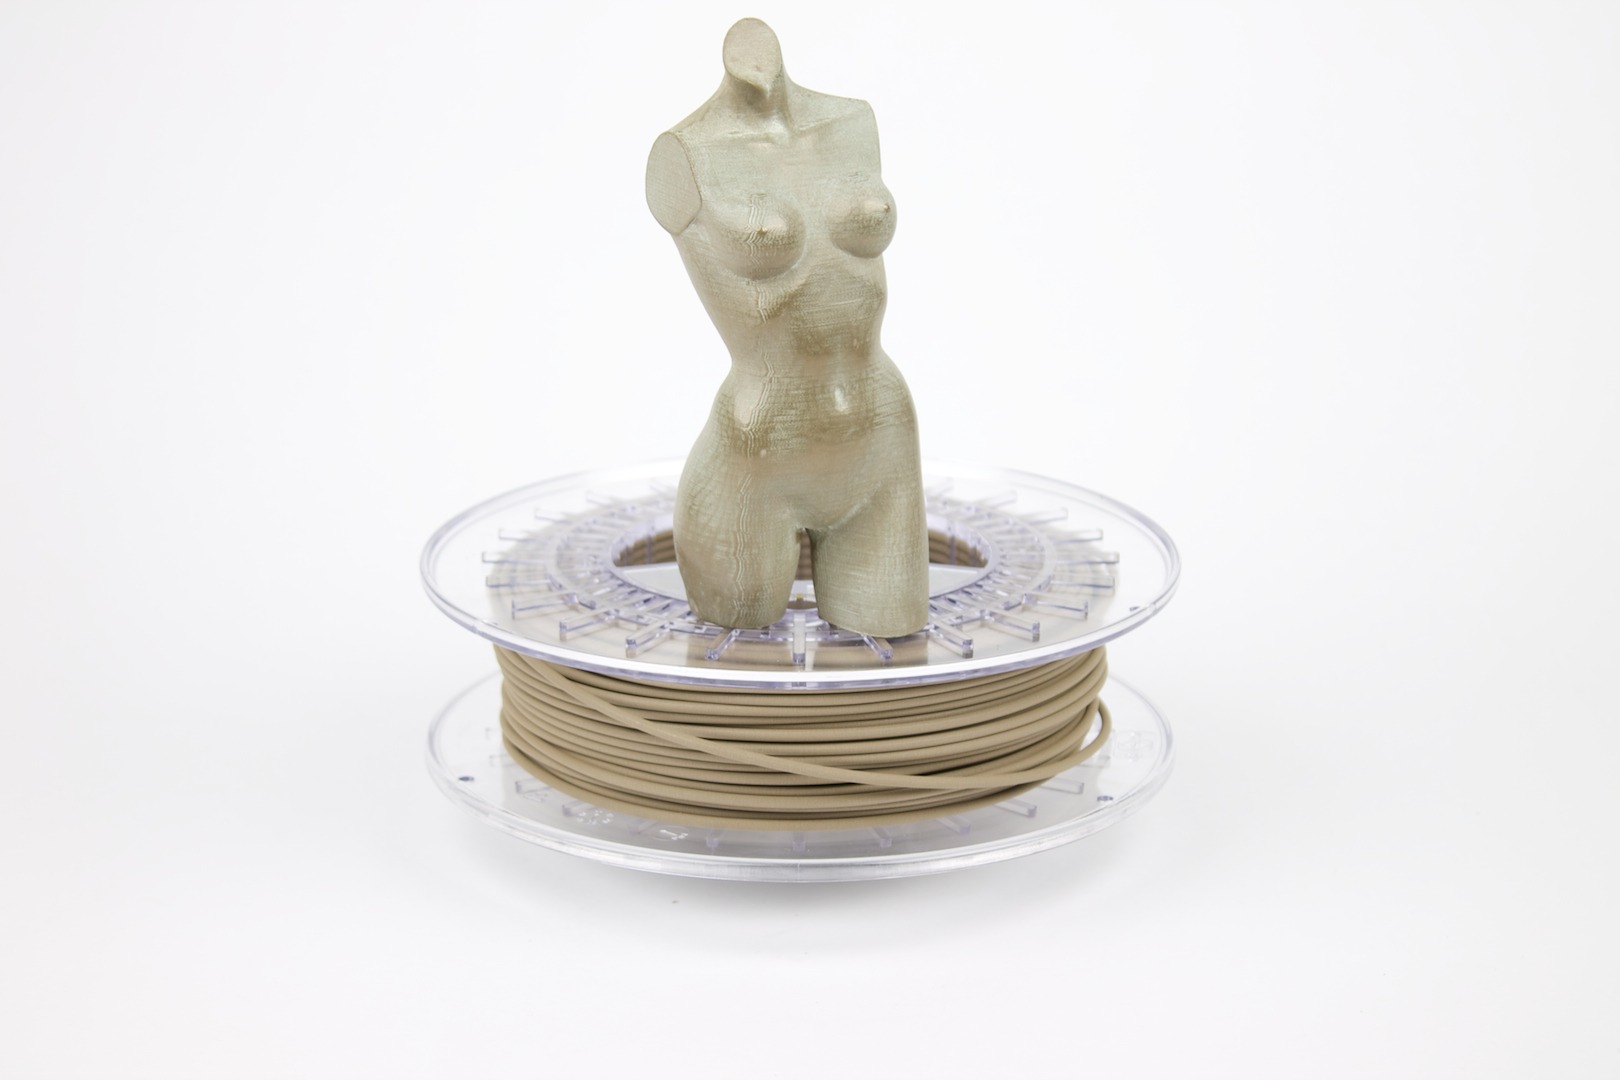
The trial period for bronzeFill is up and the first customers have already received and printed with bronzeFill. It’s time for a write up and share print settings and methods of post processing this awesome material.
bronzeFill
This material is based on our unique PLA/PHA recipe which means that it will print very similar to our other PLA/PHA materials. We’re sure most will be able to dial in settings in no time, but we still thought a write-up on print settings is interesting to share. If you have great tips or slicer settings please share! support@colorfabb.com
Build Platform
This filament will print great on both heated and non heated build platforms. For cold build platforms we generaly use blue painters tape which you can buy at any decent hardware store. We’ve noticed that bronzeFill has prety much no warping what so ever, it’s much better then regular PLA.
For heated build platforms we use a temperature of 55-60 C which will keep the print sticking to the platform. It can be printed straight on glass or with a bit of gluestick applied to it. We’ve also printed it succesfully on kapton tape with the same temperature settings.
Slicer settings
The next few tables show the most relevant slicer settings for Cura en Makerware. If you prefer to use a different slicer software you should be able to find similar settings and create your own profiles.
[table id=5 /]
Profiles ultimaker_original_02_bronzefill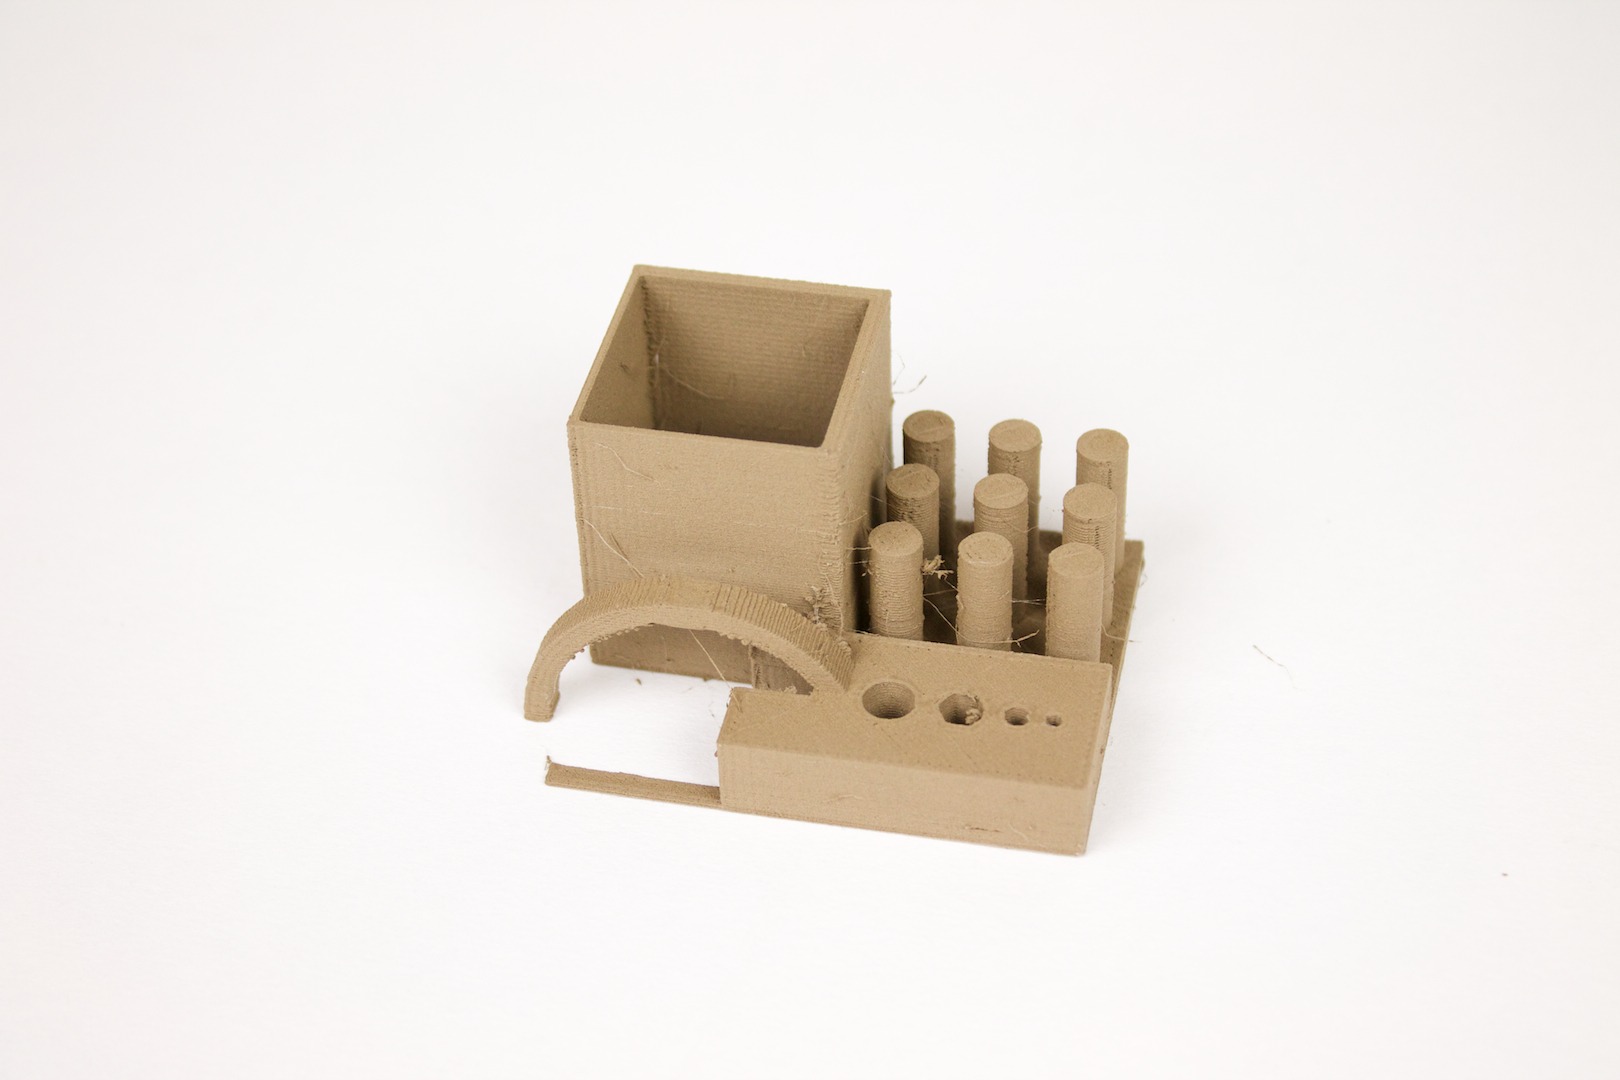
makerbot-replicator2_colorFabb_bronzeFill-medium
Post processing
Normally we don’t like to do post processing of any of our prints, they should look awesome straight of the printer. For bronzeFill we’re happy to make an exception, since it will elevate your models to another level when polished. Here we’ll document the various methods of post processing the 3d prints. We’re a little out of our depths here so we’ve been seeking help from the active community of makers.
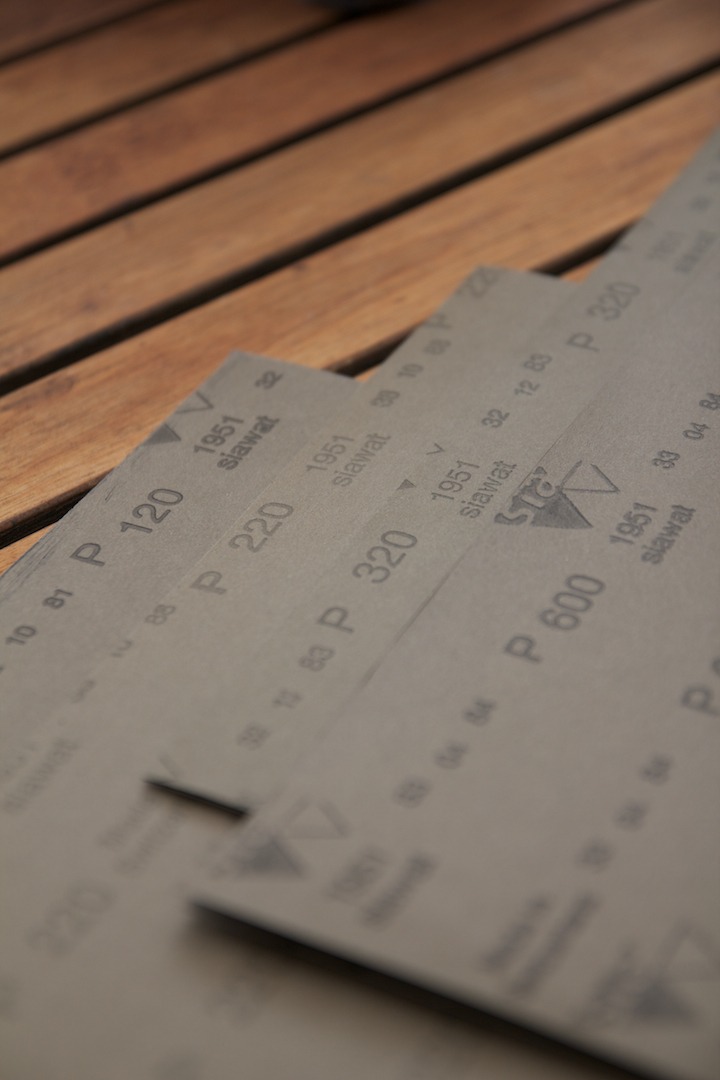
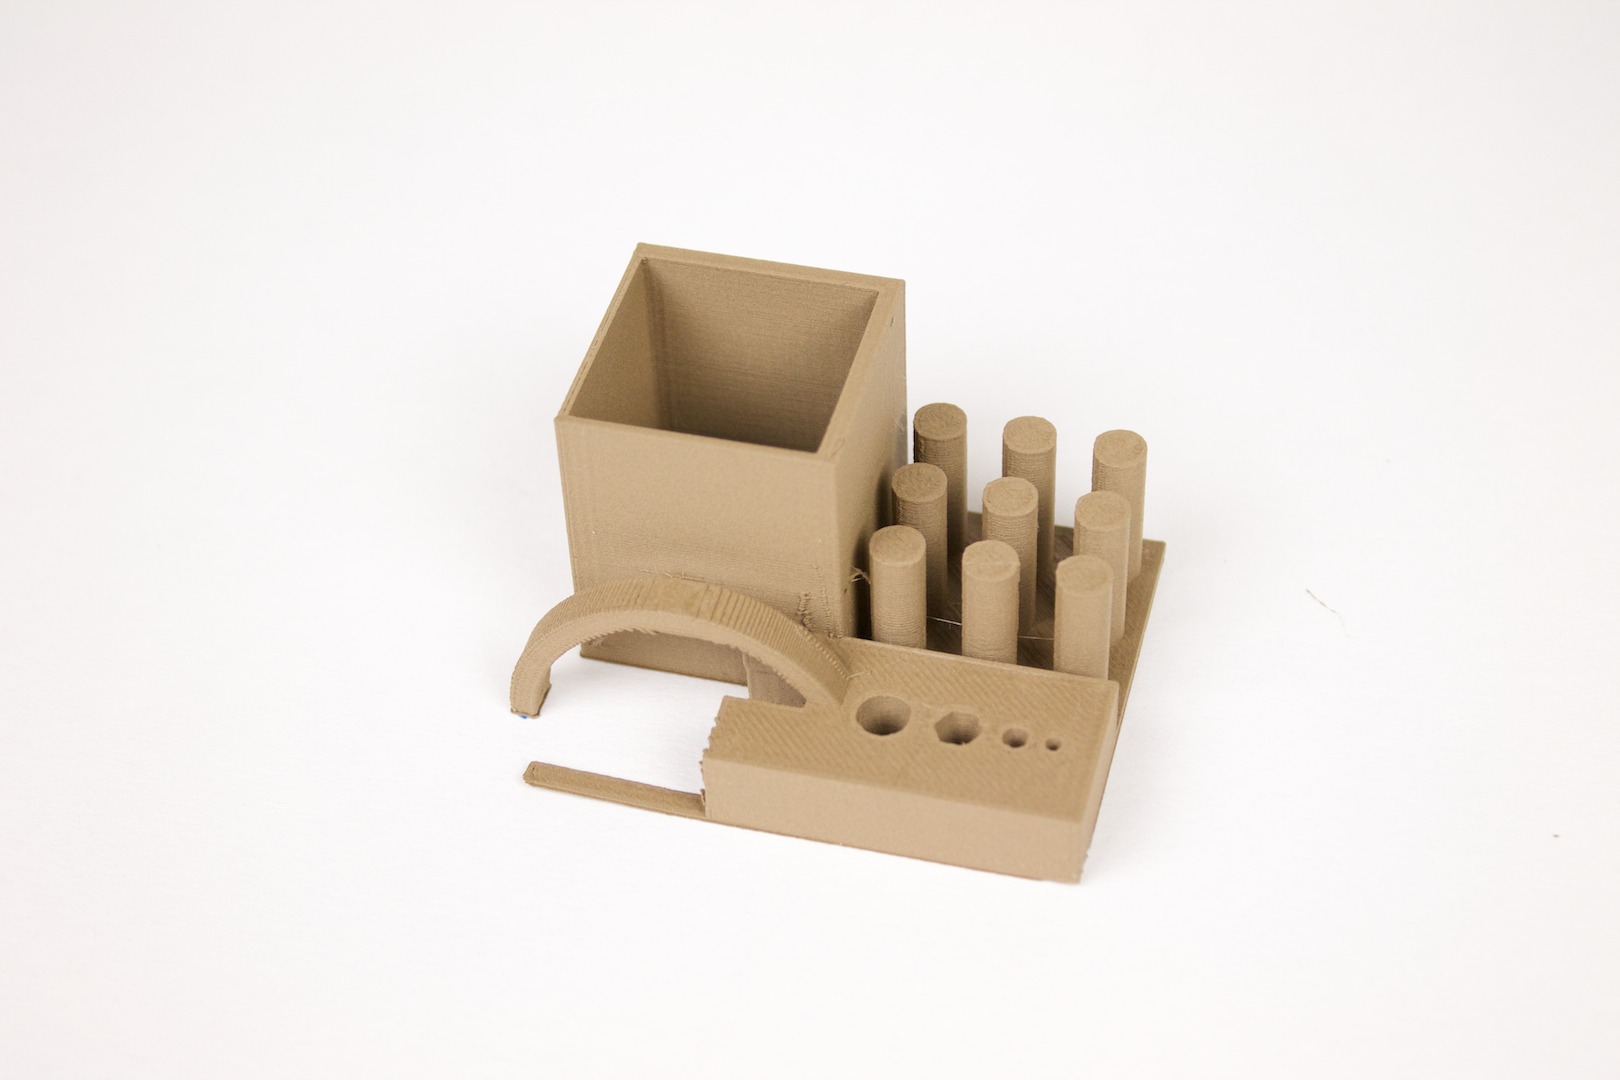
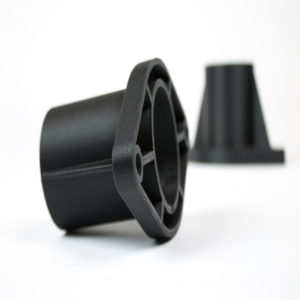
First what you want to do is sand your model with a fairly rough grit of sand paper, something like 220-240 should work nicely. BronzeFill is much easier to sand down then regular PLA, so depending on your model this shouldn’t take too long. By increasing the grit of the sand paper the model will get smoother everytime, exposing the bronze particles at the surface, but it will still look matte and dull.
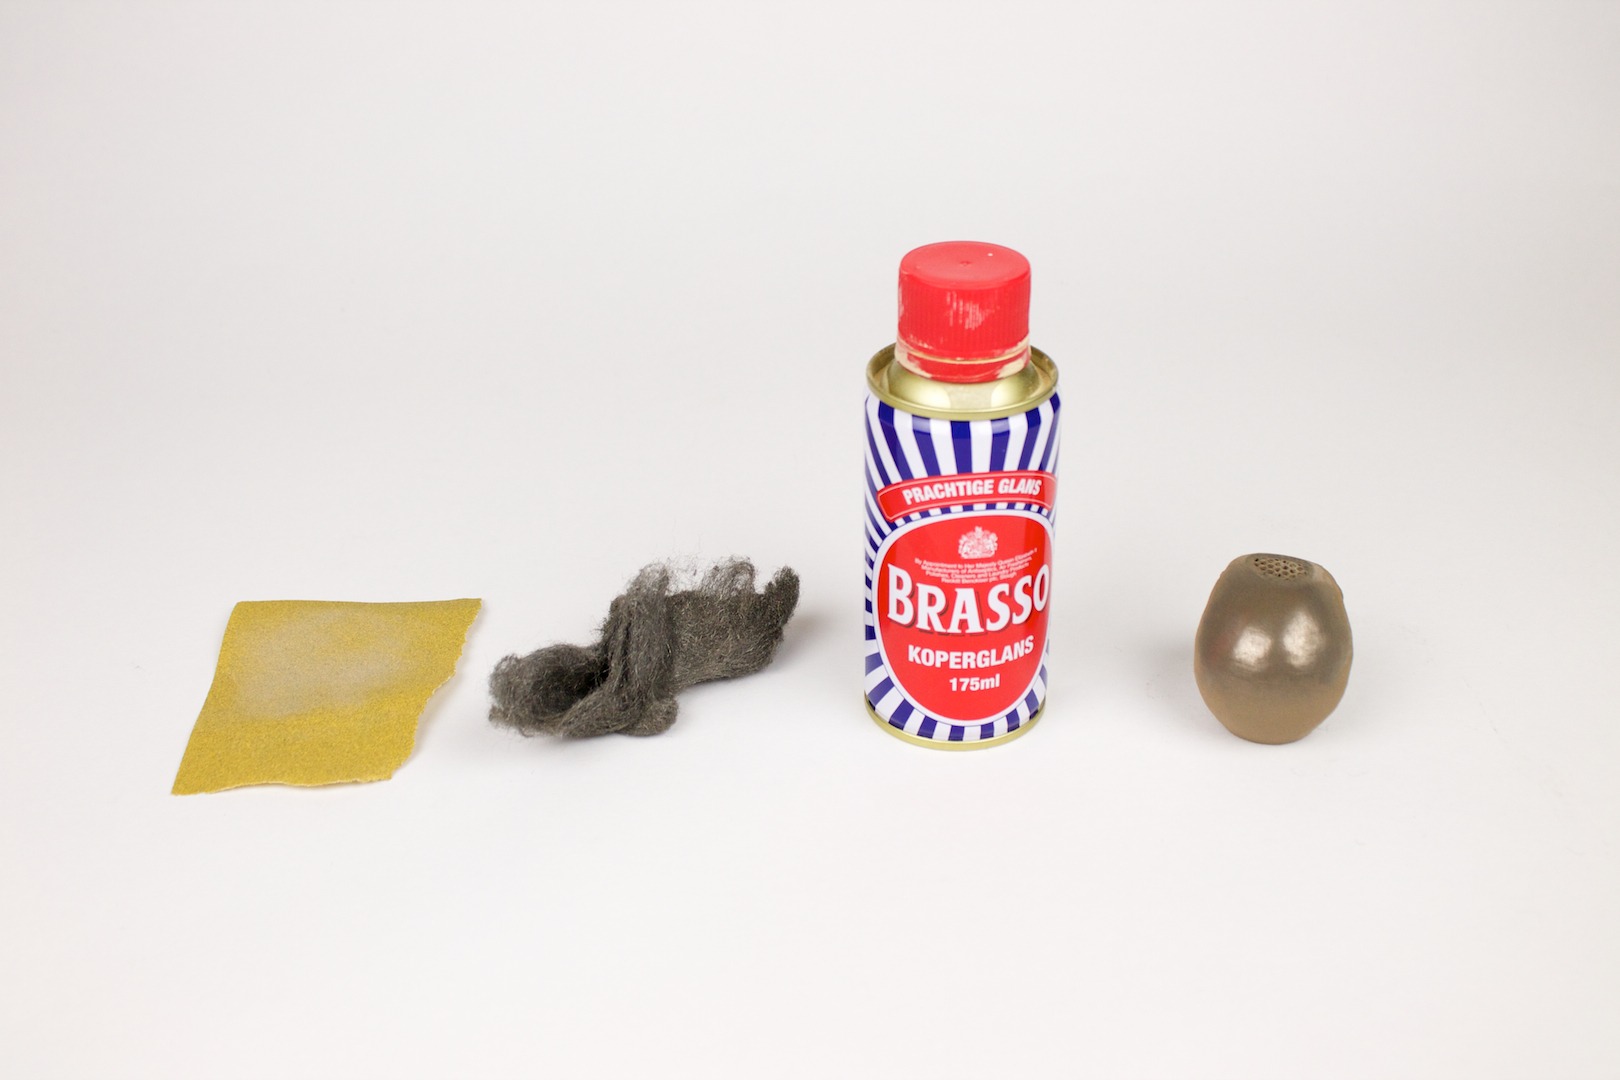
This tip came in from Paul Braddock, a talented character modelling artist and active member of the Ultimaker community. He used steel wool to polish the surface which will start exposing the bronze particles even more. We’ve tried this method with a fairly fine grade of steel wool and were impressed how shiny it already got!
3. Making it Shiny!
Now that the layers are sand down and the bronze particles are already shining a bit on top of the surface it’s ready for the next step. Now this is were it becomes really interesting, since there are so many methods of making bronze shiny. We used a copper polish which gave nice results. It was applied with a dry towel making small circular movements and applying light pressure, then we used another side of the towel to get rit of all the polishing paste.
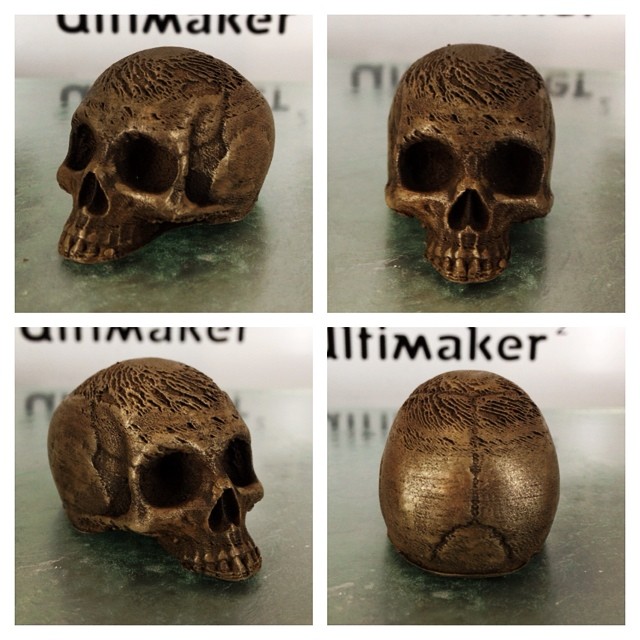
Apart from polishing the material to make it more shiny one can also apply products to create a patina look. We haven’t been able to try this personally but Paul Braddock did. This is what he was able to create with an antigue Patina, it looks stunning.
[mwi_product sku=”030001″/]

40 Comments
First I was disappointed when I opened the box, seeing only about a 3rd of a roll, yes you still get 750gm but the weight P/M is 3 times that of my normal filaments so I really don’t know what I was expecting! I’ve just used the Bronzefill for the first time, I made 2 lots of “ancient” coins, had no problem whatsoever with my Flashforge Guider II on standard “default” settings, no need to divert and make things complicated. The end result is brilliant! no cleaning needed, no warping, lifting or any other unsightly thi9ngs we get with ABS or PLA…. I’ve now printed a Ramessesii (with supports) happy to say the supports just “fell off” with a clay like feel, again, no diverting from standard settings…. I’d love to be able to print EVERYTHING in this material but cost restriction comes into play.
Hello,
I’m having a lot of trouble printing with bronzefill. My extruder gear keeps digging into the filament. No matter how loose or how tight I set the pressure wheel opposite the extruder gear, it digs in and prevents the filament from being fed into my hotend. Have you heard of this happening before? Any ideas for solving it?
For reference, I am using an Original Prusa i3 Mk2, and have tried a variety of temps, nozzles, print speeds, layer heights, and extrusion multipliers. I always end up with the same result: https://imgur.com/gallery/Zh8qv
Sorry for the late reply, this one seems to have slipped past unnoticed.
If you haven’t already, please contact support@colorfabb.com to give us some more details so we can look into this more closely.
We have a Prusa i3 MK2 in our printlab so we can also run tests here if needed.
Please provide some additional details as well as the .stl so we can have a complete picture of the situation.
Hi Jos
I have printed bronze fill 3d rings …. finding the ring keeps breaking when taking it on and off
how can I make the bronze fill pla ring more robust and harden the ring more ….. PLEASE HELP
Cat
Hi Cat,
Ensure that the nozzle is not too close to the bed when starting the first layer.
bronzeFill has quite low warp, so no need to push it in to the bed to hard.
Usually we find it enough to print on clean glass at normal PLA bed temperatures.
You can always contact us on support@colorfabb.com with some more details (pictures, slicer profile) for more info.
I do actually have the same issues with my Zortrax M300. The gear digs into the filament, loses some of the filament which gets stuck in the gear resulting in clogging the extruder gear.
Have you found a solution?
Hi,
Could you send some pictures and a Gcode and the stl file to support@colorfabb.com?
The extruder wheel digging in the filament can be caused by different things so the problem above might have different reasons.
For polishing, could one theoretically try putting the print in a rock tumbler with fine sand? What effect would that have?
Tumbling the prints will have some effect but we only have (limited) experience with more abrasive media like steel balls & pins or wood-screws.
Based on that I reckon fine sand will have a limited or very slow effect.
But please let us know the results if you do try it!
I had heard that some of the metal fill filaments can tear up your nozzle. Has anyone seen this happen with the Bronzefill? Is there a specific nozzle I should use with it?
We do not see additional wear of the nozzle when printing with bronzeFill ourselves.
SteelFill is however noted to be abrasive and so is XT-CF20.
If you’re looking to print with abrasive materials there’s a large range of more resistant nozzles on the market already.
Mostly (hardened) steel variants but newer ones also include a ruby insert for wear resistance.
not very successful in polishing, it is easy to sand print lines out and get a smooth finish, top marks for that.but unable to get the shine as in models shown.tried wire wool,brasso, duraglit, and plenty elbow grease. just a light metallic sheen.
The weight is good, but will not use again due to cost.and disappointing finish, better results with ordinary filament and a quality metallic paint
Hi,
The best looking shine we’ve had so far is with a polishing wheel / disc.
We’ve used a drill-mounted wheel to polish gCreate’s Rocket Ship for example, which is a cheap solution for nice results.
You can check out the details here: https://learn.colorfabb.com/post-processing-gcreates-rocket-ship/
With wire wool you can go a bit coarser than what we used in the picture first and change over to a finer version later, similar to sanding paper.
The brasso is more for the final touch and also a bit of clean-up if you’ve gotten some black smudges during polishing.
thanks i will try this.
perhaps increase shells to 3/4 to give some latitude for material removal when sanding’
just done first print with the bronze-fill, on my Leapfrog creatre Used exactly the same settings as normal PLA, Simplify default except:- 210, .25 layer, 20% infill, COLD BED, BLUE TAPE.Took about 4 hours
Perfect print,layers practically invisible, try finishing now
sanded down with grades of wet/dry. very easy to remove print layer lines very quick.
not getting a shiny finish as per the examples above, used fine wire wool, then scouring pad with Brillo, got a ‘sheen’ but not shiny????
Only done by hand so far so may try rotary polishing mop with die makers polishing stick.
( was a compression mold maker so used to achieving mirror finishes, mostly on hardened steel ebut also brass prototypes)
I printed successfully using Printrbot Plus Metal. Used setting .2mm layer height, 50mm/s (3000 mm/min) speed, 215C extruder temp, 60C heated bed, 4.5mm retraction distance, 45mm/s retraction speed. Printed on blue painters tape with light coating of hairspray. Using Simplify3D, I slowed down my print speed to 50% as I heard the filament slipping as the print started. I also tightened my extruder spring that holds the filament to make a tighter grip than required while printing PLA. Then things printed okay.
My print was tall and narrow and took about 12 hours to print. I used support and it was able to be removed easily.
I had the same slight stringing that is shown above for Ultimaker Original print. However, the stringing is easily removed by just rubbing my hand on the print. The weight of the final print is truly impressive.
Now I plan to use the finishing techniques mentioned above (sand paper and steel wool) followed by bronze patina, which is available at my local Michaels craft store.
I couldn’t get my model to be as shiny as the above. I’m not sure what I’m doing wrong, I still like the filament since it gives a nice weight and that cold feel of metal. I ended up getting more something that looked like wood with a metallic rub than I did bronze =/
Hi Aj,
There’s a wide variety of finishing methods you can use to get different results.
We generally use the method described above with the copper polish (Brasso for us).
But there are a lot of polishing compounds and patina’s etc. available that you can try.
The skull was done with a patina finish by Paul Braddock for example.
More and more people are publishing their polishing methods online every day as well, so keep trying.
Hello,
i hope you are doing good.
May i ask you how many % of the metal or wood particles is in your fillament?
I was not able to find this information.
BR
MK
Hi Martin,
I can say that there is roughly 80% metal in the copper and bronze, 70% in the brass.
Bamboo and woodFill containt around 30% natural fibers.
turns out that I had a problem with the extruder: it came already assembled, and the set screws that hold the filament drive cog in place were loose and the wheel had moved and a smooth surface doesn’t drive anything too well 🙂
a few drops of thread locking epoxy and it’s back in business, prints fine now…
time to start experimenting with post-processing
Thanks for the update!
Looking forward to seeing the prints you make.
I tried to print with it today, can’t get it to extrude even at 210 degrees: pushing the filament by hand works and doesn’t feel like much effort, but the extruder just skips, won’t push it in; I guess it’s because bronzeFill is more rigid than the others and the teeth of the knurled wheel can’t bite into it, or something
PLA and XT work mostly fine (PLA and PLA/PHA work perfectly, XT works fine as long as I stay at a low-ish speed – 50mm/s; at 70 mm/s it skips badly even at 260 deg. C, so I guess I’d need a hotend along the lines of the E3D Volcano for that)
Do I need more pressure on the filament? curved gripping surface instead of the straight knurl it has now? higher temperature? oiling the filament?
Hi M0n5t3r,
Have you tried playing with the temperature?
Depending on your printer (hotend), we sometimes print it up to 225*c.
You should not have any issues printing on most printers on the market and you definitely shouldn’t need a high-volume hotend like the E3D Volcano for this at normal speeds.
We generally don’t tweak feeder pressure for different materials or the oil the filament.
Keep in mind though that the filament should not stay hot in the hotend for a longer period, as this will cause clogging.
Please contact us via support@colorfabb.com if you’re still having issues and also list things like the type of printer, settings etc.
[…] found a tip on ColorFabb’s Learn website about using Steel Wool to make the bronze particles shine. I couldn’t find any steel wool at […]
Does anyone have the links for the models above?
Is is conductive, can someone please test it out?
Despite the real metal particles bronzeFill is not conductive unfortunately.
Thanks for the reply, I looked for conductive materials for FDM and found abs embedded with fine graphite that’s meant for printing circut boards. Bronzefill just got me curious on conductive materials.
One more tip: bronzeFill loves PVA glue, it will stick to glass coated with it as anything else does.
any idea how to get it to work on a Replicator 2x, i tried the settings above but filament gets stuck always, tried also higher and lower tempertures as well as different speeds
any suggestion welcome !!!
I had the same issue on my Up Mini…I solved the filament jamming issue by placing a small fan blowing directly at the nozzle area of the printer. Leave it on during the whole print. I have also read that people have had good success by placing a drop of canola oil on the filament tip when first feeding it into the extruder. I read that the jams occur when the filament stays too long in the nozzle and the heat runs up into the extruder, softening the filament and causing the jams. The fan fix helps to keep the nozzle cooler when printing. I cannot change the flow rate on my up mini so I was thrilled to find this fix and be able to print with the Bronzefill.
Hi Helmar,
The Replicator 2x is mostly an ABS printer, which can cause some problems when trying to print PLA. A known problem is the feeder bold getting to hot when all doors are closed, for ABS this is fine but PLA will get soft. Since bronzeFill is an PLA based filament I think is causing you problems.
On the Replicator 2 (the PLA version) we get amazing reliability. Usually 0.2mm layer height and 190-195C at speeds of 70-80 mm/s.
I have a Replicator 2 and I have had NO LUCK at all trying to print with this filament. I have tried various settings, temps, speeds, etc and have had Zero success trying to print with this filament. I find it quite soft and brittle. I am wondering if I might have a bacd batch of filament.
The material is very brittle. I’ve had to make a filament holder that hangs off the top of my printer to the side, because the angle was too steep to print without breaking off. I am noticing, after every print, the next print will not go due to a clog. Unless I’m attentive and batch printing, it seems it is best to change materials before things cool down after a print.
The material is indeed more brittle than a regular PLA for example. For most printers we’ve had experience with it’ll go through the normal feeding system.
But some machines have tight corners or high stresses on the filament going into the machine, they may need some additional attention.
It’s unusual though that after a normal print ending and the printer cooling down, you’d need to replace the material before printing again.
From our experience a normal purge routine at the beginning of the print is enough to have a good material flow and start printing without issues.
[…] Here are colorFabb’s advised printing settings for this material. […]
[…] How to Print and Polish Bronzefill […]
[…] hat auf seiner Homepage nun ein paar empfehlenswerte Einstellungen veröffentlicht, die jeweils für den Ultimaker […]