
We’re taking a look at how to 3D print with a high level of transparency. Our latest material, colorFabb_HT, is highly suited for this because of its high-flow characteristics. More information will be published later once we have it, we’re still very much in the testing-phase. But here are the basics so you can try it yourselves.
 You can find the model of this print designed by Walter Hsiao on Thingiverse here: http://www.thingiverse.com/thing:854360
colorFabb_HT
Due to the process of 3D printing, there is always a limit to how clear your print will become. With most materials the small gaps in between the 3D printed lines never really gets filled, resulting in a milky look when printing with transparent filaments. colorFabb_HT manages to fully close these gaps, resulting in a fully solid and transparent part. Printing transparent not only means new and exciting optical applications, but it also means maximum toughness as the material is fully fused together.
For more information about the _HT material, take a look here: http://ht.colorfabb.com/
Material and heat
Printing clear products mainly relies on two key aspects: extruding enough material and getting enough heat (energy) into the new material. The easiest way to start is by locking in some settings and only play with temperature, speed and flow.
We’ve started with a 0,8mm nozzle; no cooling; 0,1mm layerheight; 20mm/s and of course 100% infill. In terms of temperature, set your heated bed to the max get your hotend up to at least 260°c. Using this as a starting point, we’ve found settings to print transparent on a few different machines already. But with so much variation between printers (even from the same type!) you will always have to find the best settings for yourself. Also, the bed material has a big influence on the transparency straight out of the printer, the smoother the bed material the better. A coat of 3DLAC on a glass plate seems to work the best for us so far.
Looking at the two key components, first start with getting the right amount of heat into the material. This is a combination of volume per second and nozzle temperature. If your printer has a maximum of 260°c than your stuck playing with speed, otherwise you could try printing a bit hotter to allow for more speed.
Printing too hot will result in minuscule bubbles inside the print and may also cause the part to turn a bit yellowish. Printing too cold will not fuse the sides of the lines together properly and show as white stripes.
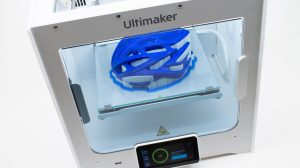
With the temperature dialed in, start playing with the flow. Try to turn it up to the maximum without losing (too much) dimensional accuracy or creating a bulge on top of the print. The Ultimaker 2 we used for this required about 110% flow to achieve an optimal filling.
Optimal settings can lead to some very clear and transparent parts straight from the printer. These cylinders have had no post-processing at all.
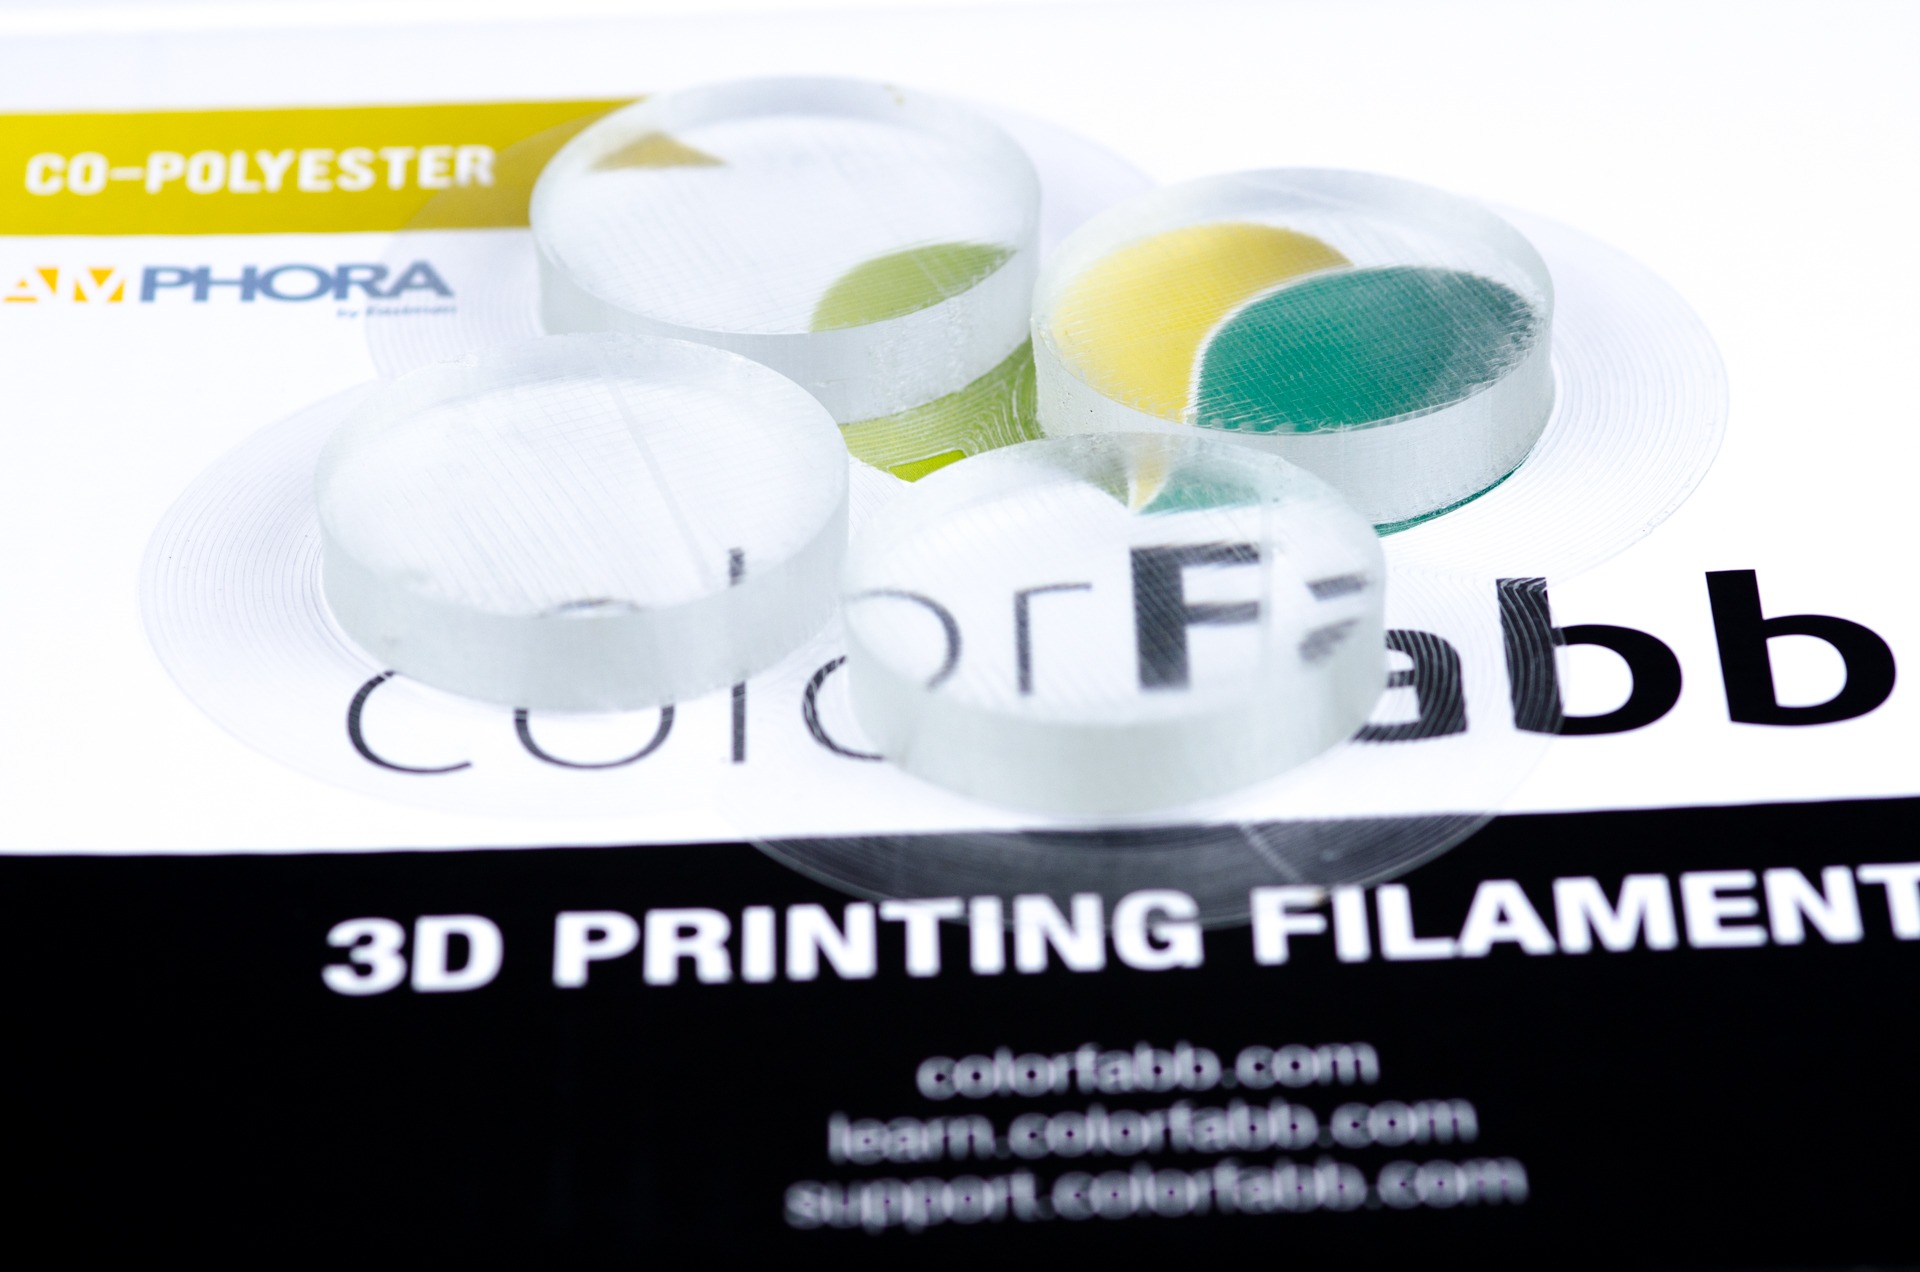
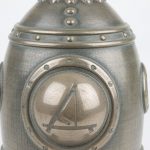
With some extra effort though, you can create parts which look amazingly transparent.
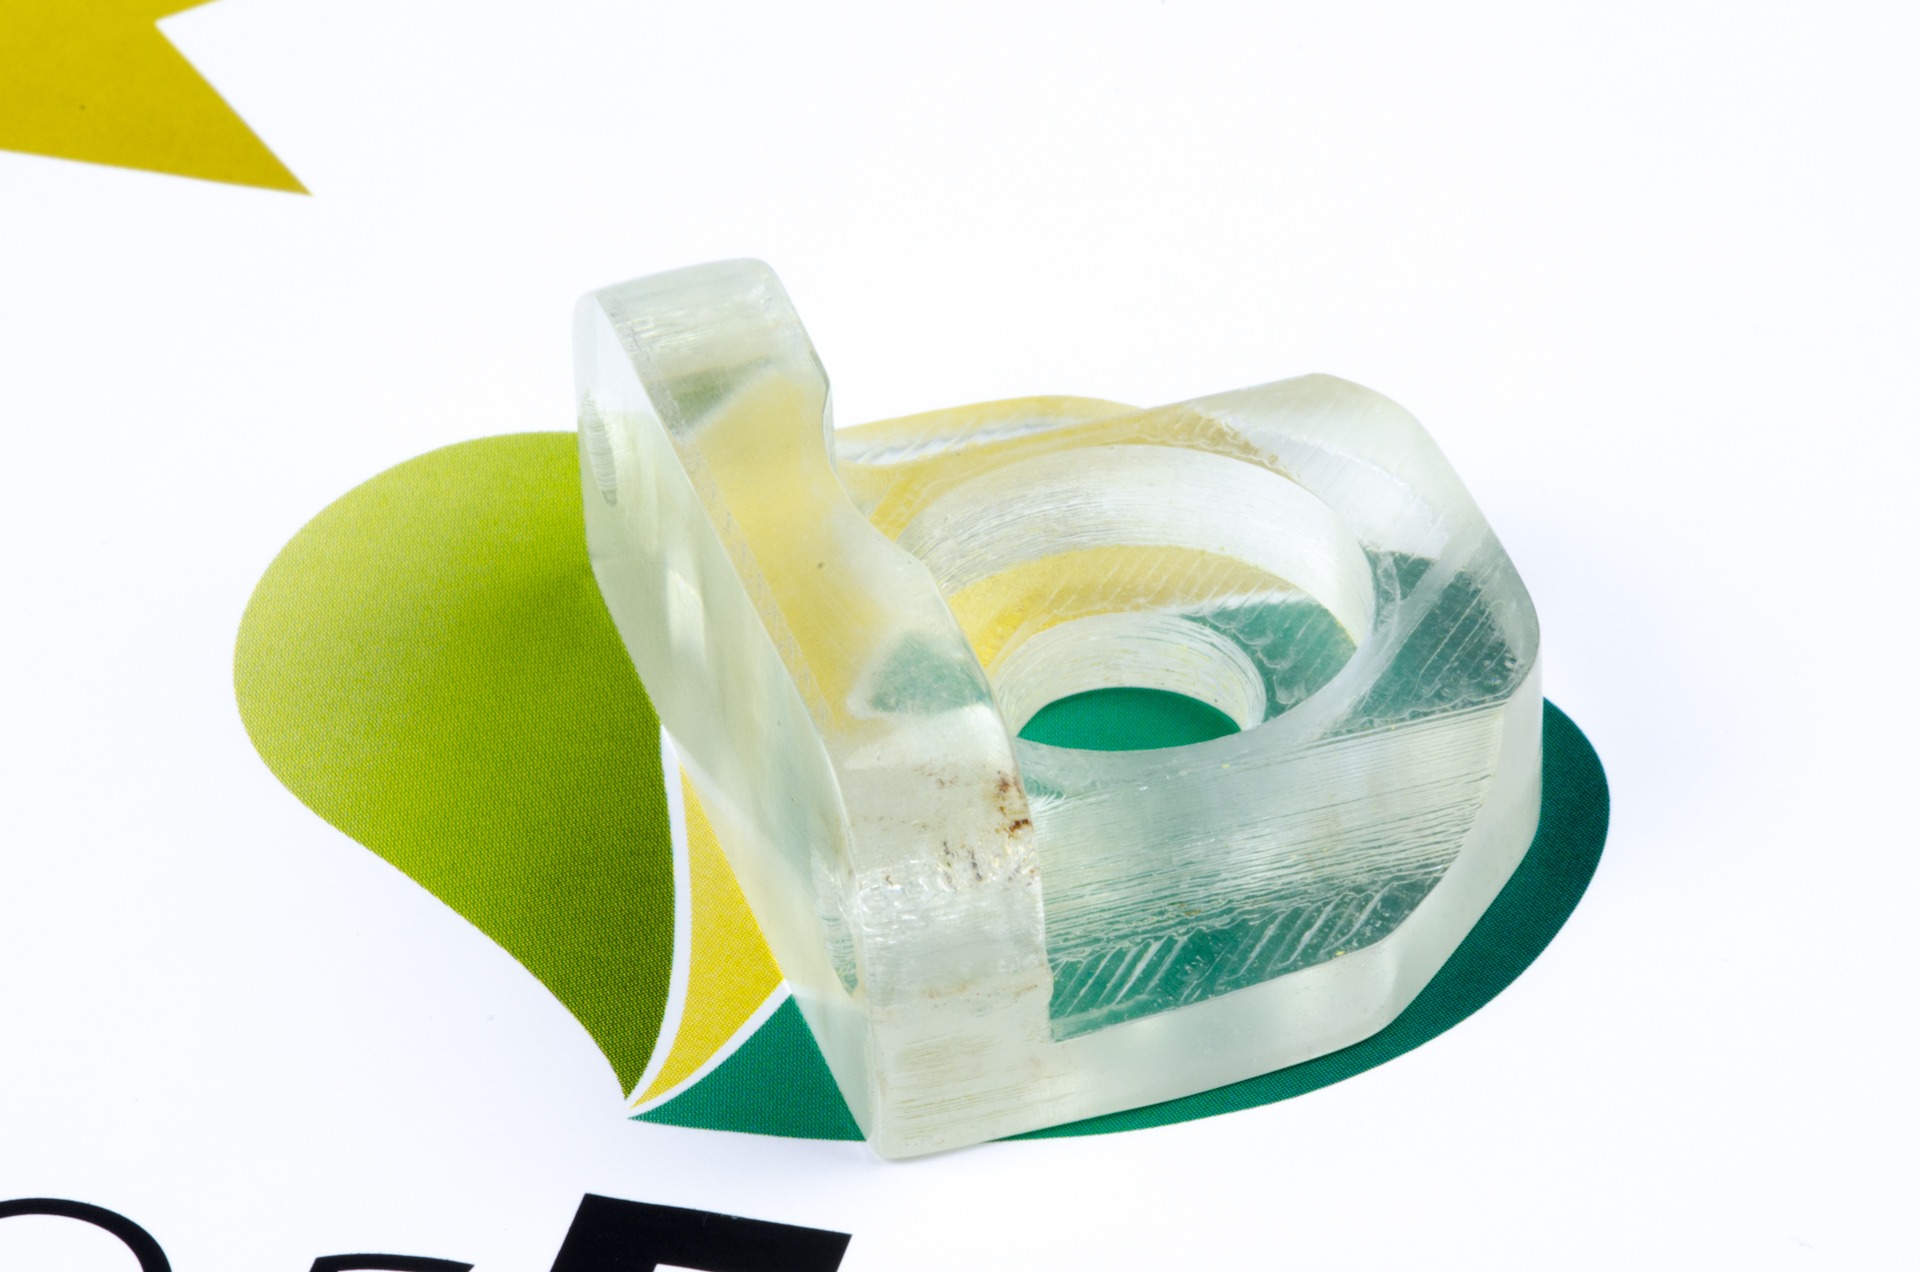
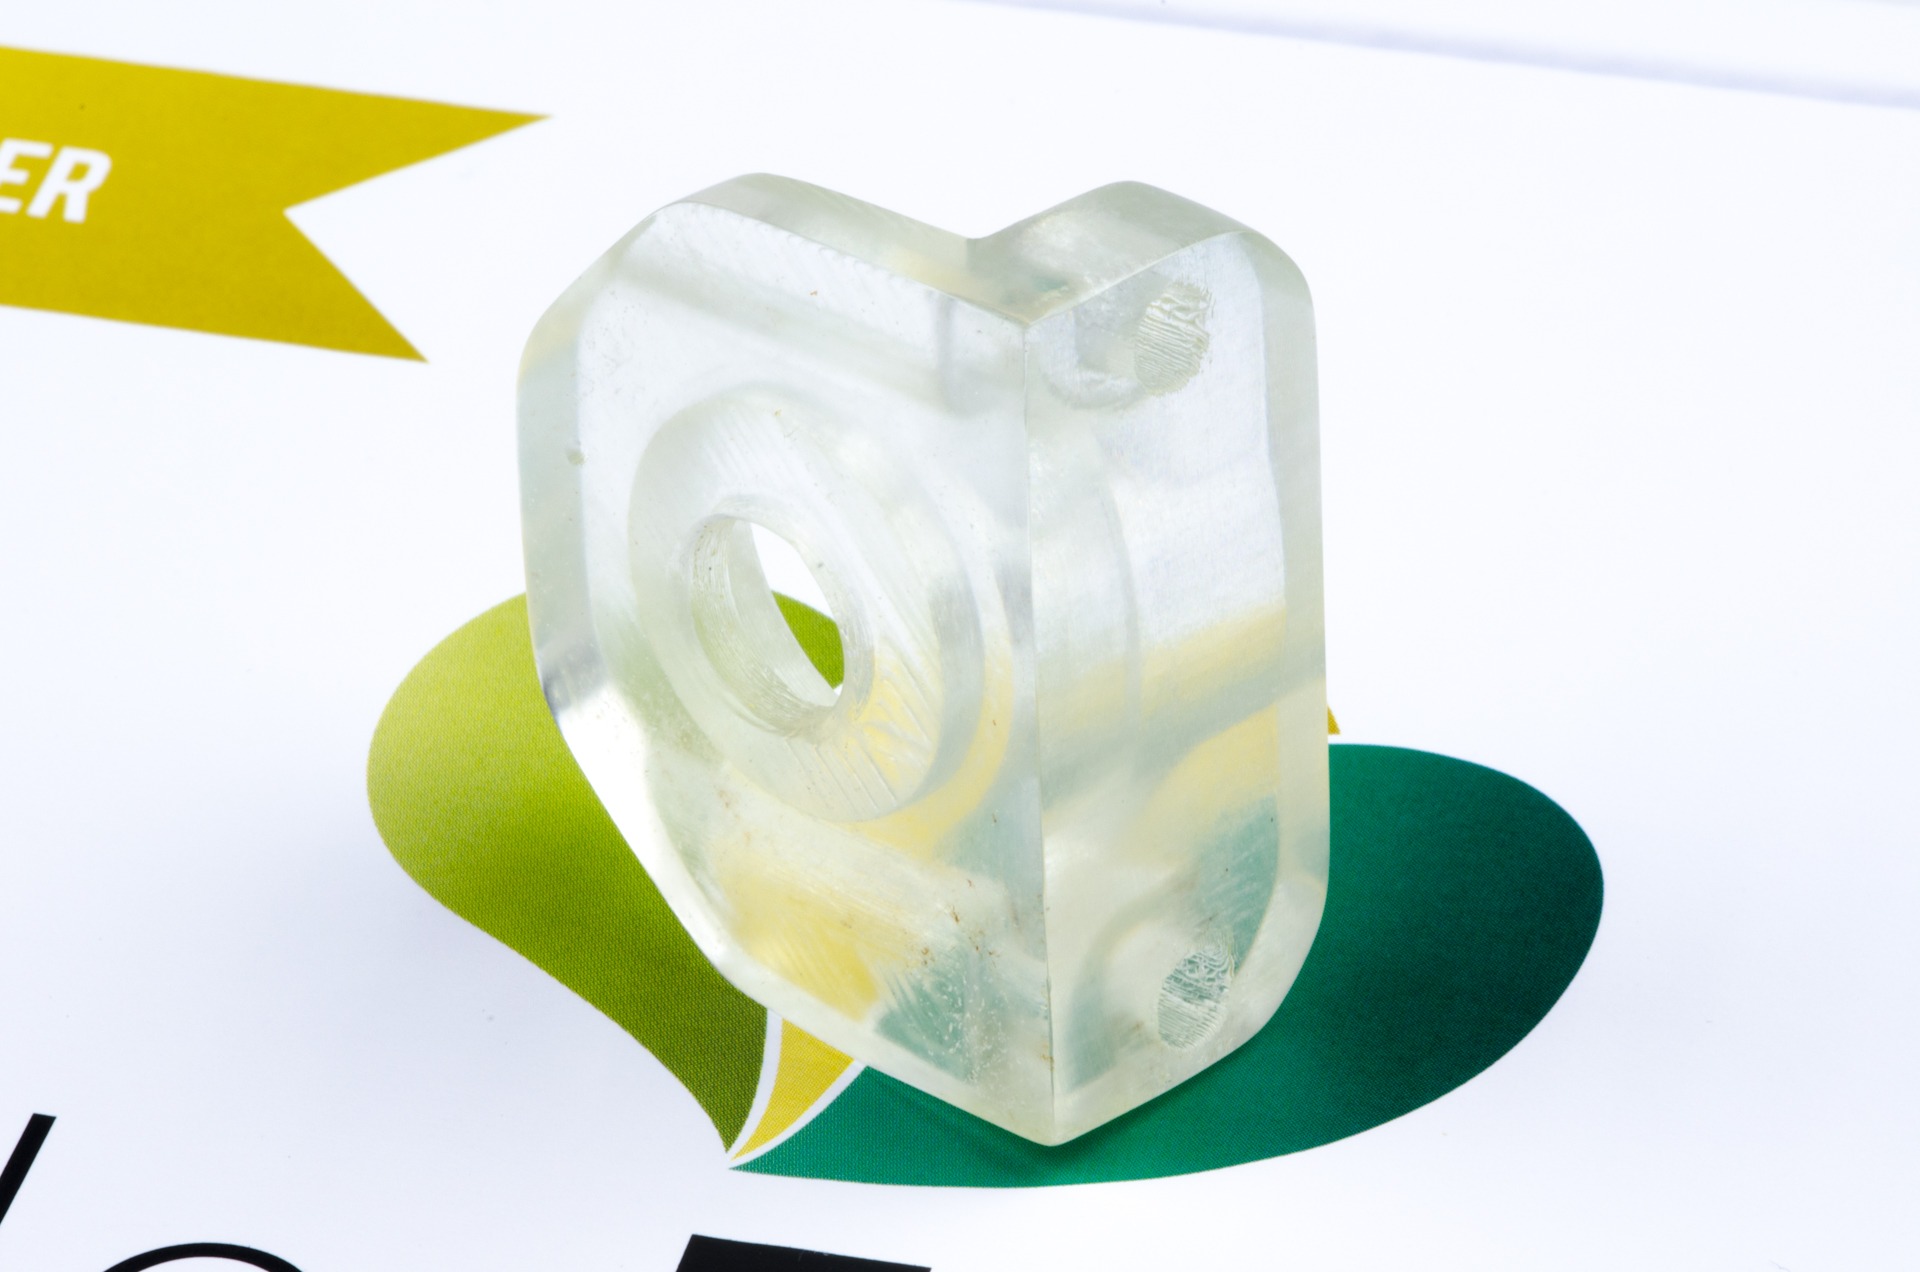
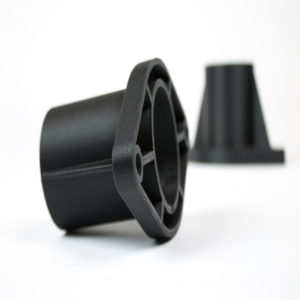
Using the same technique as for post-processing our metal-filled filaments, we have sanded most of the outside of this bearing holder using up to 600 grit sanding paper. This results in a very smooth but matte finish, which you can than polish to create the best transparency we’ve ever seen in a 3D printed part. But more on this later, because we’ve only just started testing this.
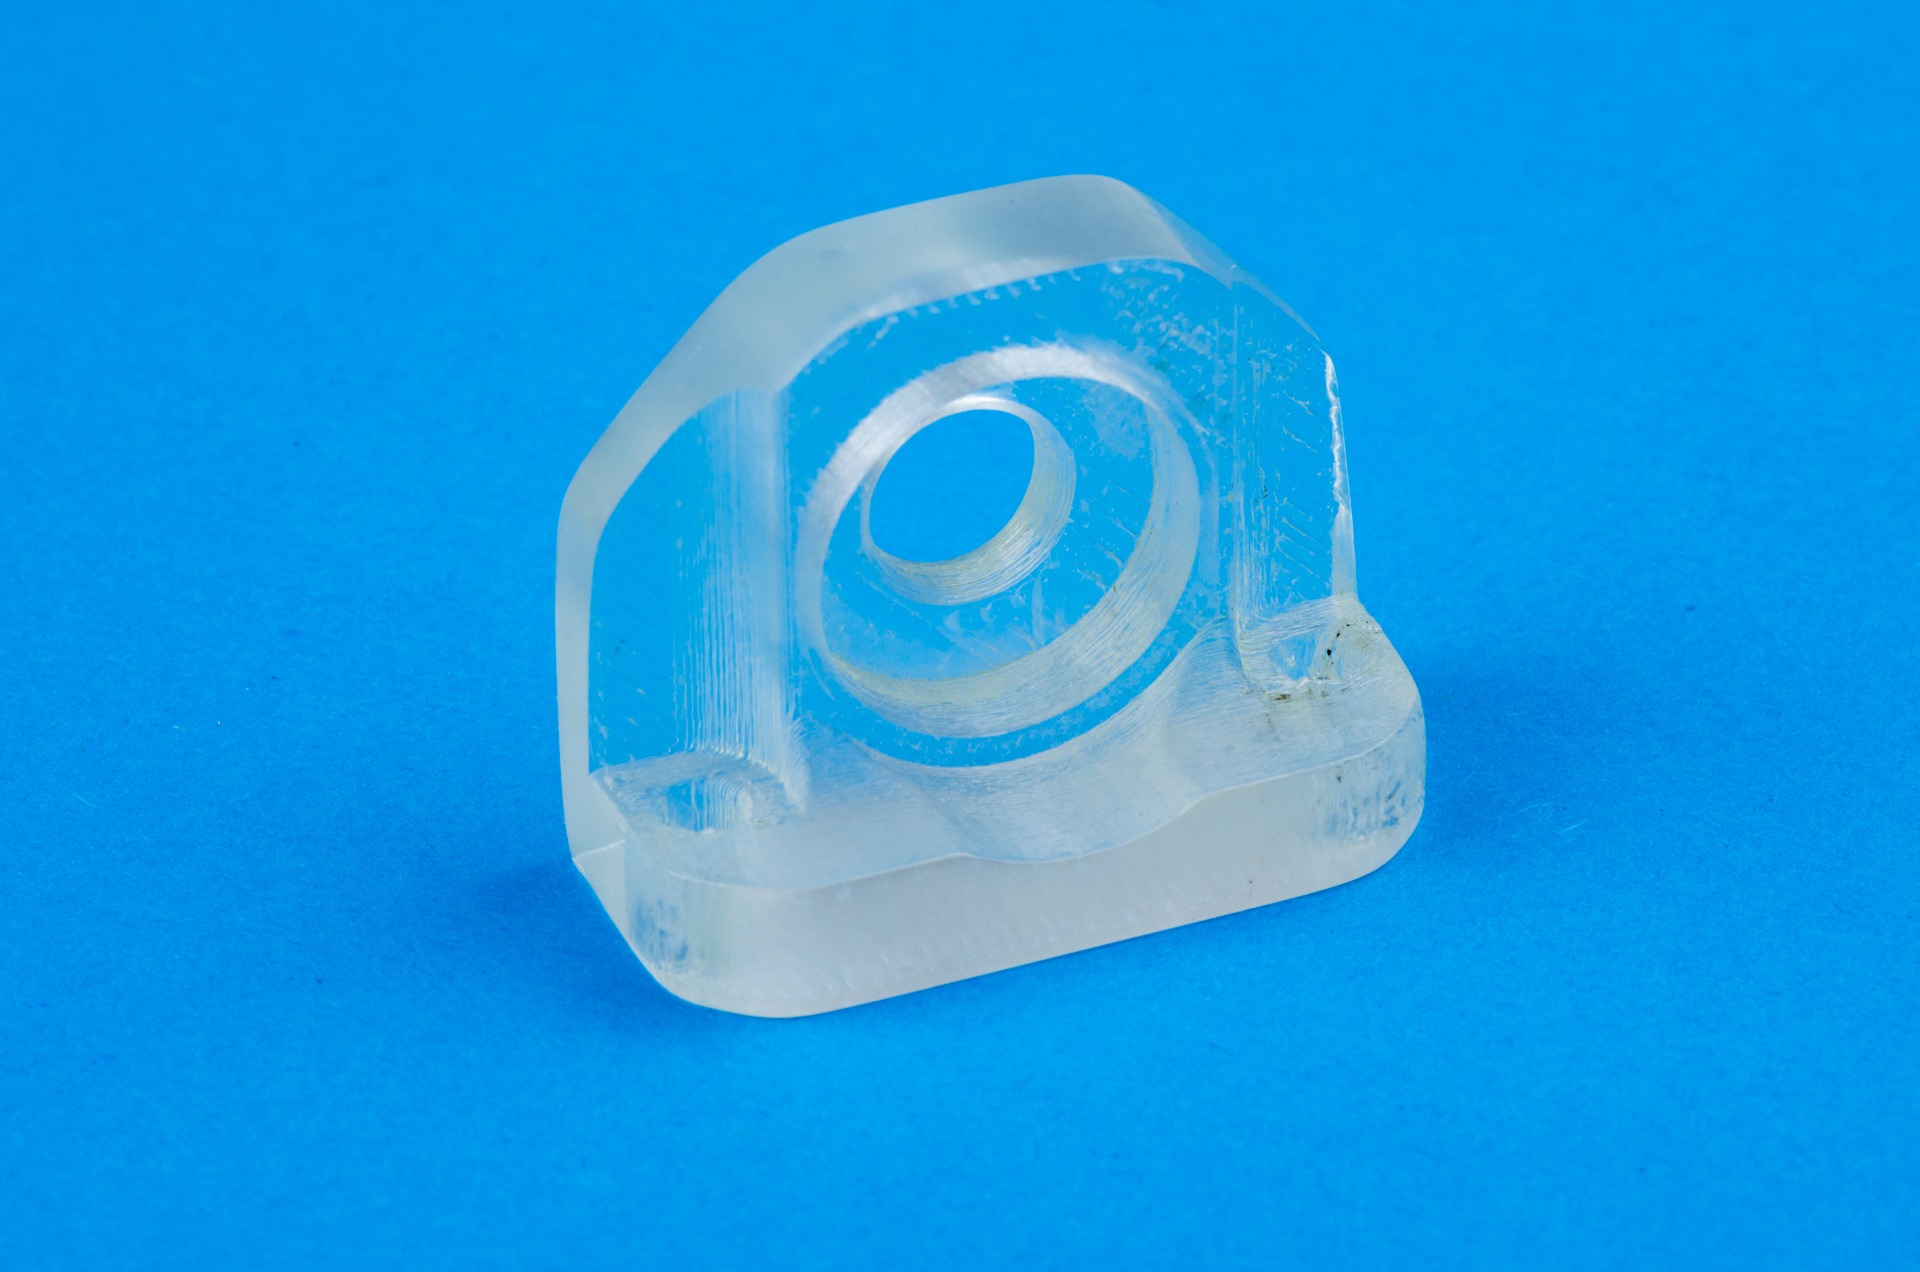
Properly photographing a transparent part is quite tricky, take a look at the last (blue) picture to get a better understanding of how transparent it really is.

36 Comments
[…] T3DPG video on transparent PolySmooth prints: https://youtu.be/92C10-n21Po Colorfabb article: https://learn.colorfabb.com/lets-make-something-clear/ dasFilament PETG: […]
Thanks for sharing this! All the best!
I wasn’t able to get clear parts at first. They were hazy/frosty no matter what I did to temp/extrusion_multiplier/layer_heights/etc. What helped me was switching to a 0.8mm nozzle. Every print was 10x more clear, consistently. From there it’s a matter of tuning, but if you aren’t getting 90% clear with little tinkering, then try a big nozzle!
Hi, I’ve tried the HT Clear on my Lulzbot Mini (0.8mm nozzle, sliced with Cura for Lulzbot) and a Prusa m3 (0.4mm nozzle, sliced with Slic3r for Prusa). I find the best bottom layer transparency can be achieved with a very smooth kapton tape layer.
My issue is the top (final) layer has the print lines which defracts the light going through the object. I can’t sand the top with 2000 grit sandpaper without just scuffing it up and making things worse.
I’ve had some success reducing the final layer flow rate and extrusion width, but I can’t achieve what is shown in the 4 pucks above.
Can you suggest the proper top layer tweak to get all the filament paths to lay flat and just touch the previous path just enough to “erase” the line without getting plow lines?
Thanks
Have you tried ironing?
Hello!
I am using Simplify3D and I’m curious about what type of infil I should be using. Theres rectilinear, wiggle, honeycomb, fast honeycomb, grid and triangular.
I’ve tried rectilinear and honeycomb with 100% infill and it doesn’t look great.
Any ideas?
I cannot seem to get a print that is any where near transparent.
I need information on what settings to use. All my infill lines are very distinct making the print very patterned and quite opaque.
There are so many settings with very vague and ambiguous descriptions to adjust. None of the articles I’ve read are at all specific, and I continue to waste large amounts of material without acceptable results.
We’ve set up a guideline in the article above.
It is very hard to tell you which settings you have to change on your specific machine. Even between two exactly the same machines there are differences in temperature and flow. So this is something you will need to find out with trial and error with the guideline in mind.
Good luck.
Hi
Thank you for this great tutorial. I tried it and got very good results. The only problem was, when printing bigger parts with 3mm walls, after some time I got drops of brown plastics on the printing part. I think, that the nozzle pushes away some over-extruded plastic, which stays at the nozzle and when there is enough material, the drop will fall down. I am using a Prusa MK2S.
Did you already had the same problem? Should I reduce the extrusion multiplier?
Thanks for your help.
Michael
Extrusion multiplier is key here probably, when too much material is being extruded the printhead will smear through this and pick it up.
Try limiting travel moves through the material as well and you can see about installing a brush / wiper to clean the nozzle maybe.
Using a machine with dual extrusion like UM3, would it be possible to combine this material with PLA? I’d like to use colorFabb_HT for transparent parts and PLA for colored parts in my model.
We have no experience with combining _HT and PLA specifically but it’s definitely worth a try.
Keep in mind that the _HT will need post processing most likely and you may also hit your PLA part in the process.
I have an aluminum bed- will kapton tape work? You haven’t tried a 0.4mm nozzle yet, right? i’m guessing bigger is better when it comes to nozzle size.
It’s worth a try for sure. We expect Kapton tape to work at least OK.
But due to the solid nature of transparent parts they are often pretty warp intensive.
A 0,4mm nozzle should also work.
We went with a bigger nozzle to speed up the print, have easier material flow and have less lines that have to perfectly melt together in the X-Y plane.
Let us know how it works out for you.
Not bad for my first print in HT: http://www.thingiverse.com/make:293575
Another great colorfabb ht clear print: http://www.thingiverse.com/make:300242 Really love this filament- prints cleanly, w/out edges curling up even though I’m not using cooling nor do I have an enclosure. It is sticking well to PET tape @120 degrees, supplemented with wolfbite adhesive from matterhackers.
I have a CR-10 upgraded with the KSwiss all metal hotted. I can only go to 260. I am printing on PEI with glue stick and have no problems getting it to stick. However, I cannot get clear parts. I am using Simplify 3D as a slicer. What infill did you use, rectilinear, grid ? I can see the grid lines in my parts. Printing at 15 mm/sec, 0.1 layer height, 150% extrusion multiplier. Note that this has a 0.4 mm nozzle.
Rectilinear mostly.
Although if you’re really having to go to 150% extrusion multiplier I reckon there is something else not quite right.
150% is way too much if there is truly that much coming out of the nozzle, so you might have some under-extrusion going on there?
If you’re seeing the lines of the infill the material is not flowing / melting together properly.
What’s it look like if you don’t finish the product with sanding?
The 4 cylinders in the center image have had no post-processing done to them.
Also the bearing holder has only been sanded on one side, you can still see that the top section around the bearing hole has not been sanded.
Basically the inside of the part can become (nearly) fully transparent, it’s just the outside factors that are caused by 3D printing that you’ll want to remove.
Do you have any similar settings/advice for the nGen clear? (Not HT) I just picked up a reel of that to test and was hoping to make things a little more transparent. BTW nGen is my favorite filament at home and the RedHat Westford 3DPrinting Lab (also all Lulzbots) I run at work.
Take care,
-Bill
@TinWhiskerzBlog
@TheRainford
TinWhiskerz.com
Hi Bill,
Haven’t done any testing on nGen but I reckon the basics will be the same.
The material needs to flow together such that it fully interlocks to avoid creating gaps in the XY plane.
If you test it we’d love to hear how it turns out.
Has anyone had any experience printing this in a heated enclosure? I figure it would help with flow between layers? I’m about to give it a shot.
We have done limited testing with this and it does seem to have a positive effect.
What is the density of ColorFabb XT clear, especially of an object after printing? For my scaled boat modeling project the hull material must sink in water.
Material data sheets can be found on our materials page here: http://colorfabb.com/Materials/
After printing however the final density of your model will depend on a lot of variables and therefor this is something you will have to test yourself.
Of course it depends on slicer settings such as infill amount but also material flow has to be optimal and achievable by the 3D printer.
For a reliable result without too much testing beforehand, maybe it would be wiser to allow for weighing down of the model after printing?
I tried to print something transparent with HT Clear today, but everything came out white. Also, when the material were just oozing out of the nozzle, it would be white and seemed to have bubbles in it. This was at all temperatures from 230c to 290c
Have you come up with a way to optimize the material color, or have any tips on how to make it print transparent?
Thanks
It should come out clear, like all transparent co-polyesters, Xt, nGen and HT. Perhaps your spool of HT needs some drying to get rid of access moisture? You could try this at home, make sure the temperature doesn’t exceed 100C, 90C would be oke for a few hours.
Is there any treatments after printing ? or it just come out like that from the printer ?
As mentioned in the last paragraph, the bearing holder has been polished by hand.
This is only to remove the irregularities of the top / bottom layer.
Looks great would love to try your stuff here a lot of good review ant this stuff looks great keep it up
Hi,
wonderfull , but what’s the name of it, exactly ? : HT, XT,CP, transparent, clear, natural ???
Thx to give the real name( as it is on you’re website, just to order easier).
Best regards.
Alex.
3D MorphoZ.-Reims
http://www.3d-morphoz.com
This is colorFabb_HT clear: http://colorfabb.com/ht-clear
Is it possible to have a sample to test?
Samples can be ordered directly via our webshop here: http://colorfabb.com/samples
Or you can locate a local reseller and see if they offer samples: http://colorfabb.com/storelocator/
Amazing!