
A while back we started with printing Venus de Milo. It’s available on Thingiverse thanks to the amazing work by Cosmo Wenman, you can get the files here and read some more about his project.
The goal of this print project is to perform endurance testing with the E3D hot-end mounted on an Ultimaker original. In total it was about 50-60 hours or printing. We used our base material PLA/PHA Naturel because we’ll do some finishing techniques on the print involving lots of primer and sanding. We’ll get to that in part 2. In part 1 we’ll focus on the 3d printing of the parts and how we glued everything together.
Slicing & Printing
Kisslicer was used to slice all parts of Venus de Milo. It’s our preferred slicer when we’re printing statue like objects. The way Kisslicer configures dynamic speeds for inner and outer loops makes 3d prints look really great. If you’re a fan of Kisslicer also think about supporting the development by buying the pro version.
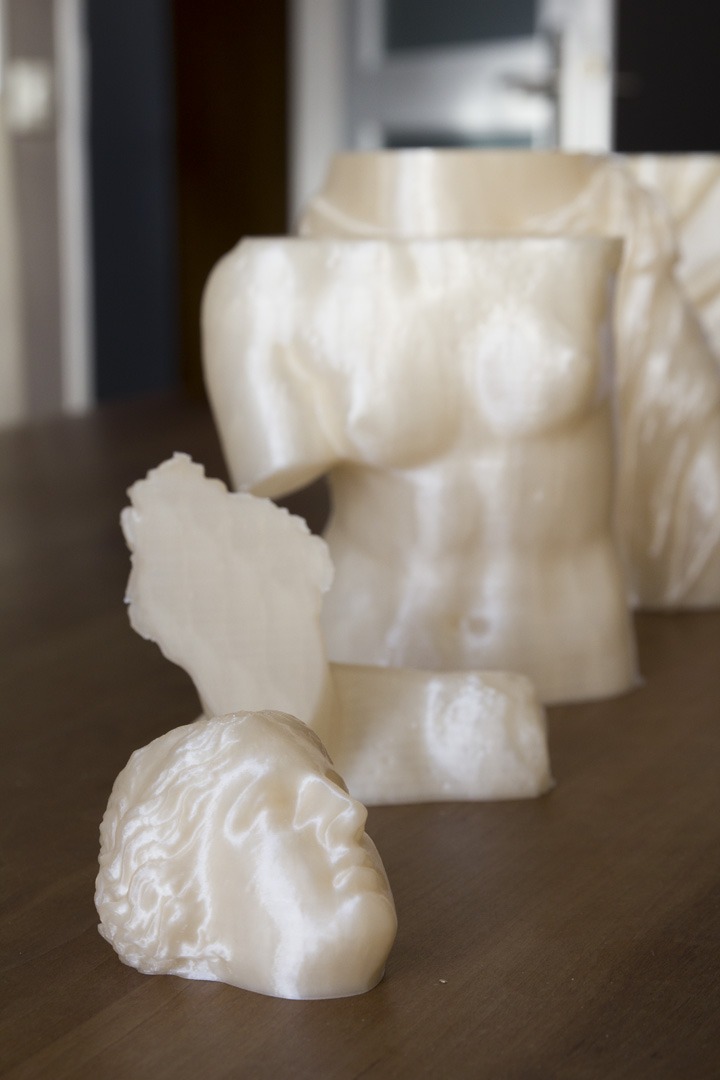

All parts, except for the head, were printed at 215C at about 60-70 mm/s with a 0.2mm layer height. Even though this was printed during the christmas holidays in a very cold shed, the parts came out great without problems. Since this was made on a Ultimaker with a self build heated bed the part stayed nice and flat.
Gluing PLA/PHA
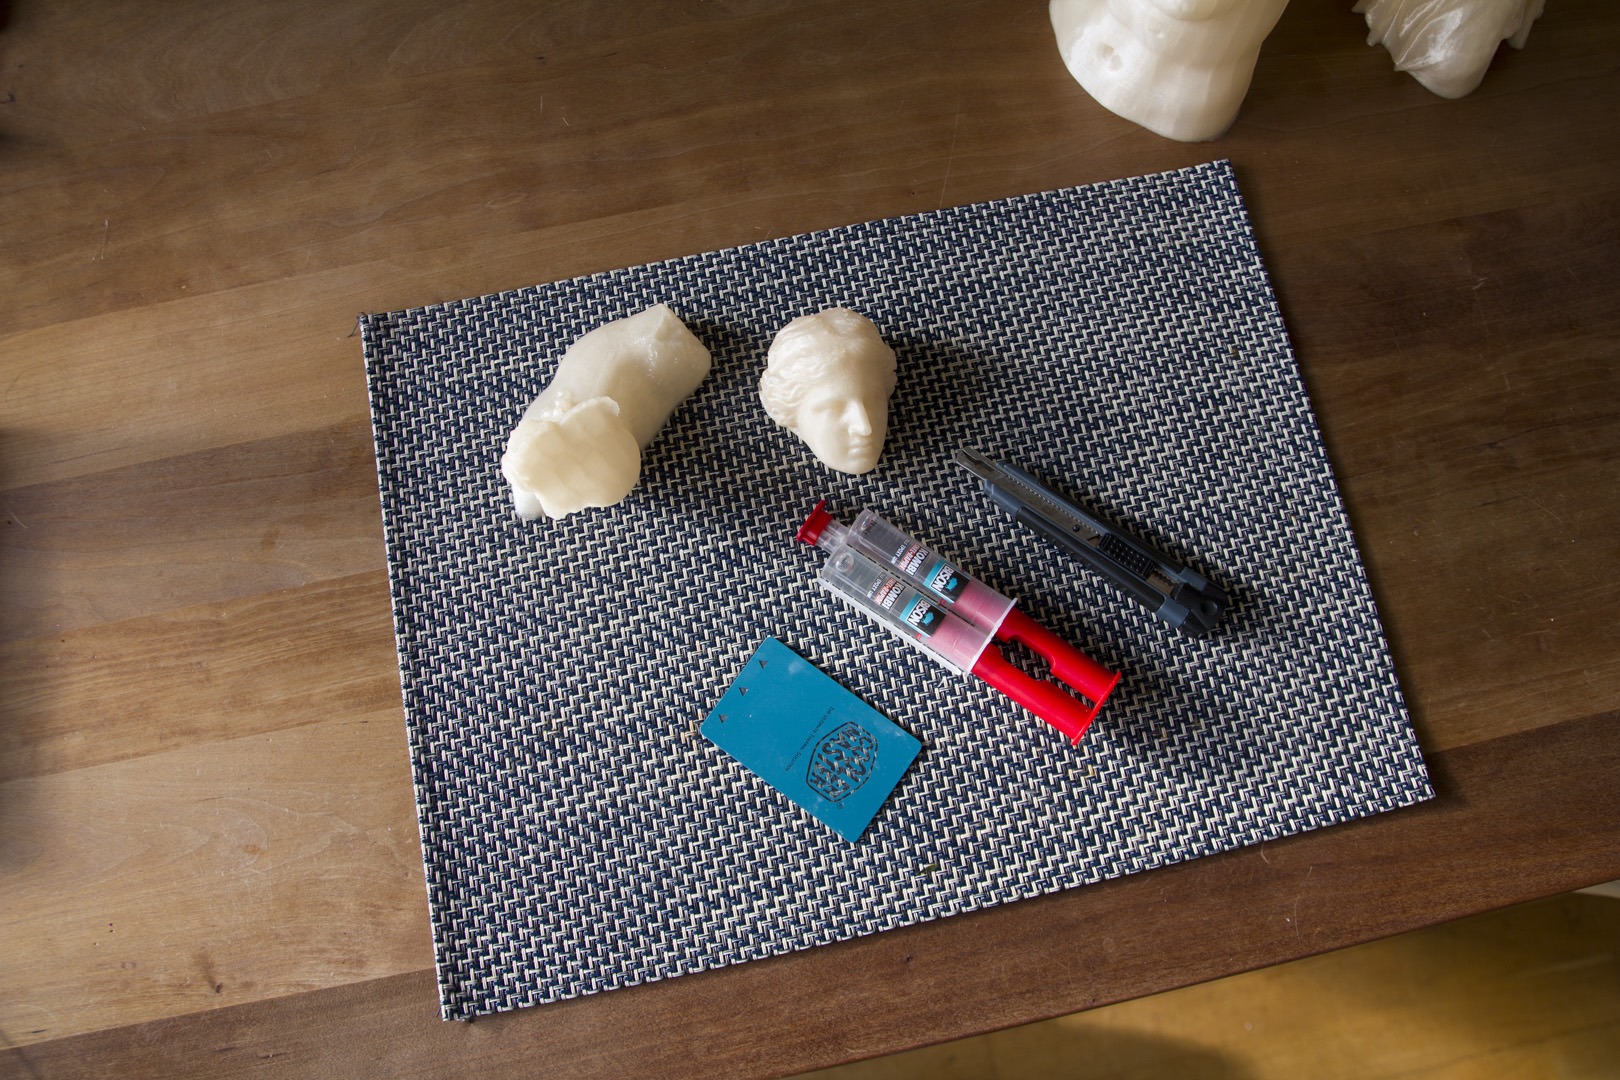
Gluing PLA’s can be difficult so usually what works well is a two component epoxy. It’s not cheap, but it’ll get the job done. A simple stress test showed that the bond between 3d printed parts, using two component epoxy, was stronger then the individual PLA/PHA layers.
This is our method of gluing parts together:
- lightly sand the surfaces that you’re going to join with epoxy glue.
- wipe down the surface with terpentine or some sort of degreaser .
- start mixing component A and B of the epoxy really well, check the manual.
- apply enough glue so you can press both parts together so the glue will spread out nicely.
- leave the parts and wait until the glue has set.
In part 2 we’ll continue with Venus de Milo and focus on finishing the print using various tools and products. Keep checking our social media the latest updates from our print lab.
[mwi_product sku=”010003″/]

No comment yet, add your voice below!