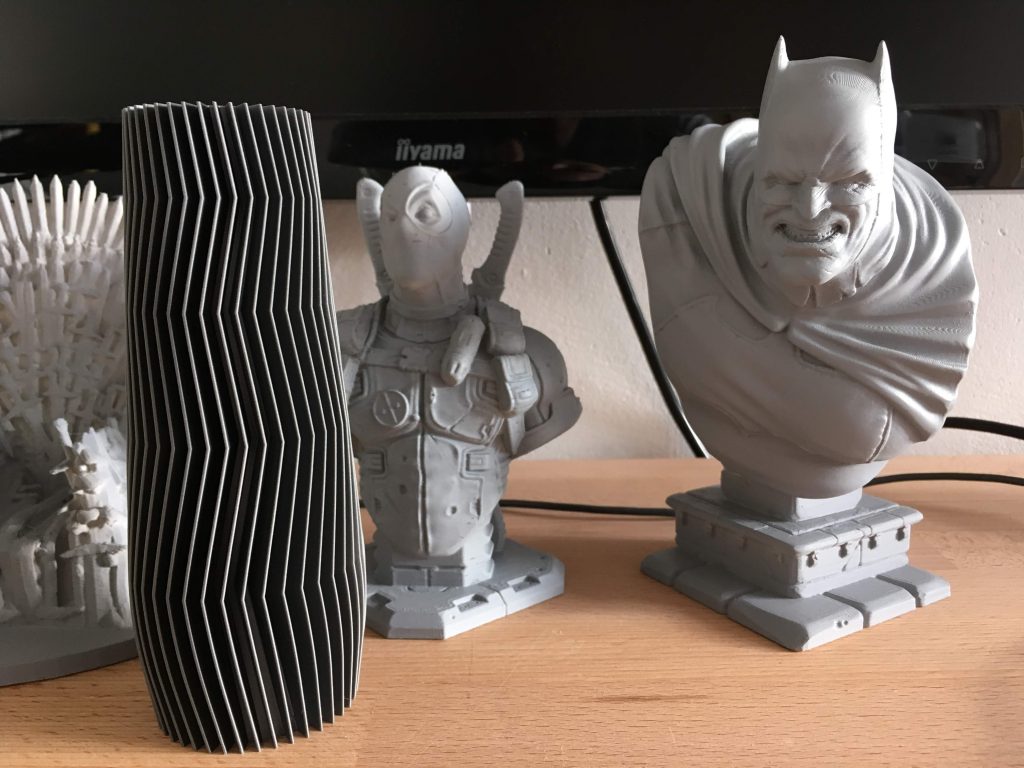
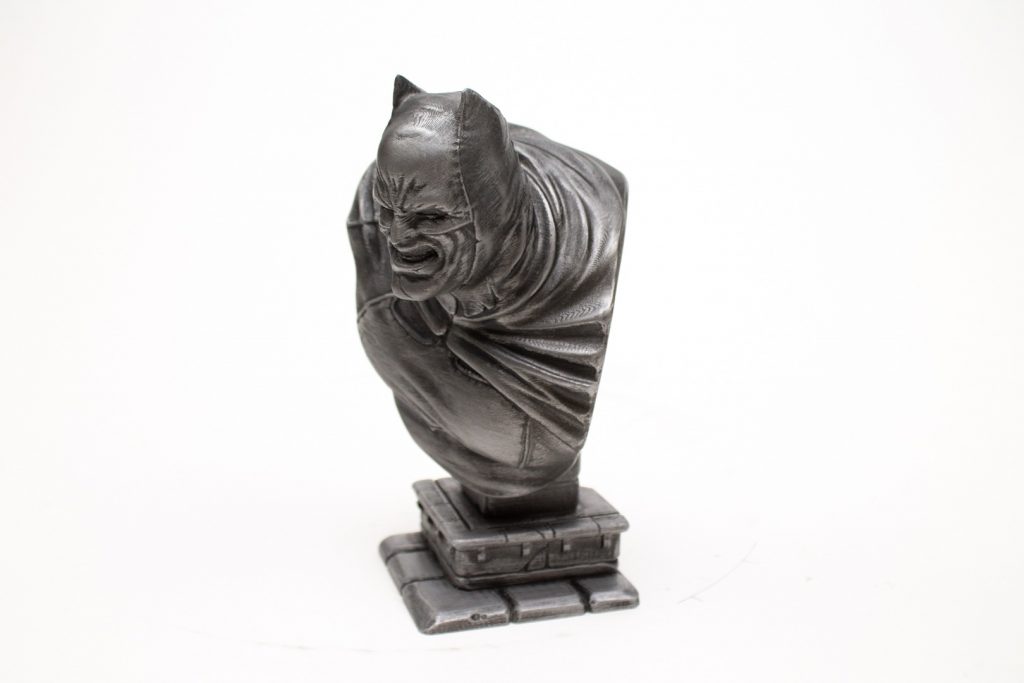
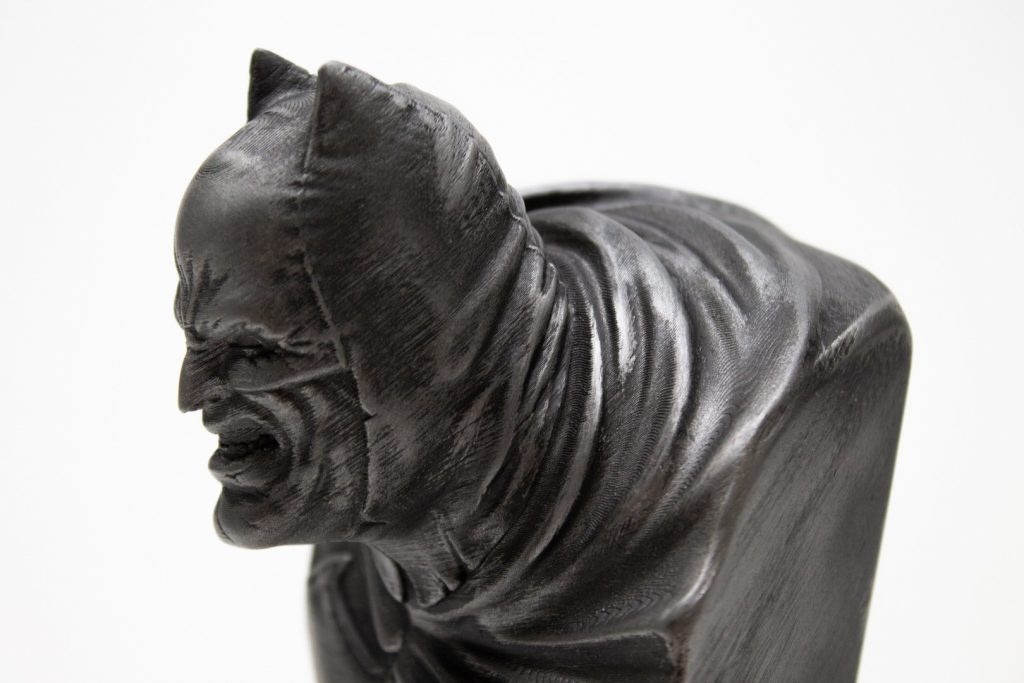
Batman bust

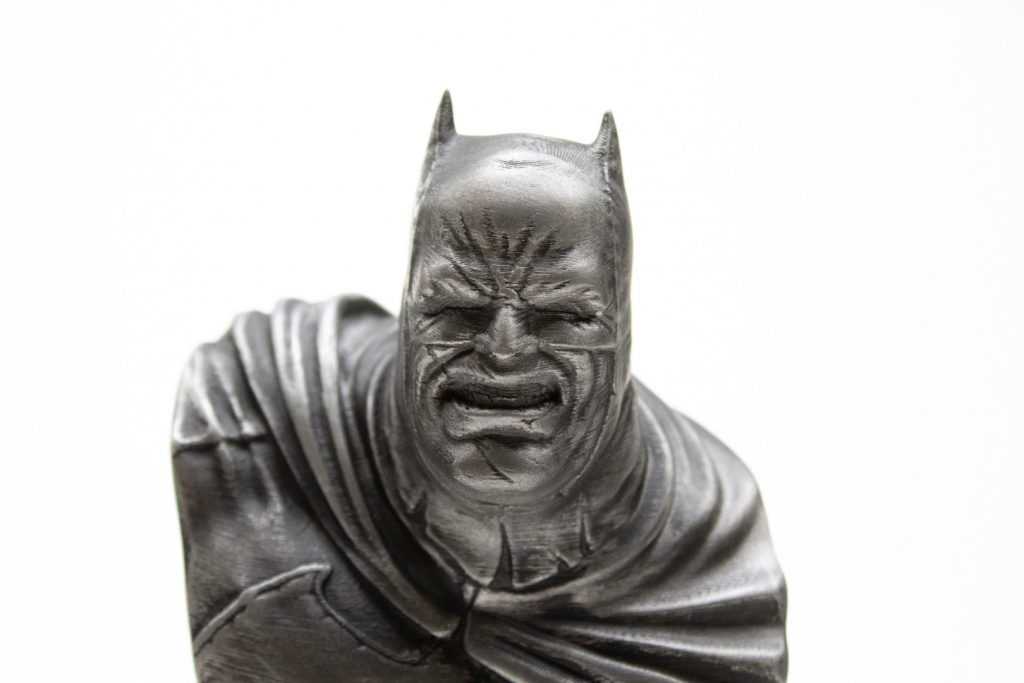
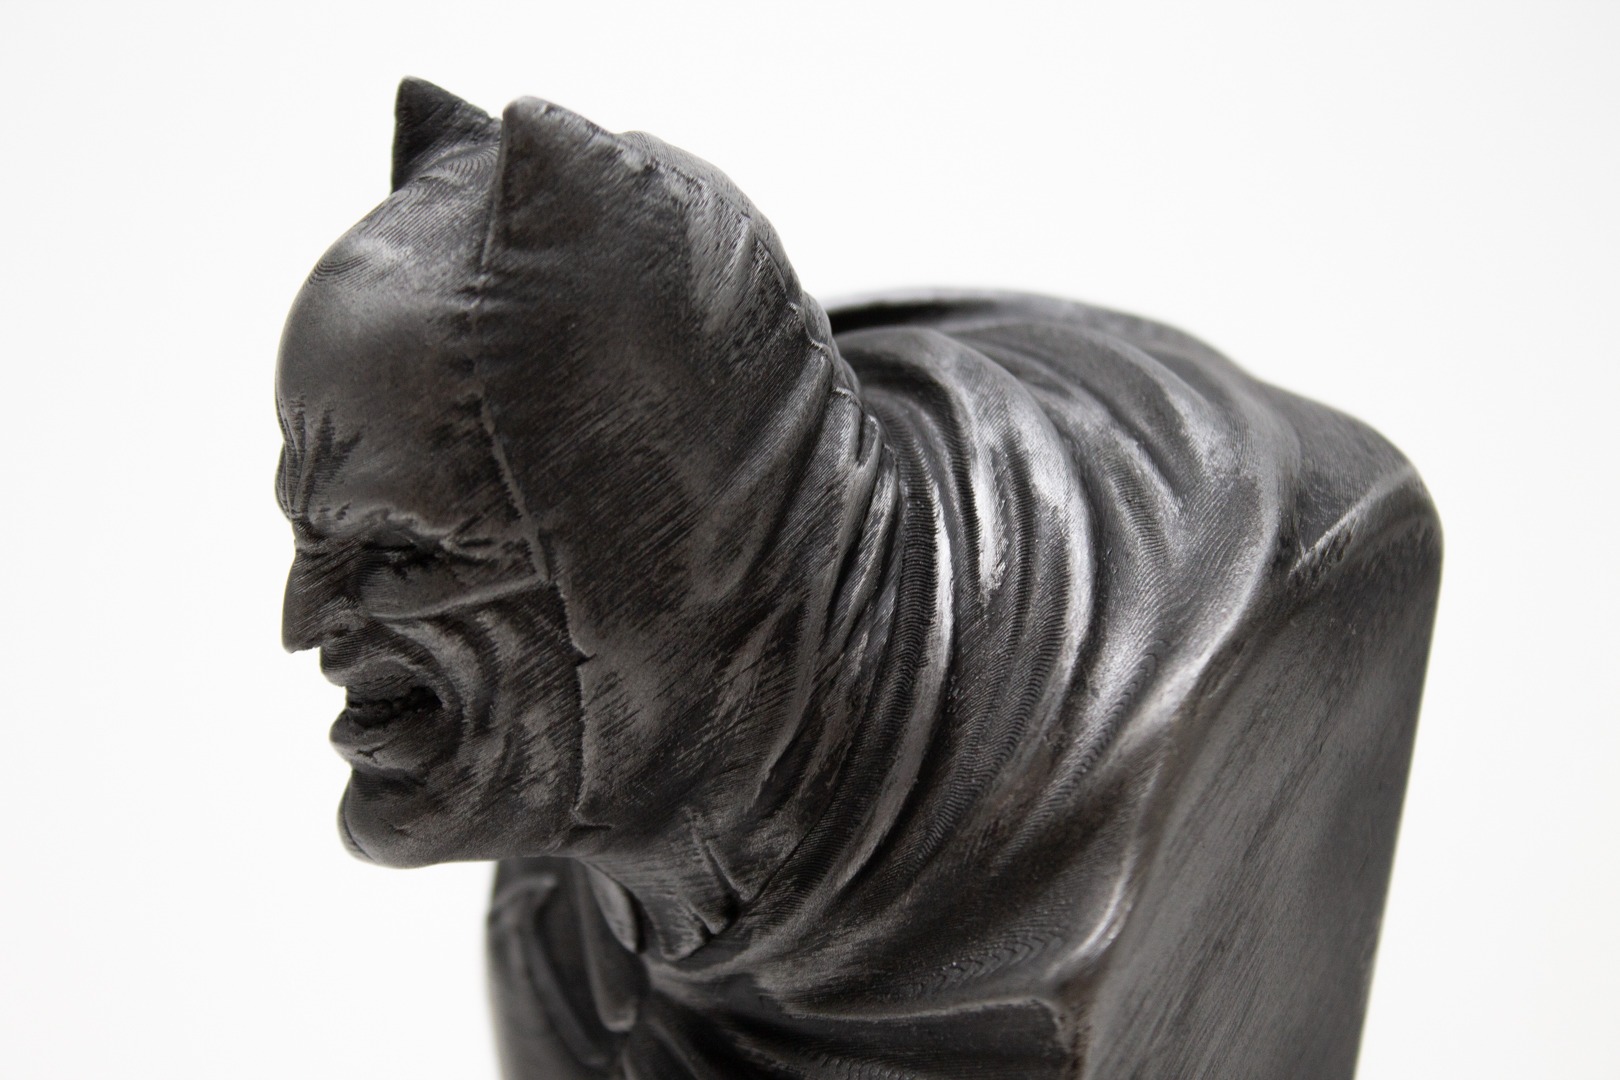
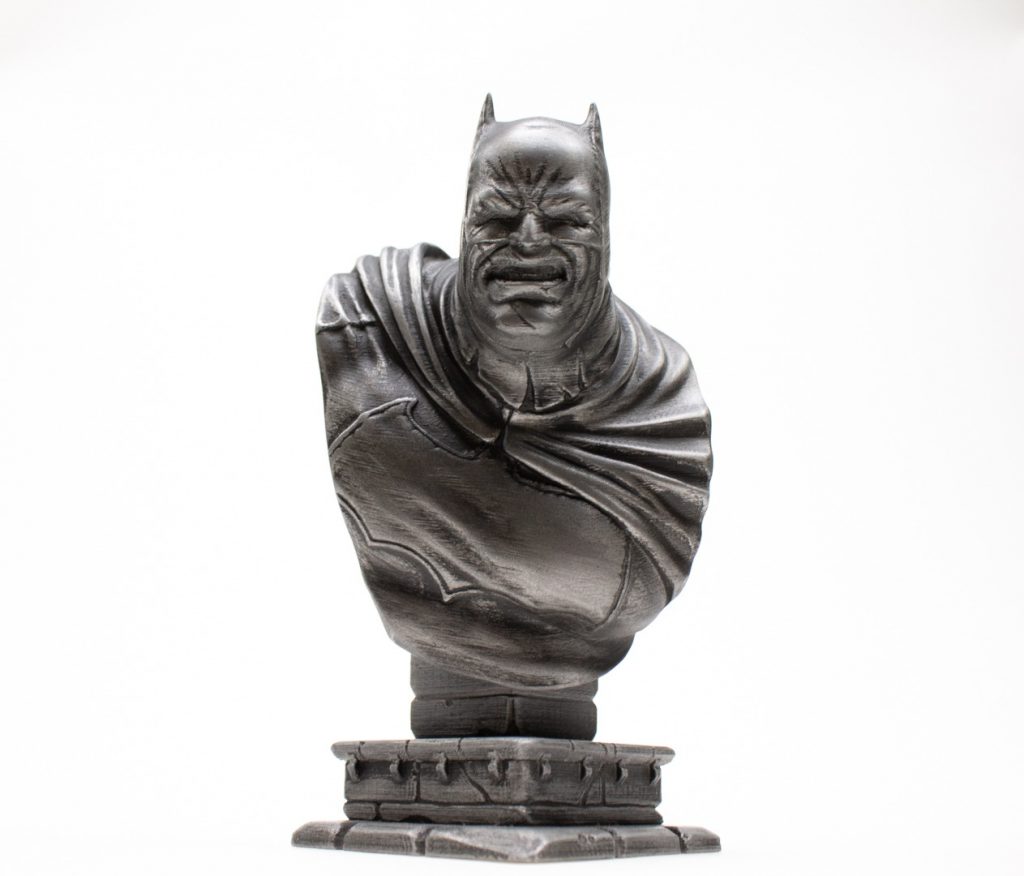
Our filaments already look great when printed, but we get a lot of questions about post-processing. Not only materials where this is kind of necessary (like bronzeFill or copperFill), but also other materials are often the subject of some serious post-printing work to make the printed object truly unique. For this post, our technical development manager (and part of the Team colorFabb from the very beginning) Gijs Houdijk takes you by the hand to show how he post-processed this awesome Batman bust, designed by David Östman.
Design at MyMiniFactory

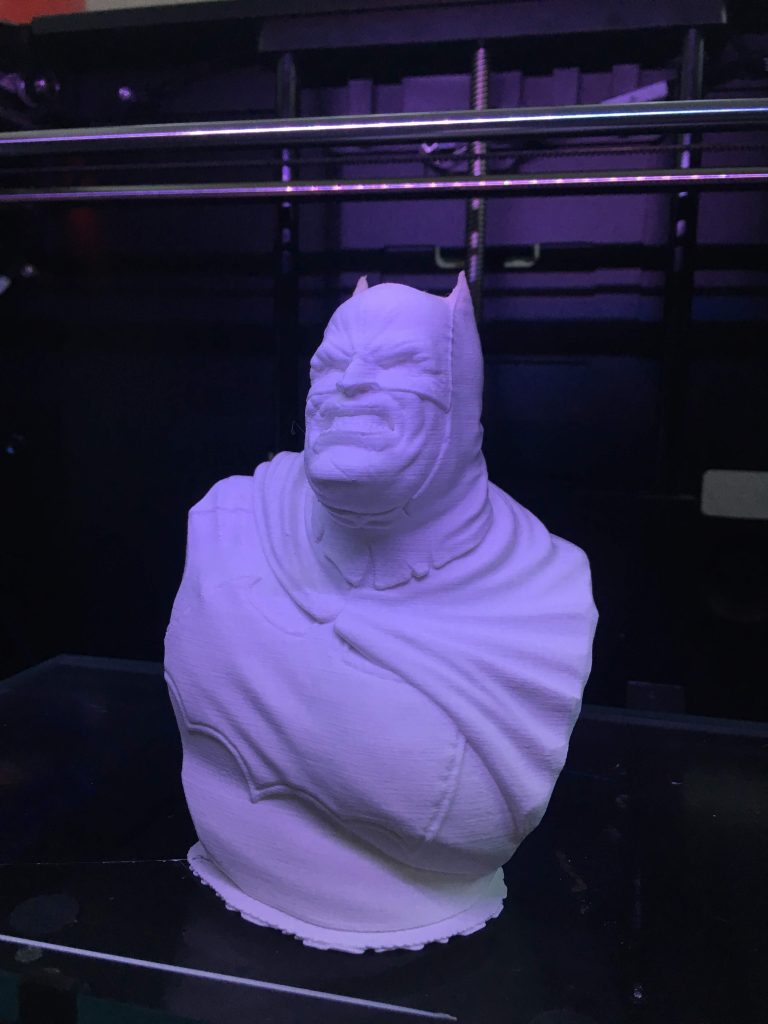
To begin with, we used our very own PLA Semi-Matte White as the basis for this print, using the standard PLA settings on the Makerbot Replicator 2. For this print we used a 0.15mm layerheight, lower layerheights equals less sanding to get smooth areas.
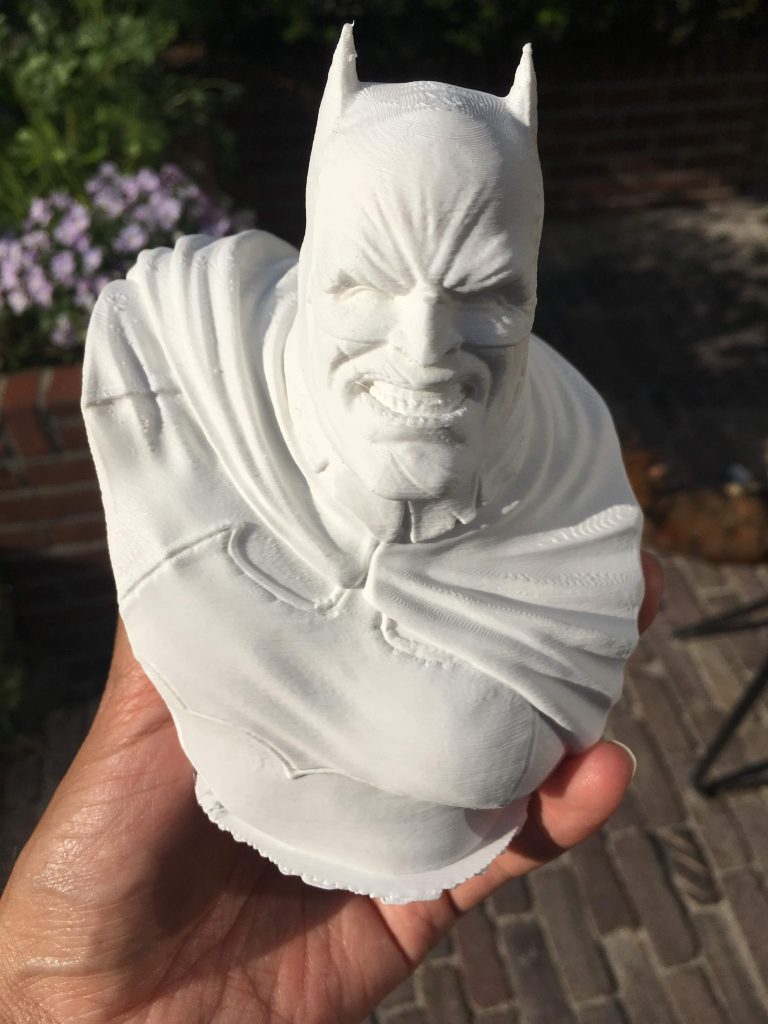
Well, this Batman bust already looks pretty great, but Gotham’s Caped Crusader can even look better! Below are the post-processing steps that Gijs took.

1. Primer & Sanding

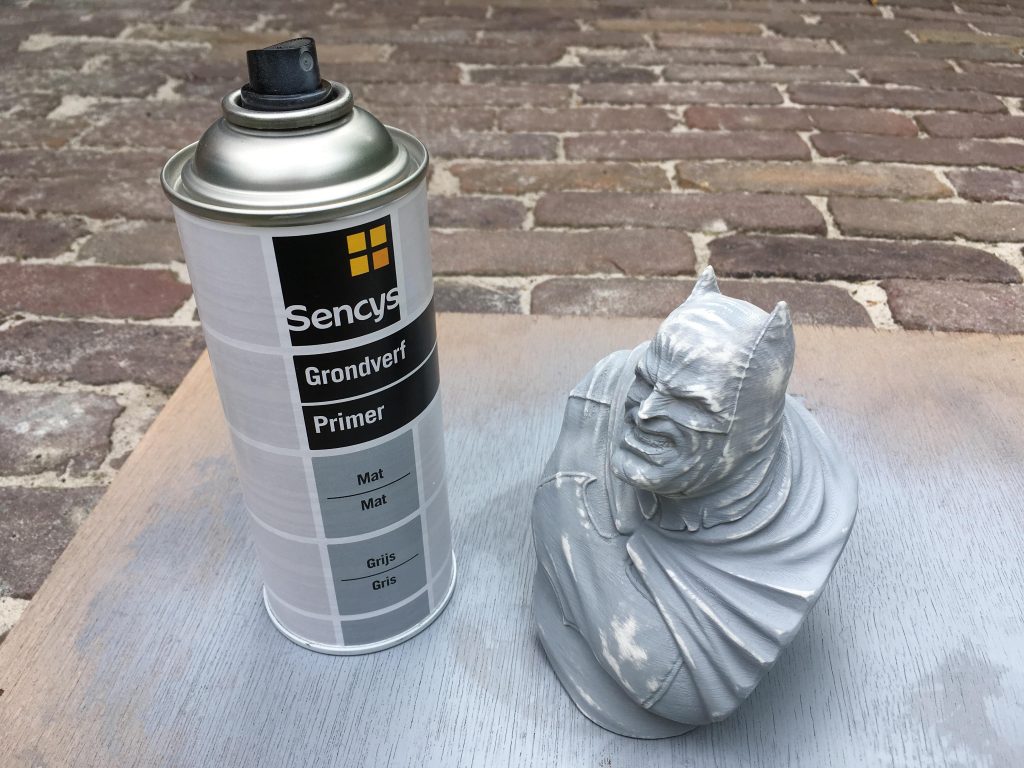
I usually start with a couple of layers of primer. After this I’ll start with sanding, using 220 grit. Then add another layer of primer and continue with sanding. My goal is to smooth out af much as possible the exposed area’s, without loosing detail in the print. The smoother the exposed area’s are, the better they will look after Step 3 ‘Wheathering’.

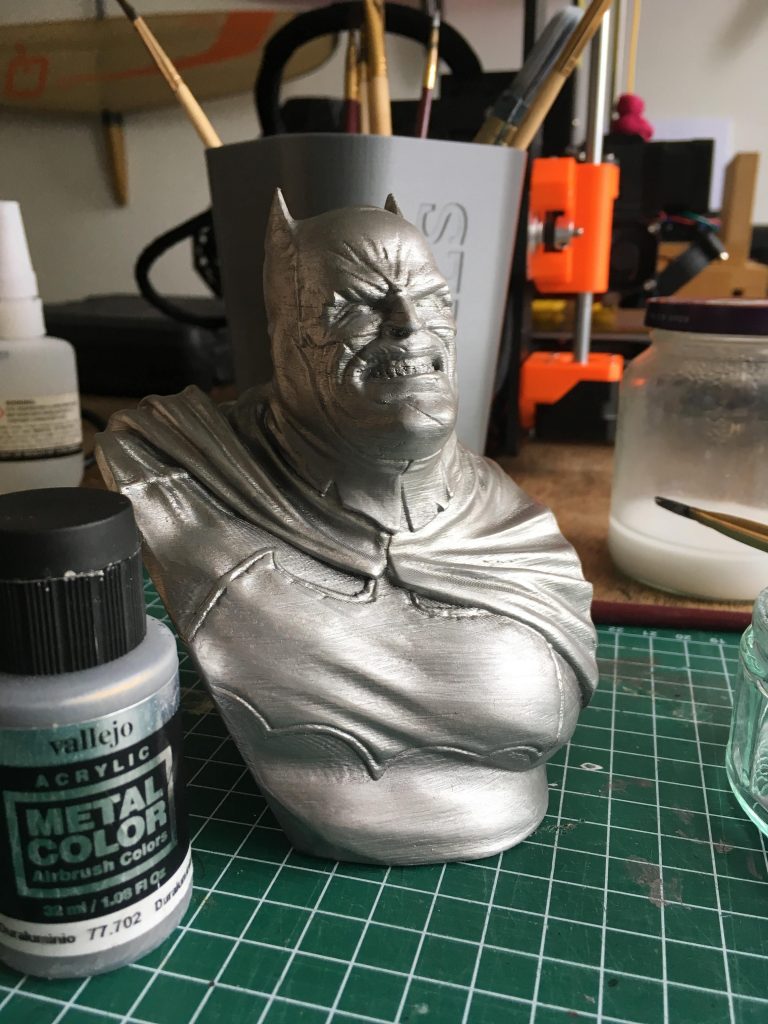
2. Silver base coat

I used Vallejo Acrylic Metal Color for the base silver metal coat. Instead of using an airbrush I used regular brush to apply paint to the model. It’s a very thin paint which coats really really well. It also dries super fast and is very easy to get an even coat.

3. Weathering the model

After the base coat I apply black spray paint to the model and immediately remove as much as I can with a soft cloth. Don’t let the pain dry, you want to wipe it off while it’s still wet. You can do this one side of the model at the time. The smooth exposed area’s will be wiped clean, revealing the metal looking surface. All the nooks anc crannies will stay dark because of the black spray paint, creating a nice contrast with the metal looking surfaces.
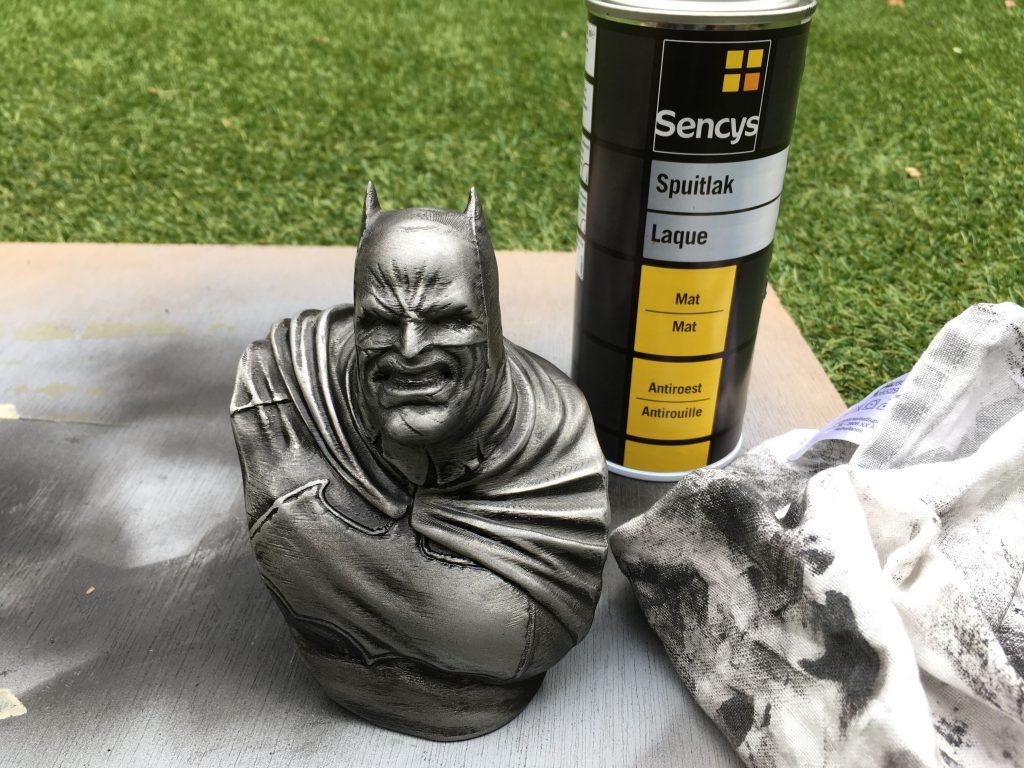
4. Glue both parts together

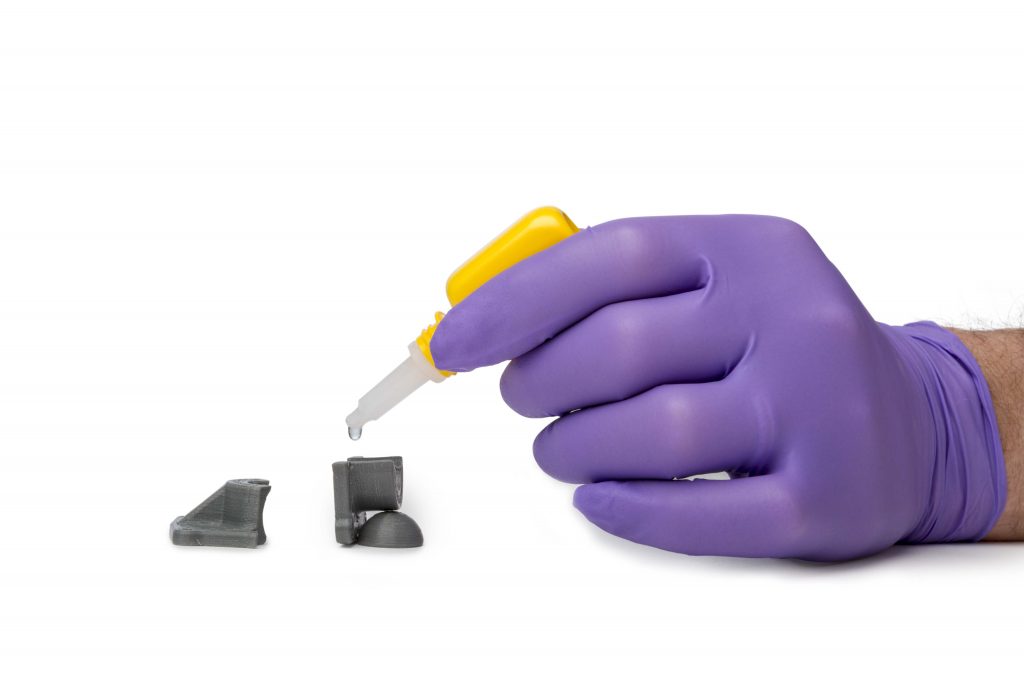
I used LOCTITE® 3DP INSTANT BONDER. Great feature of this glue is that it hardly turns white after it’s set, which some CA glues do tend to have. Loctite is available in the colorFabb webshop.
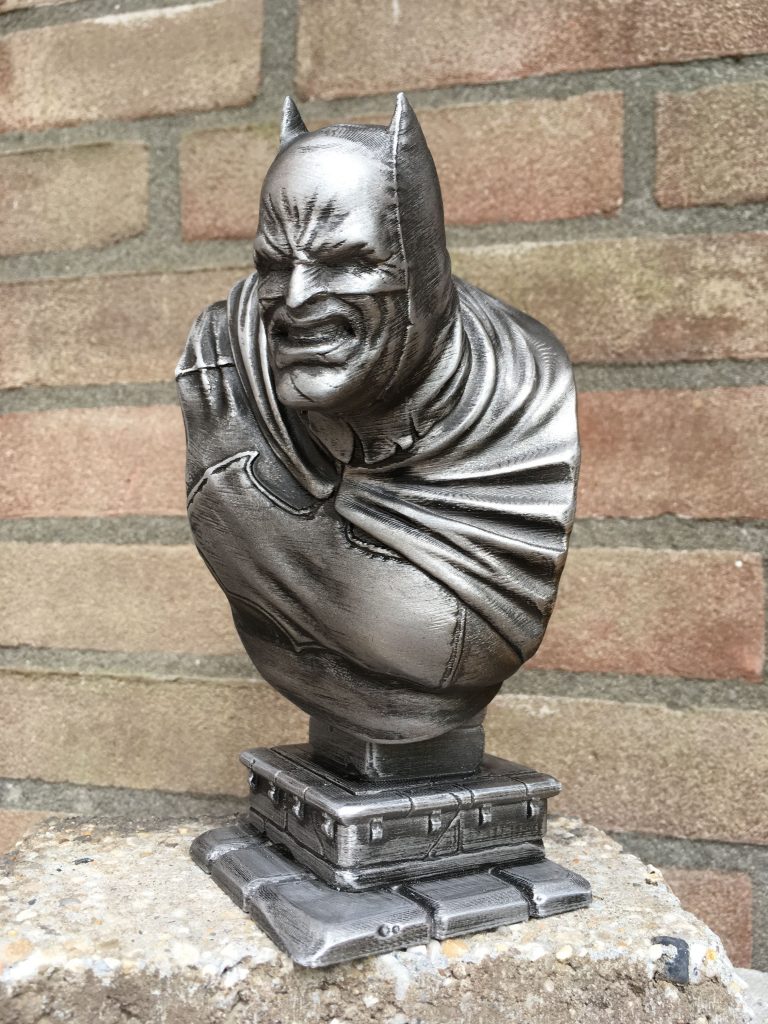
 

PLA Semi-Matte White is a great material for architects and model makers looking for a different aesthetic. Our semi-matte PLA filament eliminates the glossy appearance seen on most PLA 3D prints. The highlights on the surface will be less visible, resulting in an overall cleaner and much higher quality look. This makes it also a good choice to use as a base for prints that need to be post-processed.
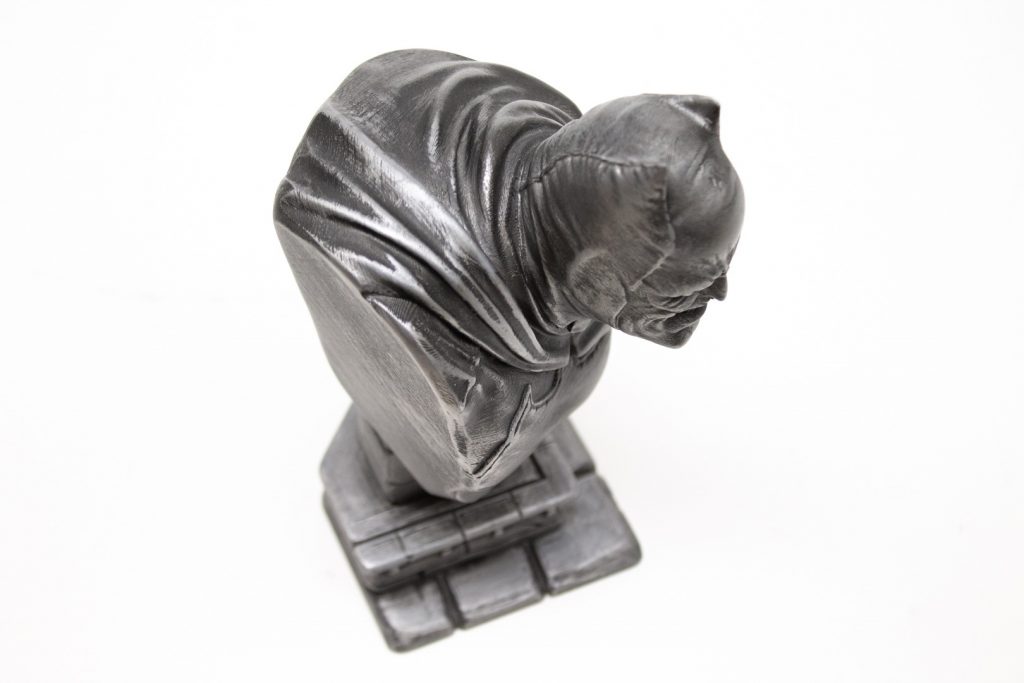
As with its black sibling PLA Semi-Matte White contains no fibers and prints at regular PLA temperatures and settings. The material is as reliable and easy to work with as any other PLA type material.
Want to read more about post-processing other materials? Check out the links below:

Copy mode: a bronzeFill story

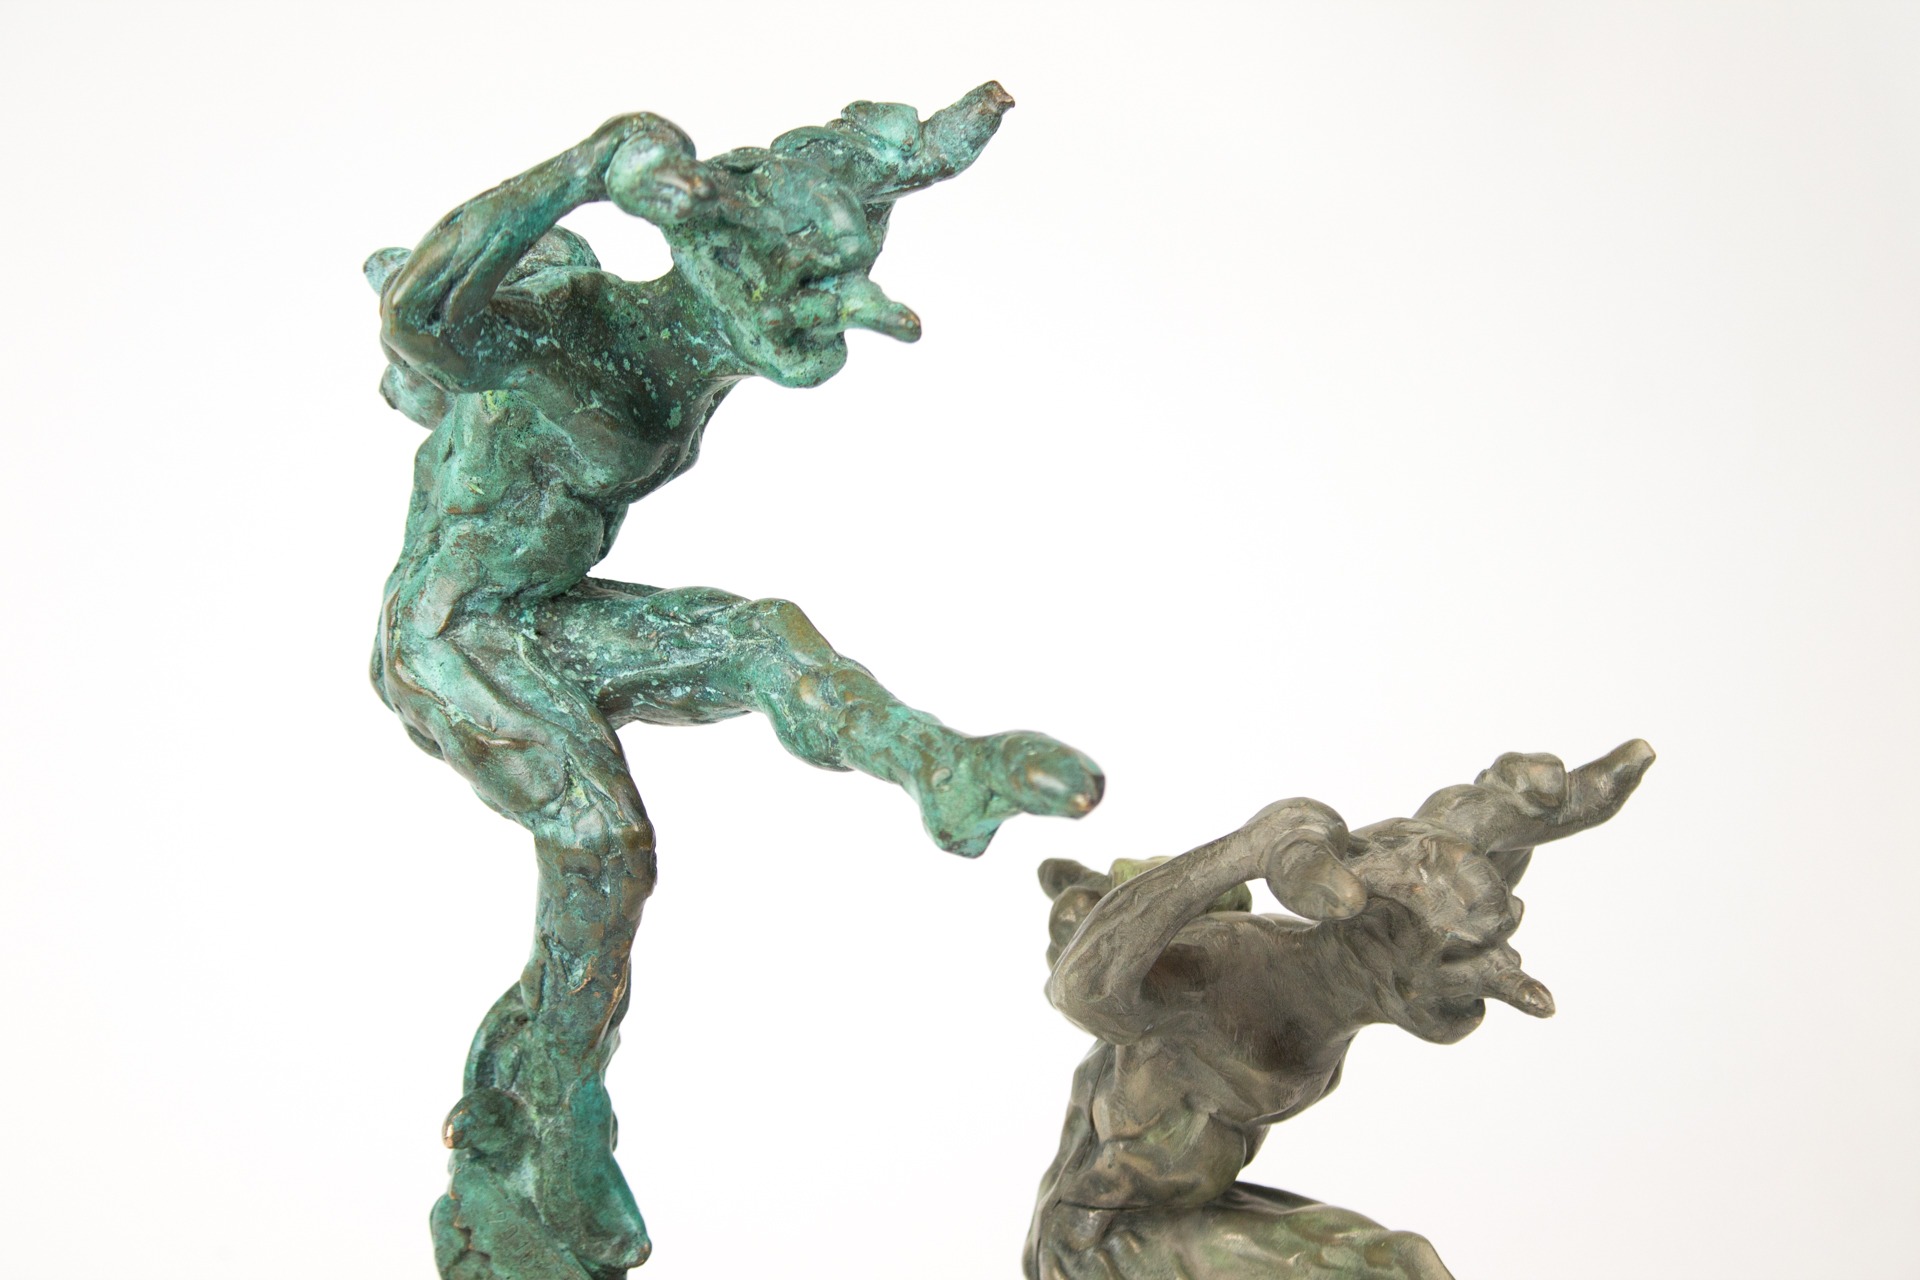
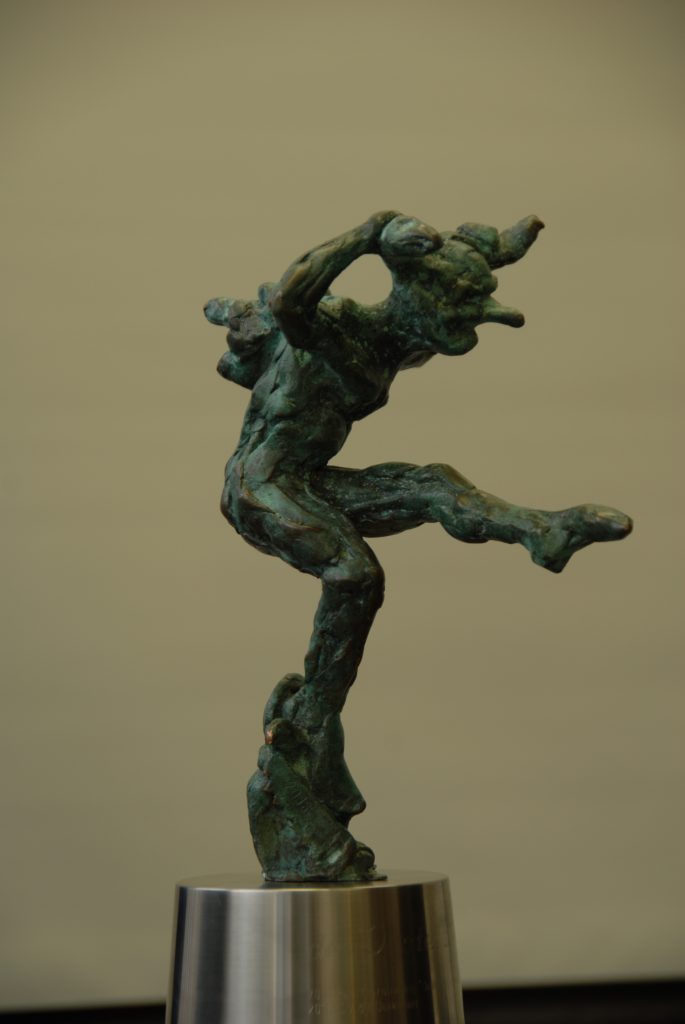
In the south of the Netherlands and neighboring regions we have the carnaval tradition. Worldwide known for the Brazilian variety, the version known to us is a different affair. It is an annual festival, celebrated widely, of Catholic origin in which people go wild and party one more time before Lent. It is a tradition chiseled into the fabric of society. It features mocking of establishment amongst other things, represented by clowns, demons and jesters.

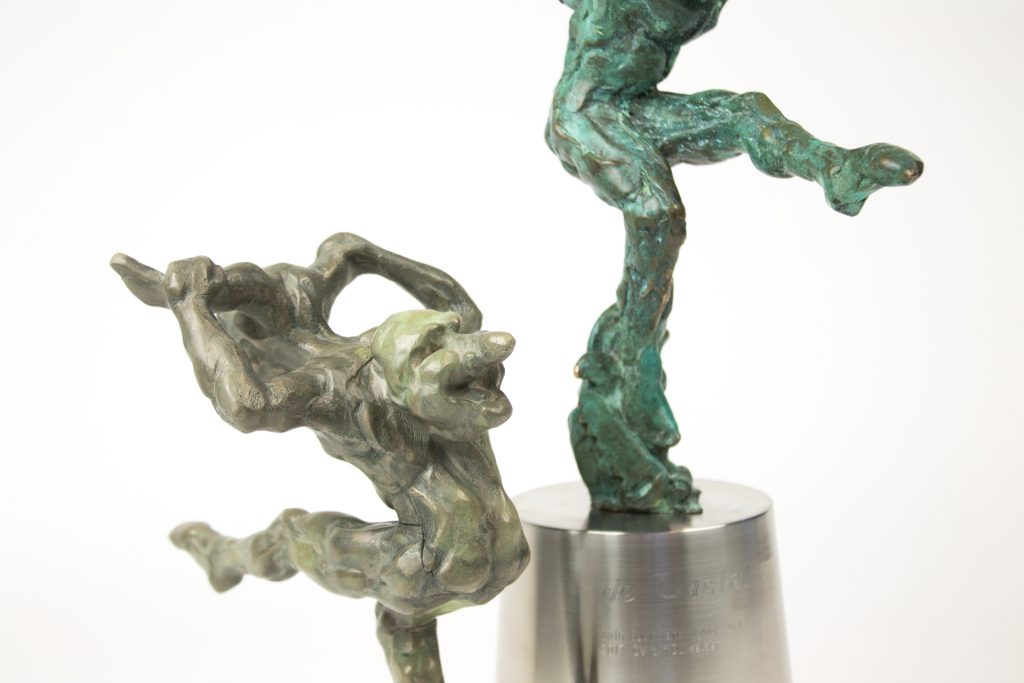
The original statue

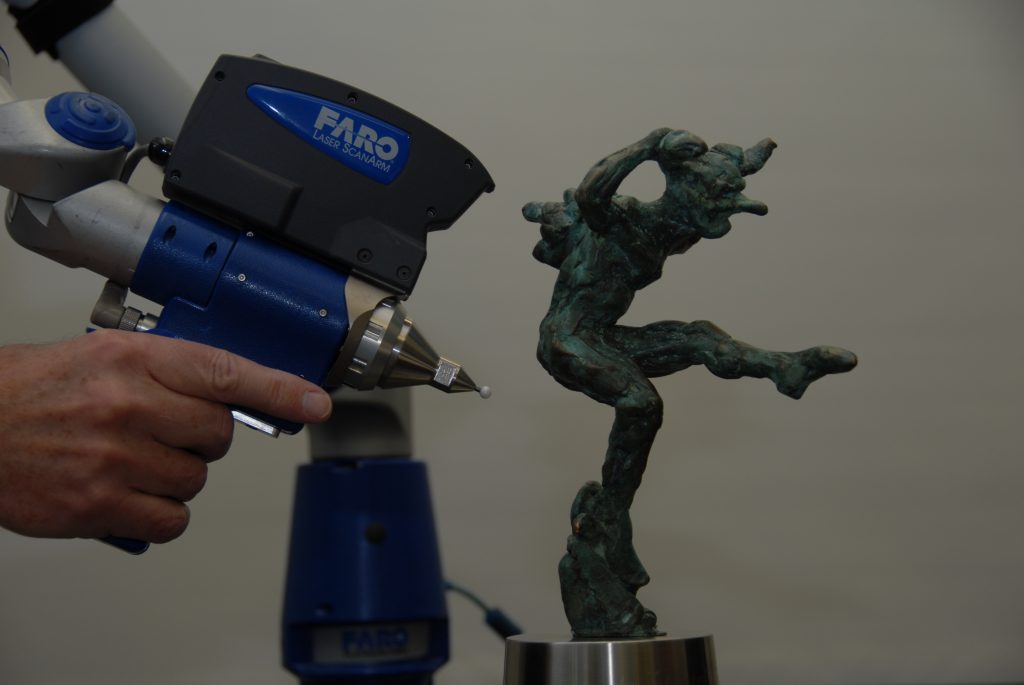
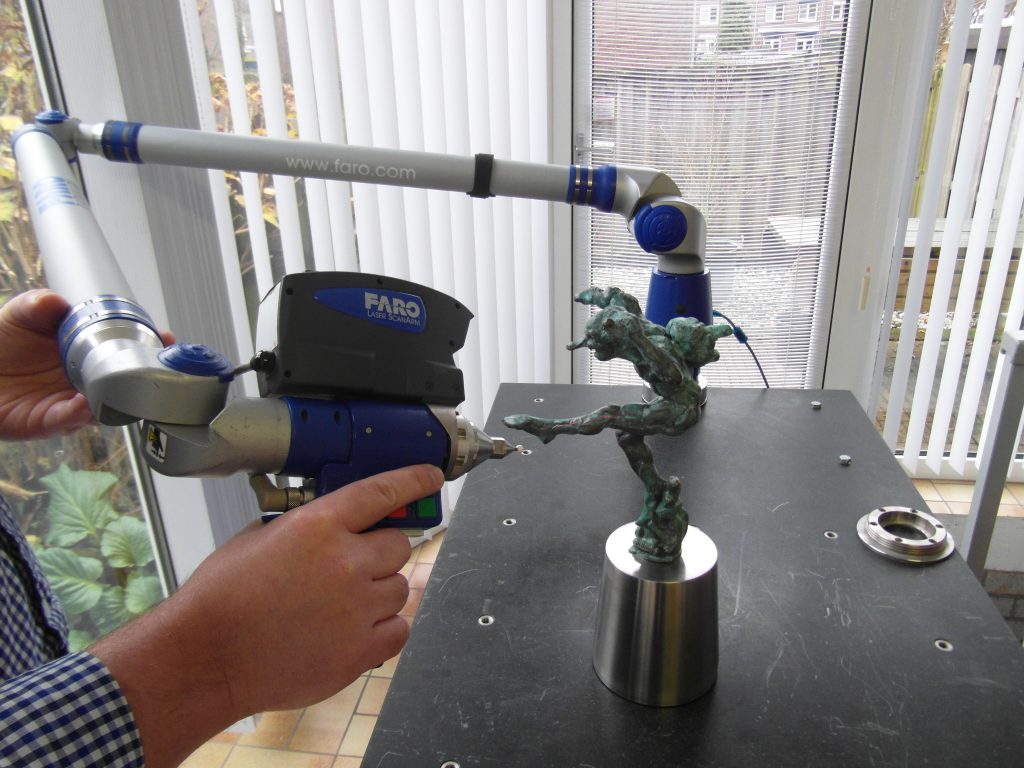
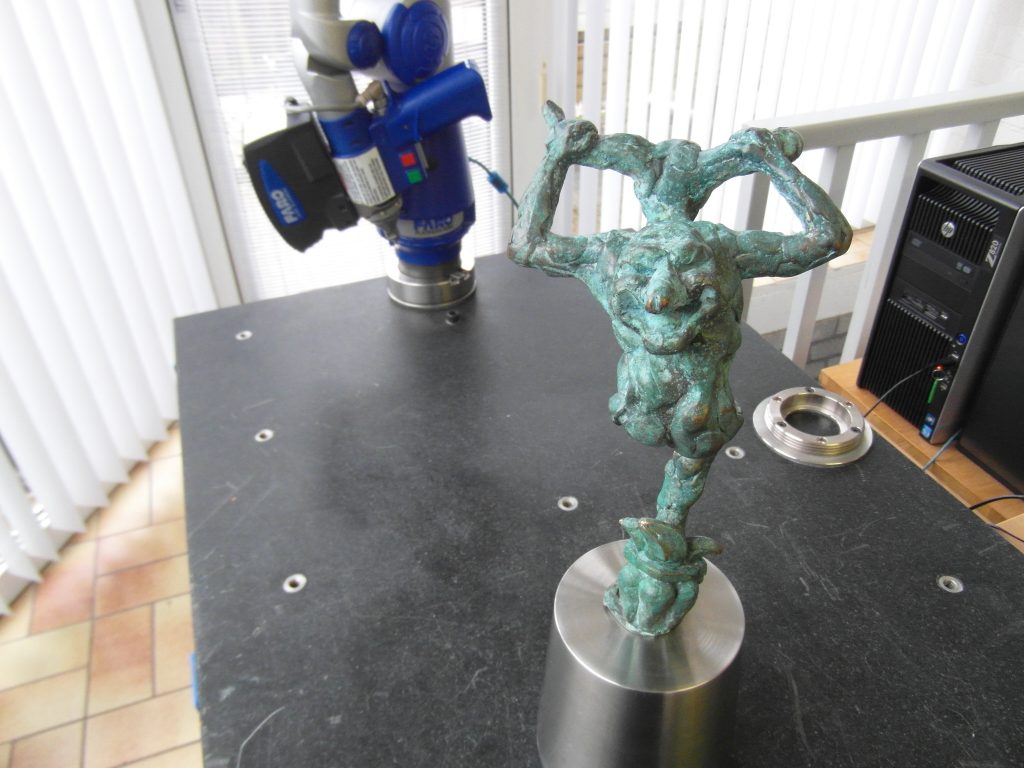
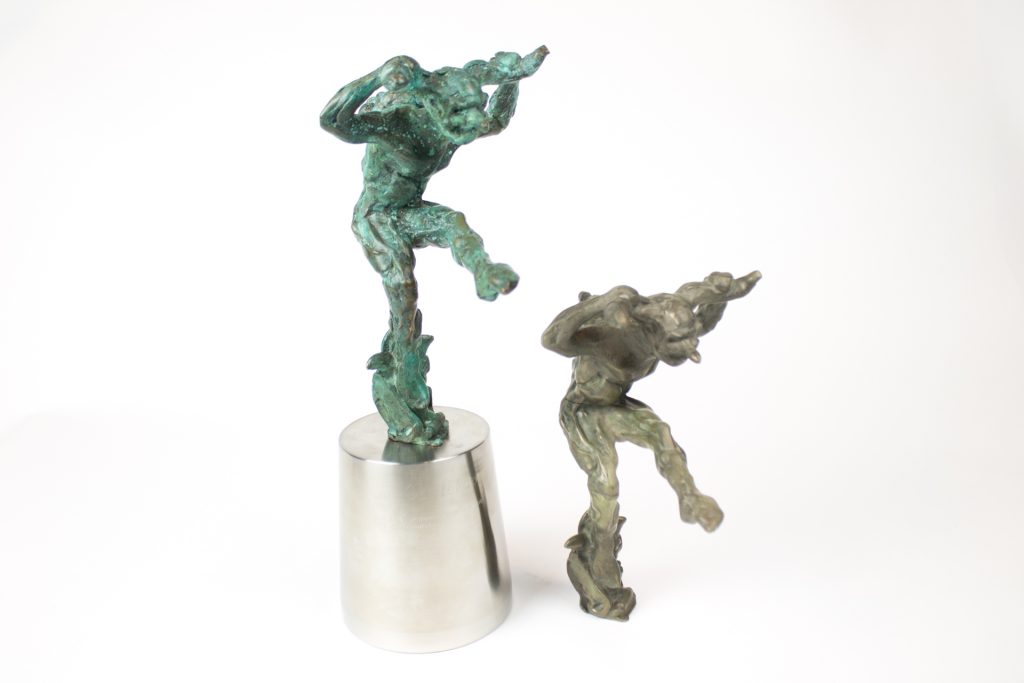
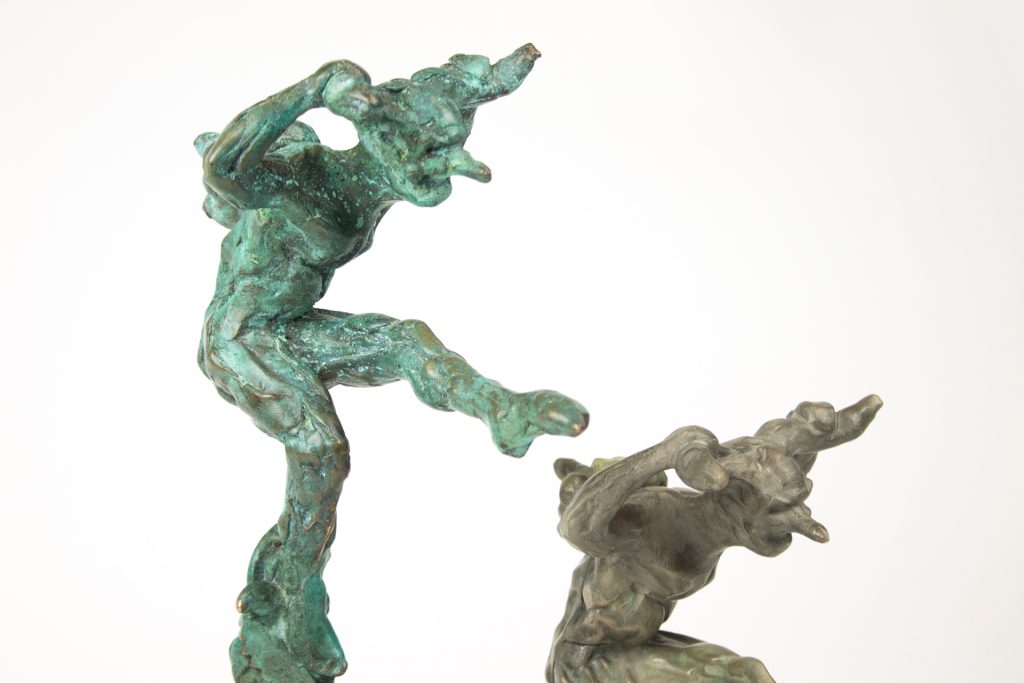
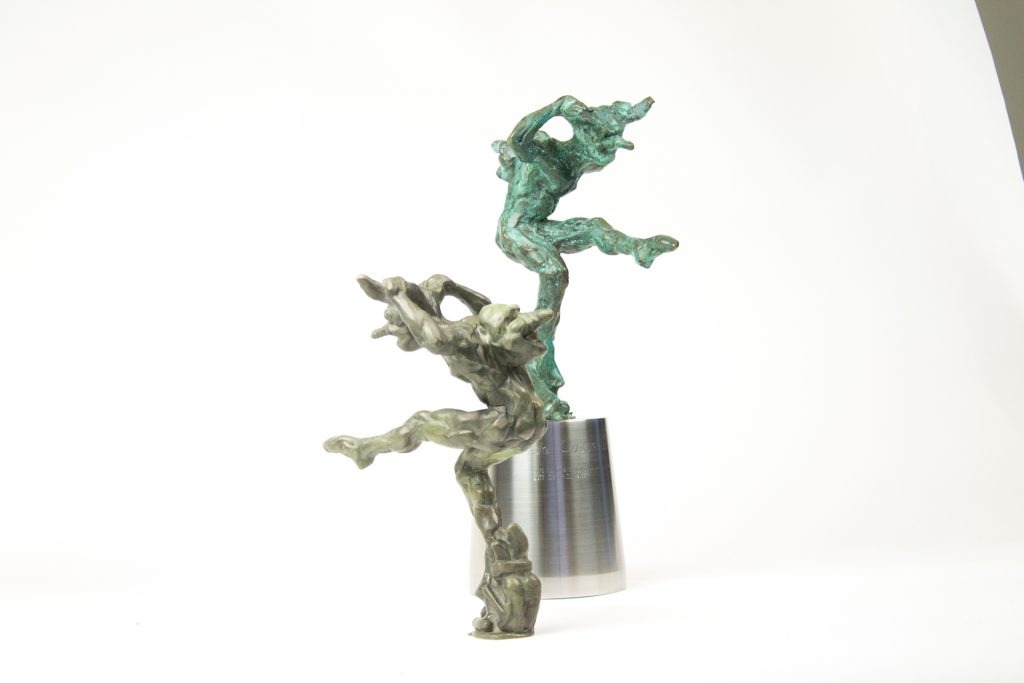
A local carnaval society needed a copy of a statue they use annually. The best way we found was to scan it, print it with bronzeFill and post-process it.

The scanning was done by local specialists at Hagenaars. This engineering company from nearby Roermond was founded in 1994 and specializes in 3D scanning solutions, amongst other things. They bought the first FARO laser scanning equipment in 2007 and this meant that 3D scanning and measuring became the main focus of this small family owned company. Their engineering background gives them an advantage over competitors since their customer base is more technical minded. You can visit their website here (Dutch only) and give some specific attention to their project page.
Scanning in progress…

With the .stl file generated we went to work and printed a copy on the Ultimaker 2+. (Before you ask, we are not allowed to share the .stl) Settings used:

Layer Height: 0.2mm
Speed: 30mm/s
Temperature: 215C
Material Flow: 106%

After that, the crucial phase of post-processing commenced.

The model was first sanded and polished. After that, we post-processed (and give it the old patina look) by using a mixture of salt, vinegar and ammonia. To achieve accelerated aging, add salt to the vinegar until the salt does not dissolve anymore and the vinegar is saturated. The Lulzbot team already did an extensive blog about this, which you can read here.

Post-processing these kind of prints require a lot of work and effort, but the results are rewarding and quite good, if we say so ourselves and the model aged quite nicely.

bronzeFill was our first truly special filament, launched over 3 years ago and still one of our most popular filaments. The added weight and unique aesthetic properties have made this an extremely popular material. Last year we published quite a bit about bronzeFill,  like the enormous Octolamp, the museum worthy Greek helmet and the stellar fountain pen.

If you want to have more information on how to print with bronzeFill, visit our handy tutorial: How to print with bronzeFill

If you are looking for more tips and advice regarding post-processing bronzeFill and our other metal filled filaments, we have a nice collection of articles collected on our site.

Interested in bronzeFill? It is readily available in our webshop as 750 grams and 1500 grams spools.

Post-processing a teapot

The special filaments are truly unique 3D printing filaments. Our first special, woodFill, was released in the fall of 2013. Not the first wood filled filament in the world, but one that made people notice colorFabb more. From there we knew that special filaments would be one of the focal points of the years to come. In May 2014 we released our first truly special filament: bronzeFill. As printed, bronzeFill already looks great: a rough and distinctive surface and of course four times heavier than a regular printed object. Now, where the metal filled filaments truly shine (yes, that is a pun and we’re proud of it) is the ability to post-process them and bring out the metal particle aspects of the filament.

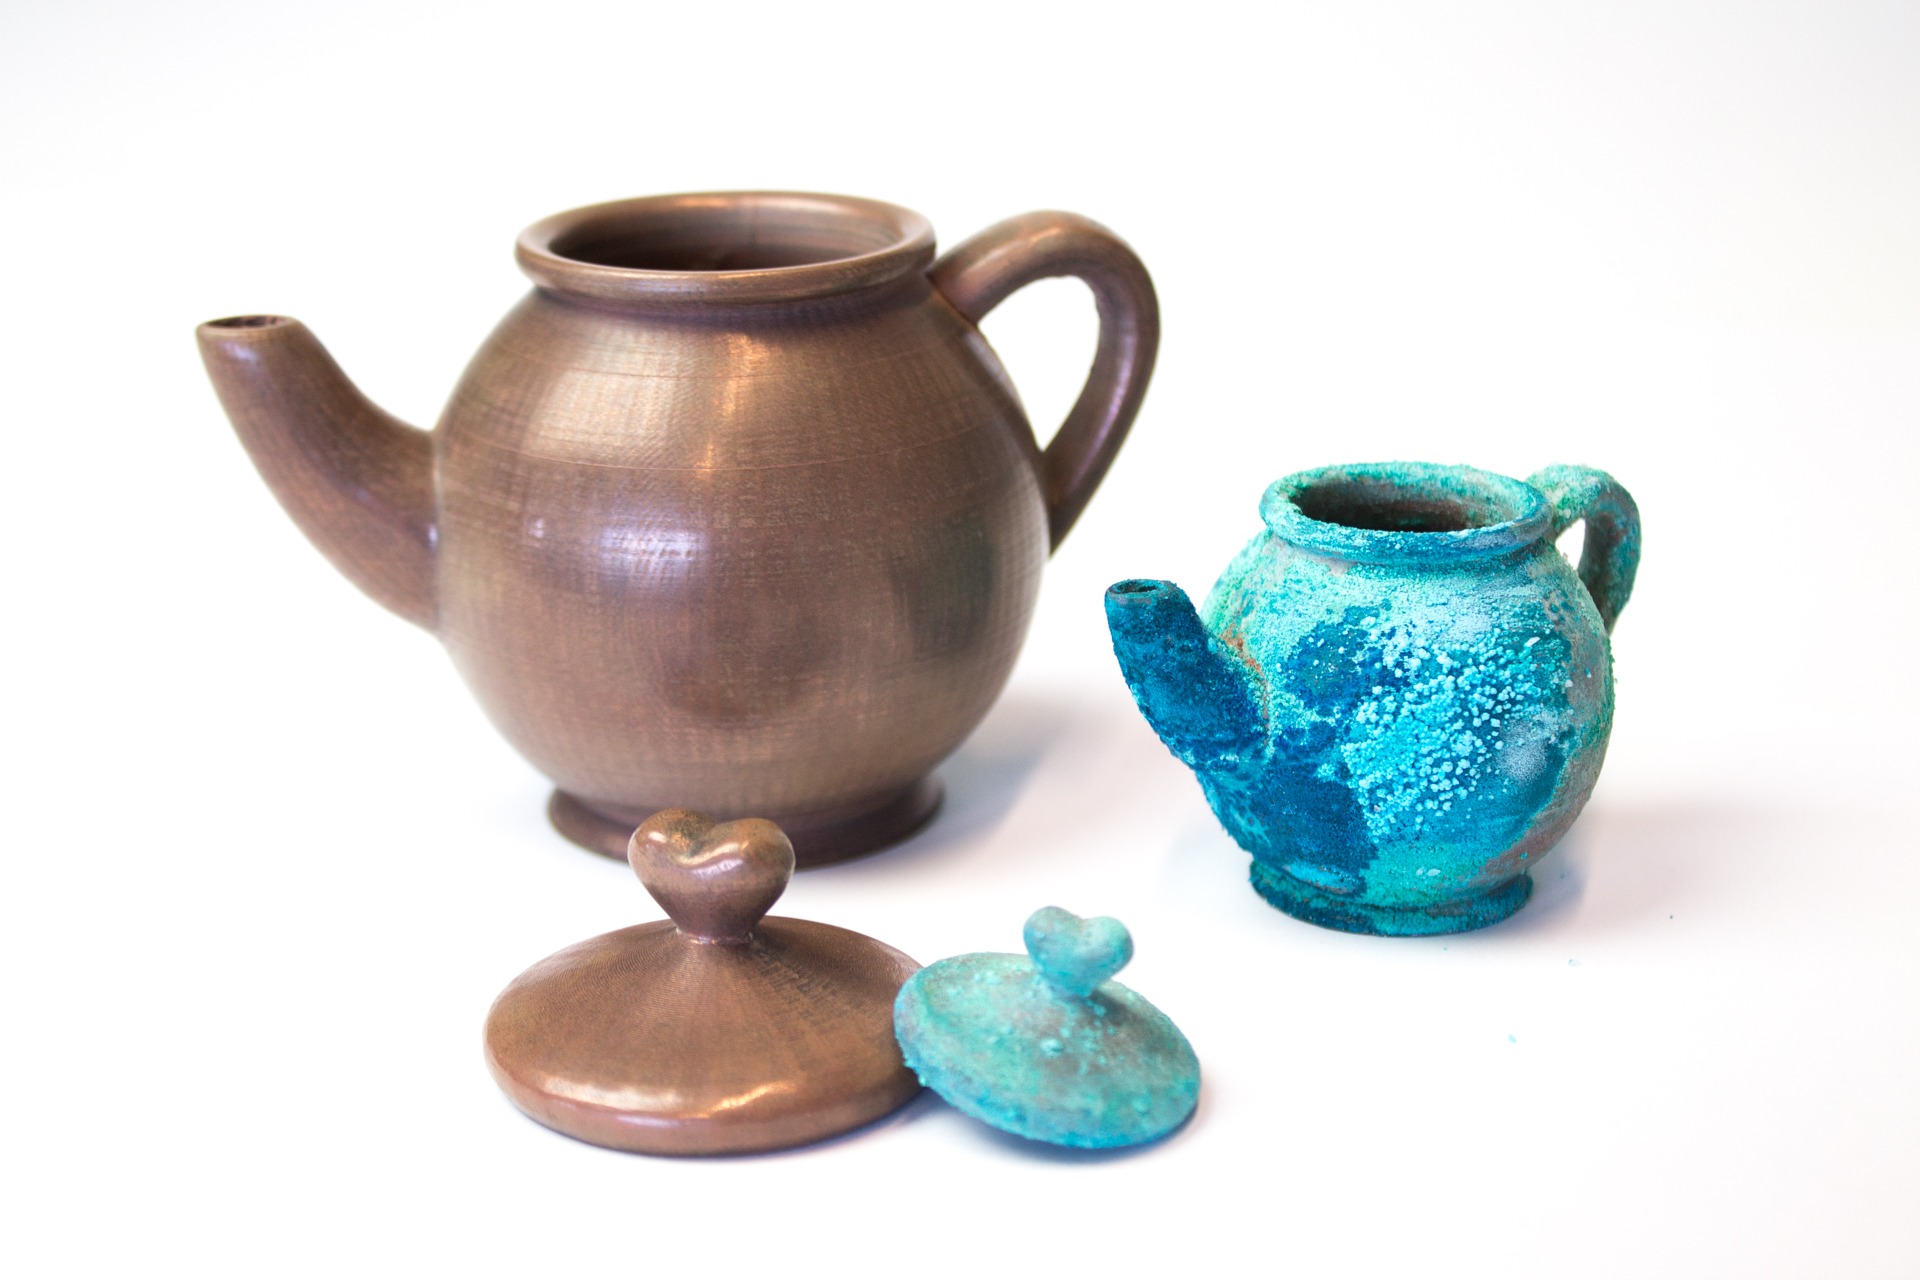
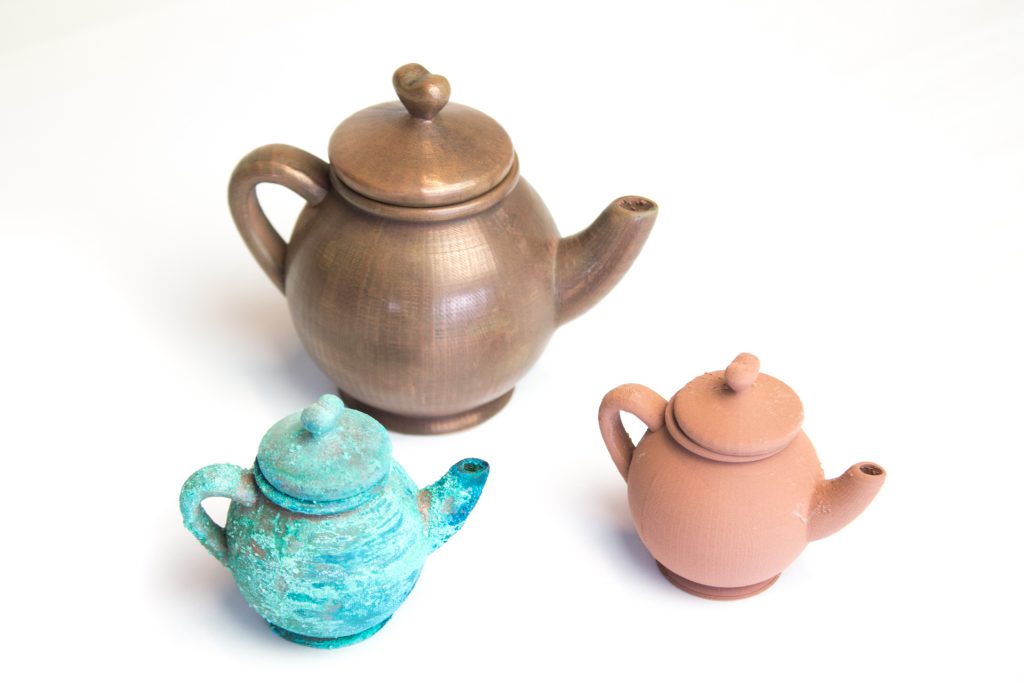
For today’s showcase we have chosen Makies Tea Pot by Makies, part of the Makies tea set. Not only is it a great model, it also fits the material from an aesthetical point of view. We used the second metal filled filament, copperFill, for these prints.

Design by Makies: https://www.thingiverse.com/thing:178668

We printed these little tea pots on the Stacker S2. Where we normally focus on big prints, functional prints or a lot of prints (small series production) on the Stacker printers, the special filaments also work very well on the industrial grade line of printers.

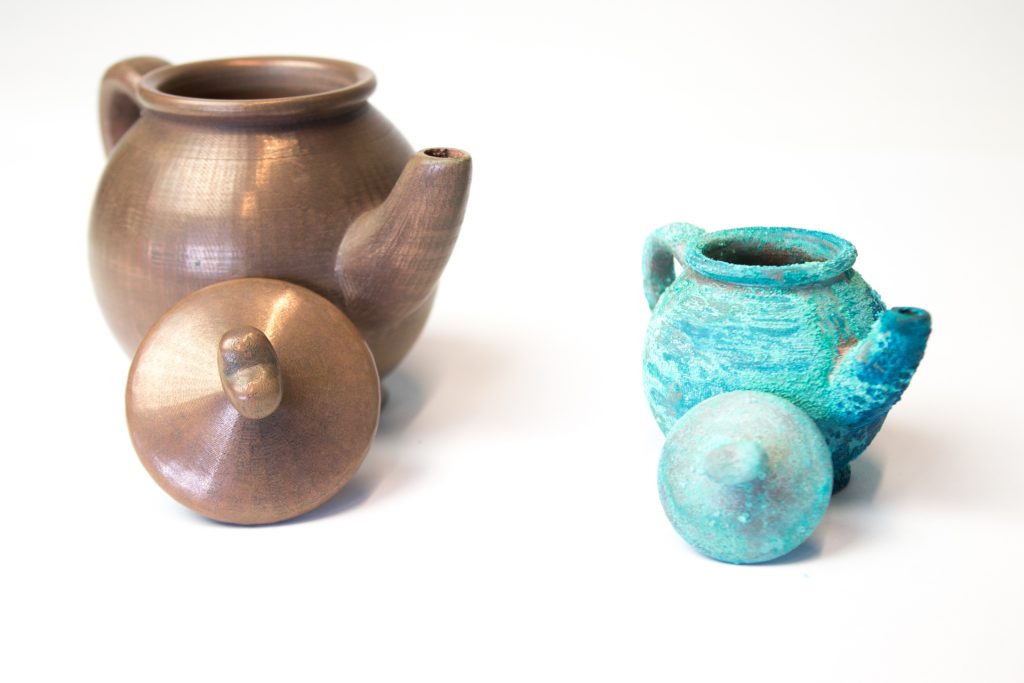
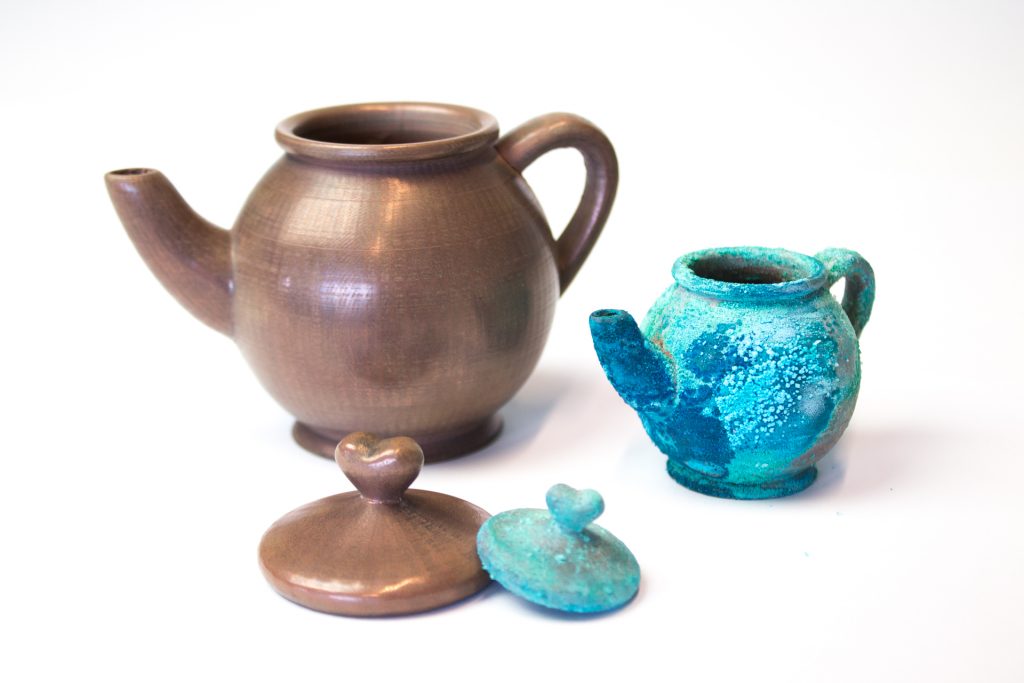
We used two ways of post-processing. One tea pot was manually polished. We did this the same way we did the gCreate Rocket Ship a long time ago (read the original post here). Manual polishing takes a long time, but it gives such a beautiful result it is well worth that time. Most people do not even believe such a print is even a print and reckon it was store bought!

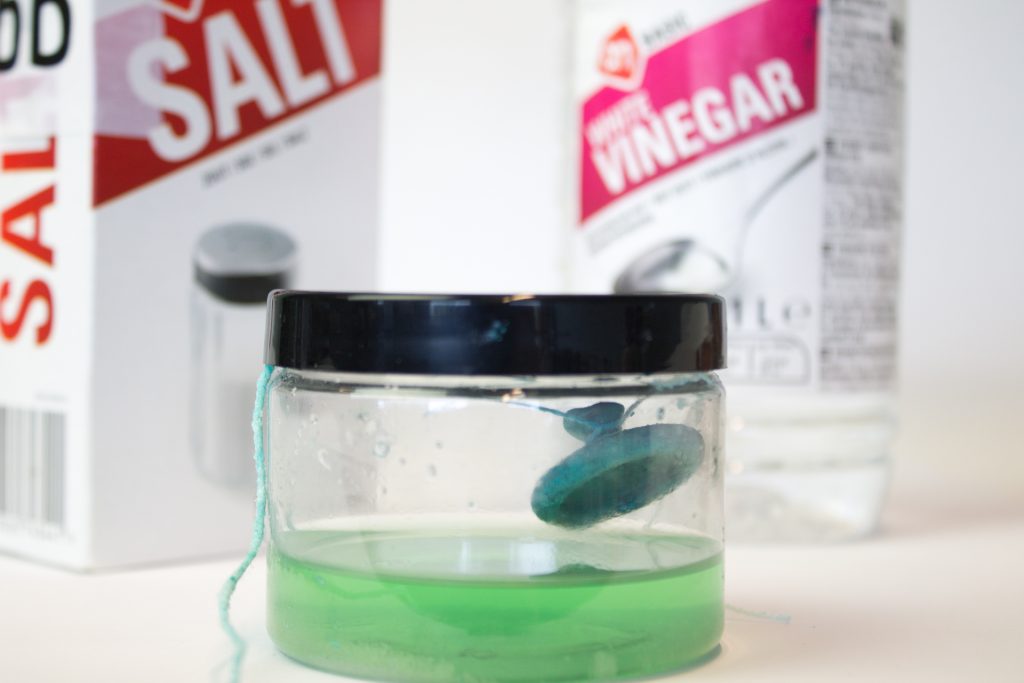
Another way we post-processed (and give it the old patina look) was by using salt and vinegar. To achieve accelerated aging, add salt to the vinegar until the salt does not dissolve anymore and the vinegar is saturated. The Lulzbot team already did an extensive blog about this, which you can read here.

copperFill was launched in the fall of 2014 and it was our second metal filled filament, after bronzeFill. The red shine that comes from the copper after post-processing has made it a fan favorite ever since. As with our other metal filled filaments, the aesthetics and weight are the key factors for choosing this filament and these characteristics make it a perfect filament for fidget spinners, for instance.

There are several five star reviews for copperFill on our website:

Learn more on how to print with copperFill with our handy tutorial. You can learn more about post-processing our metal filled filaments by visiting our blog or FAQ page on this topic. We will post more blogs with tips & tricks in the time to come about post-processing our special filaments.


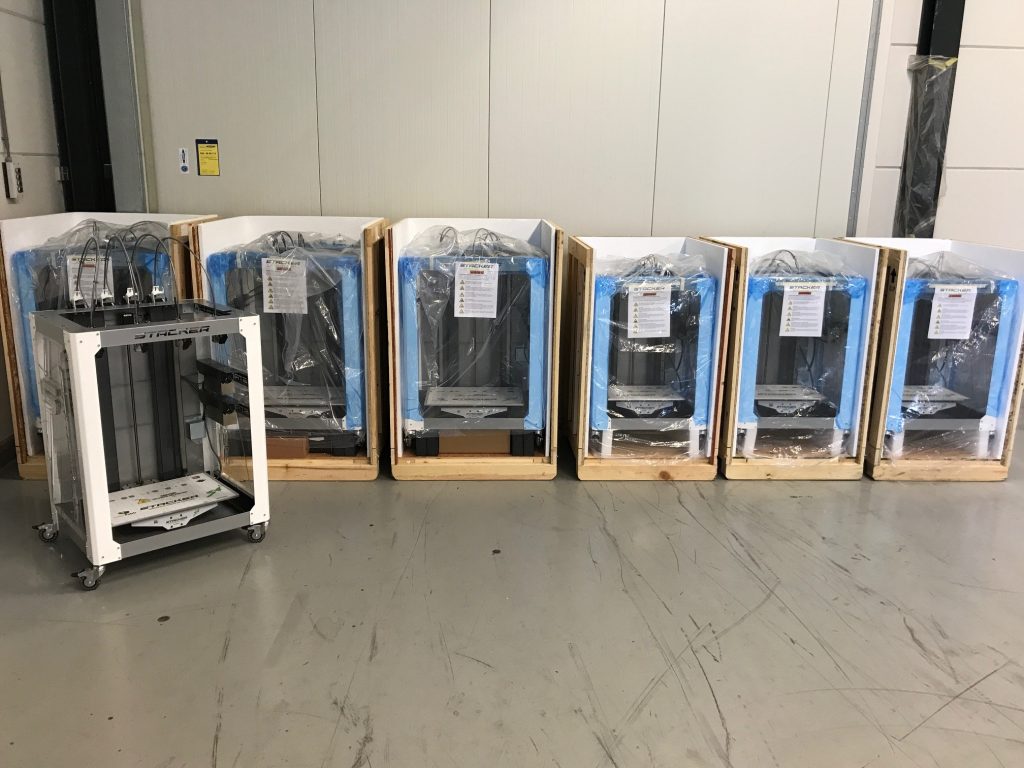
These prints were made on the brand new Stacker S2.

For Stacker the term “industrial grade” is not a hollow marketing term. It means their printers are designed for extra long service life, extremely low maintenance and that the printer will maintain its positional accuracy throughout its life cycle. This printer has been designed to be used in a professional environment, be it for large prototypes or small series production.

As many of you know, we are the distributor of Stacker 3D printers in Europe. We have been working with Stacker ever since their first prototype and now have several in our print lab. In the past 4 years we have seen 3D printing emerging from a hobby market to more professional uses. A lot of our users are using 3D printing to make a living or at least support their business in one way or another (as detailed here)
Both the Stacker S2 and Stacker S4 ship from stock right now!

What makes this printer so different from the rest? First of all, it is based on the technology that has made the Stacker S4 such a success.

You can also expect the following:

  • Copy mode for printing two objects at once for 2X print speeds
  • Dual print heads can be offset to prevent the idle head from dripping on the print when not in use to achieve super clean dual material prints
  • Large build volume: 395mm (X) axis, 325mm (Y) axis, 525mm (Z) Axis
  • Built-in mobile base, essential for EDU and work groups
  • Superior print quality
  • STACKER designed and manufactured hot ends and filament drives produce a superior finish, and work with all filaments, including flexible and metal filled
  • Uses 1.75mm filament for high-speed printing.
  • Quick change nozzles in a range of sizes from .4mm to 1mm
  • Comes with a license of Simplify3D slicing software
  • Includes a sheet of BuildTak print bed surface but will accept glass

You can find more information on the dedicated Stacker page or contact us directly to get a quote at sales@colorfabb.com

Octolamp

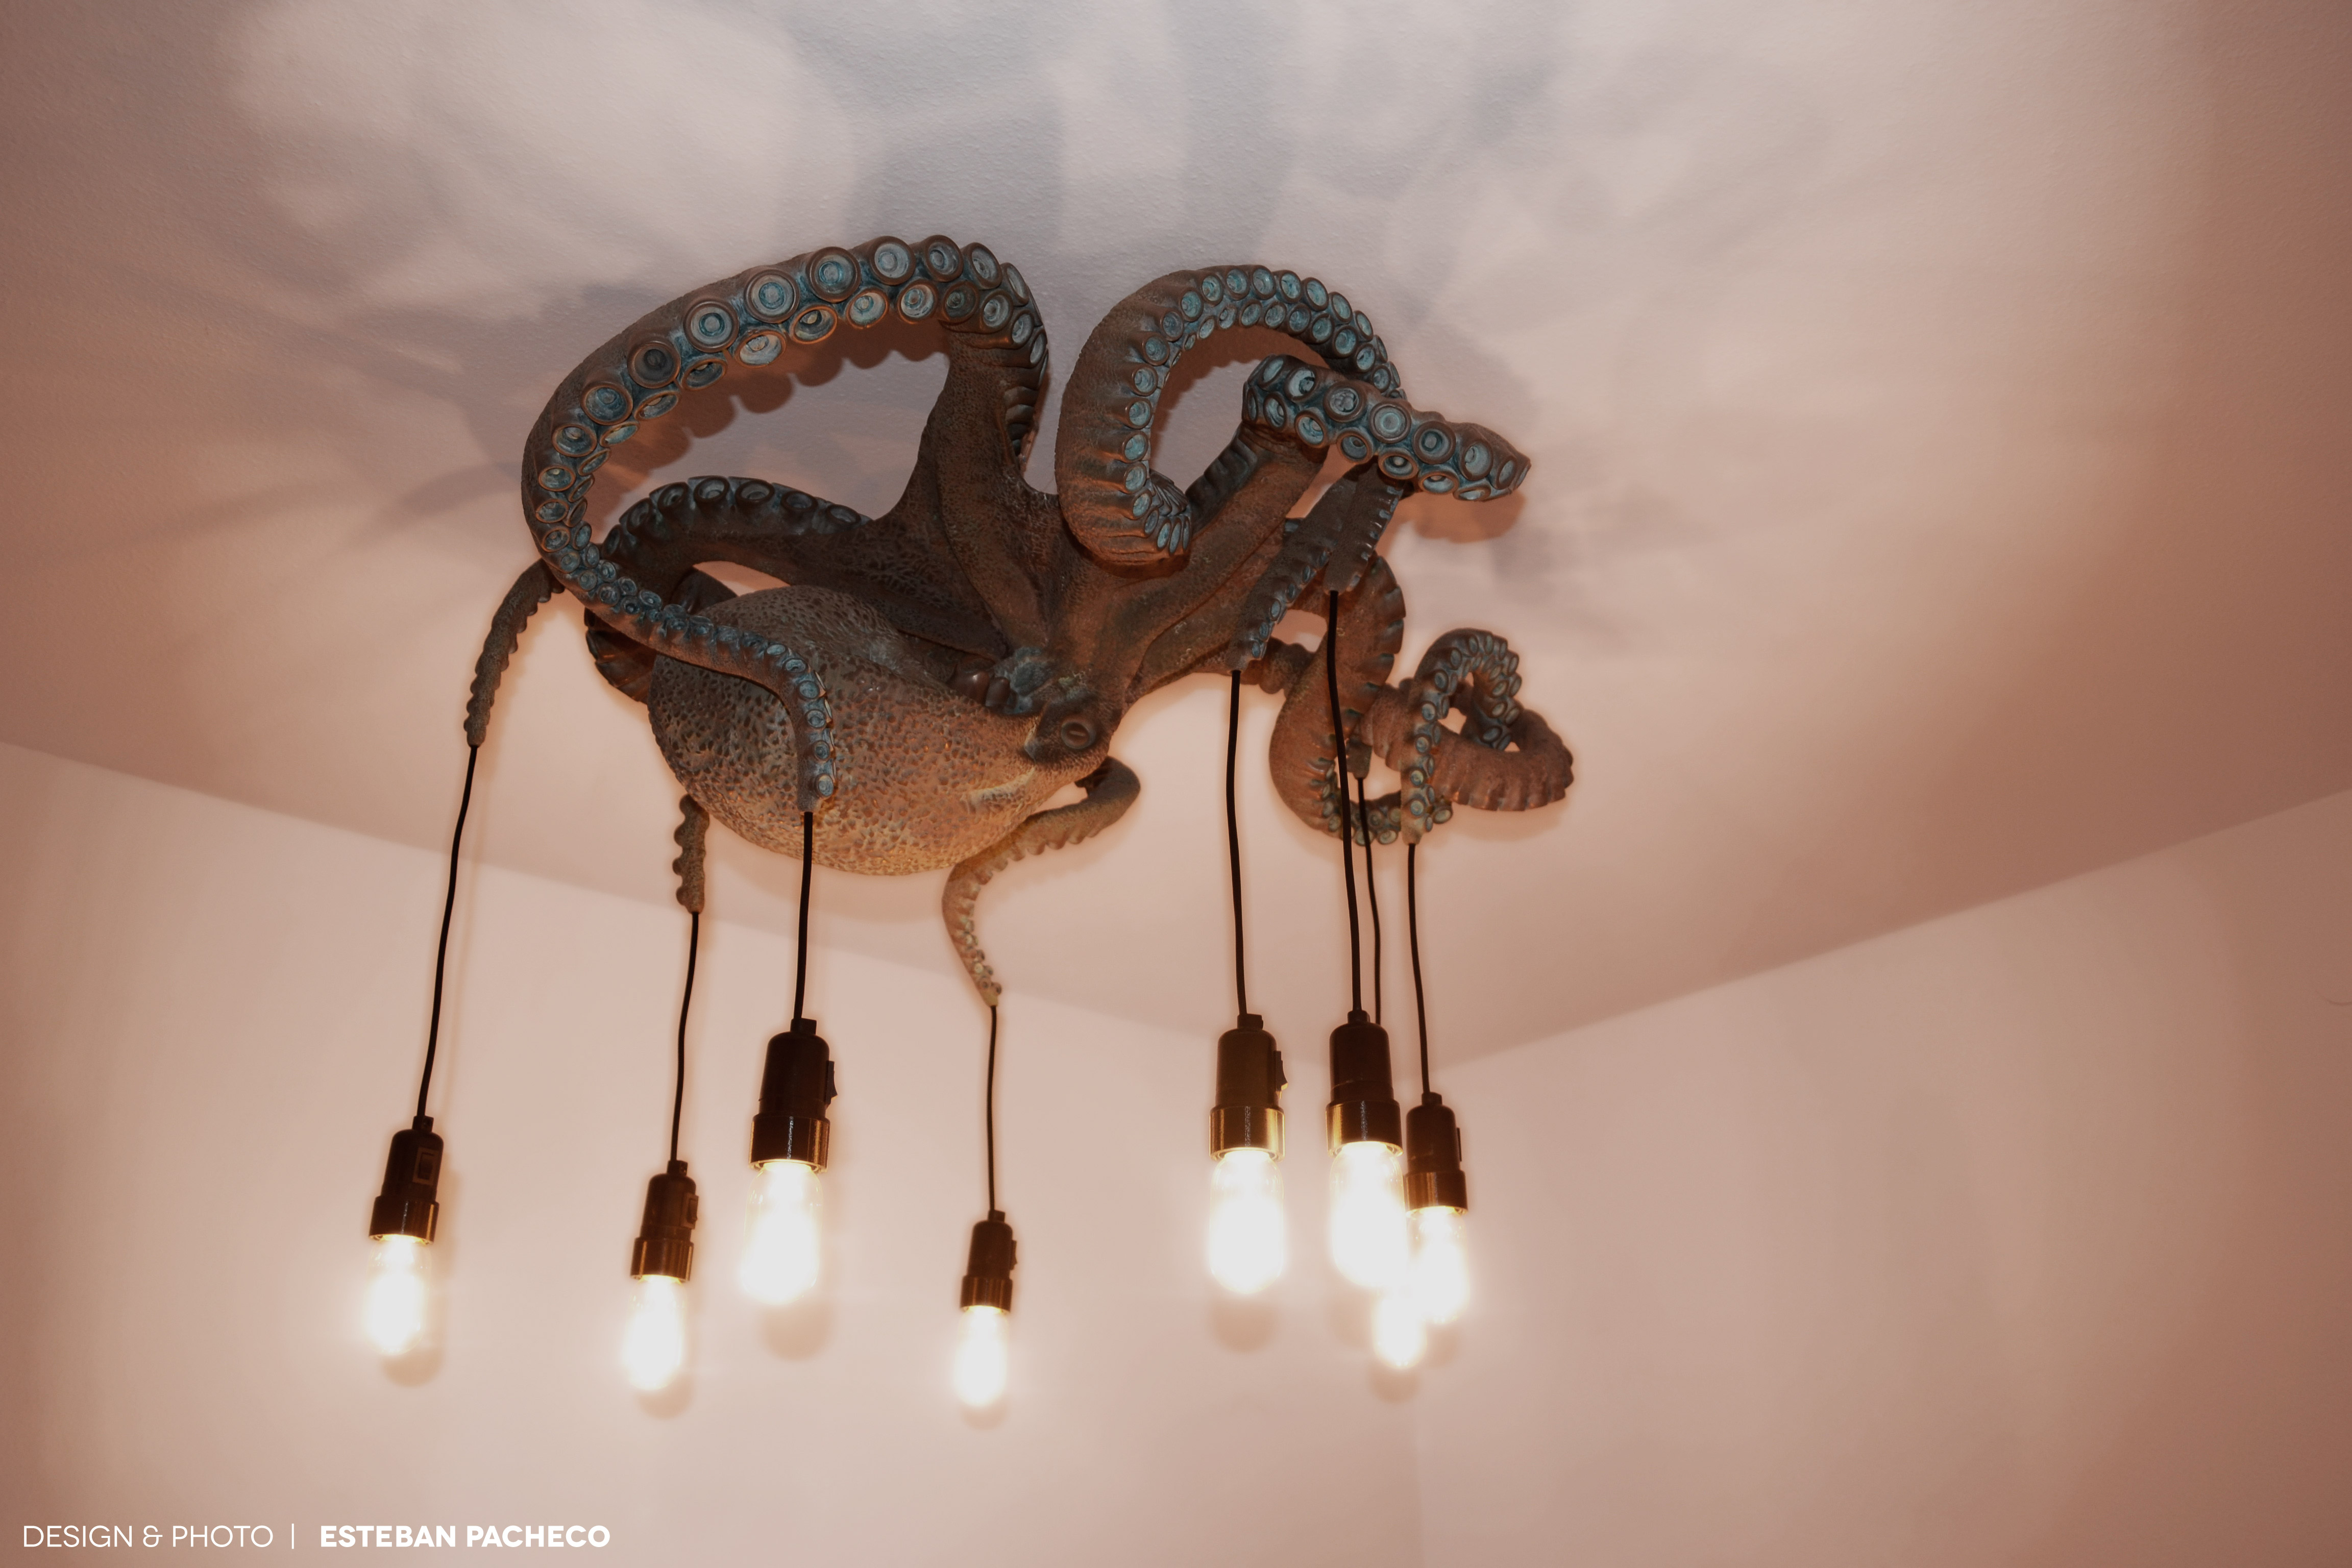
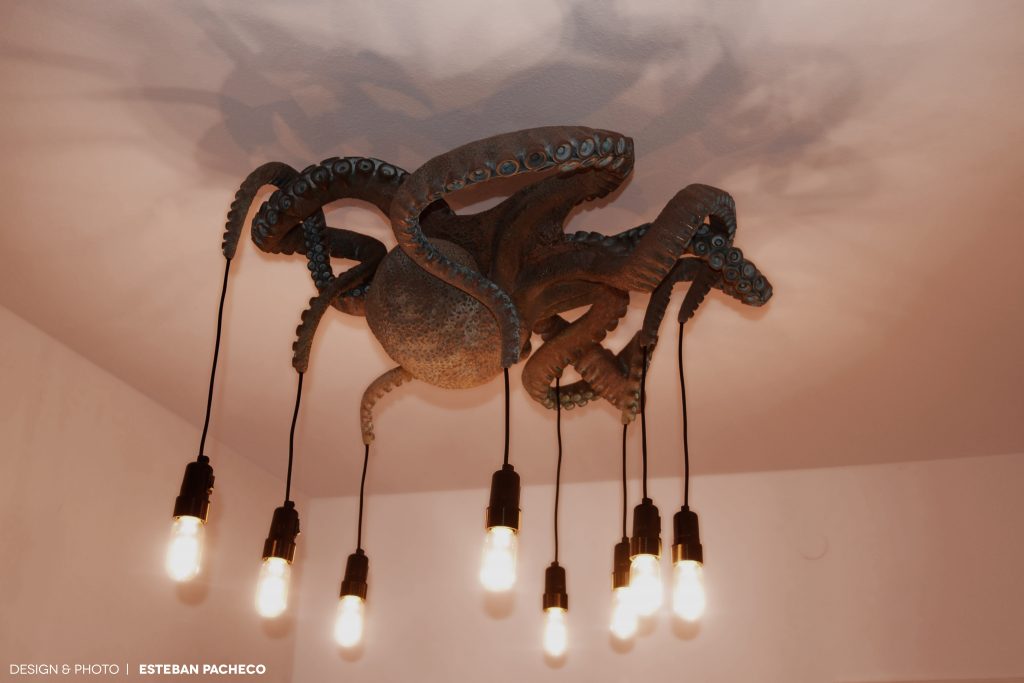
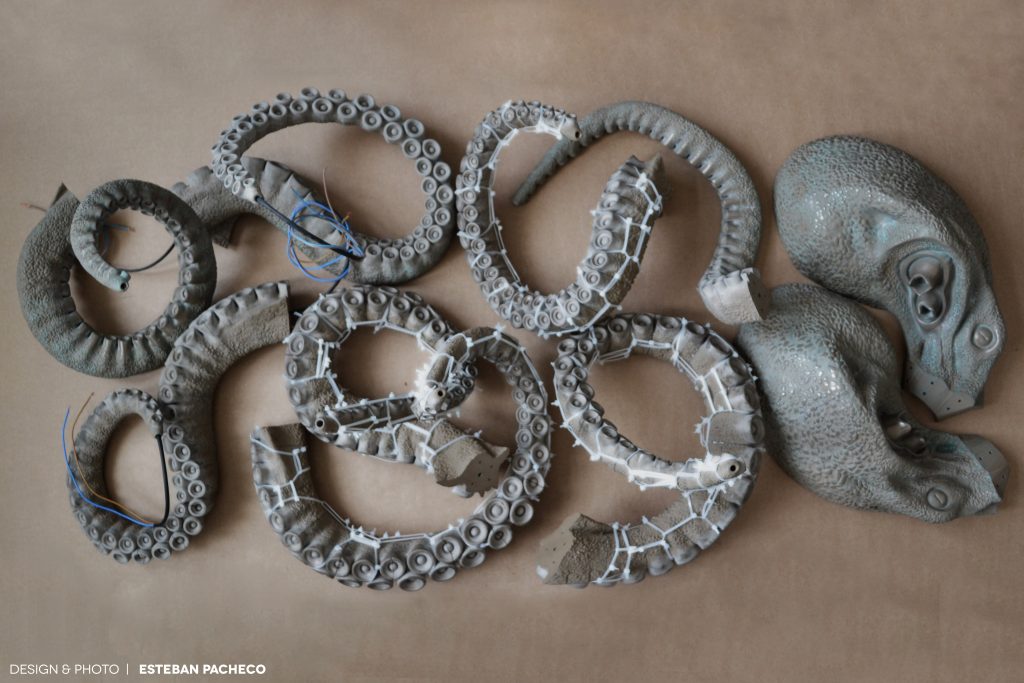
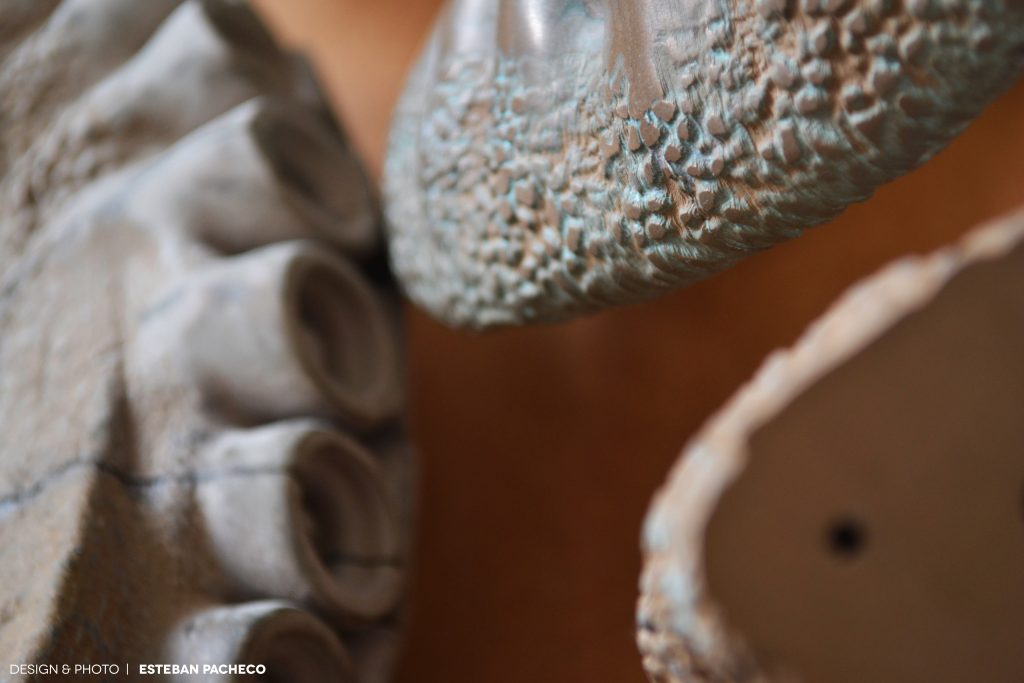
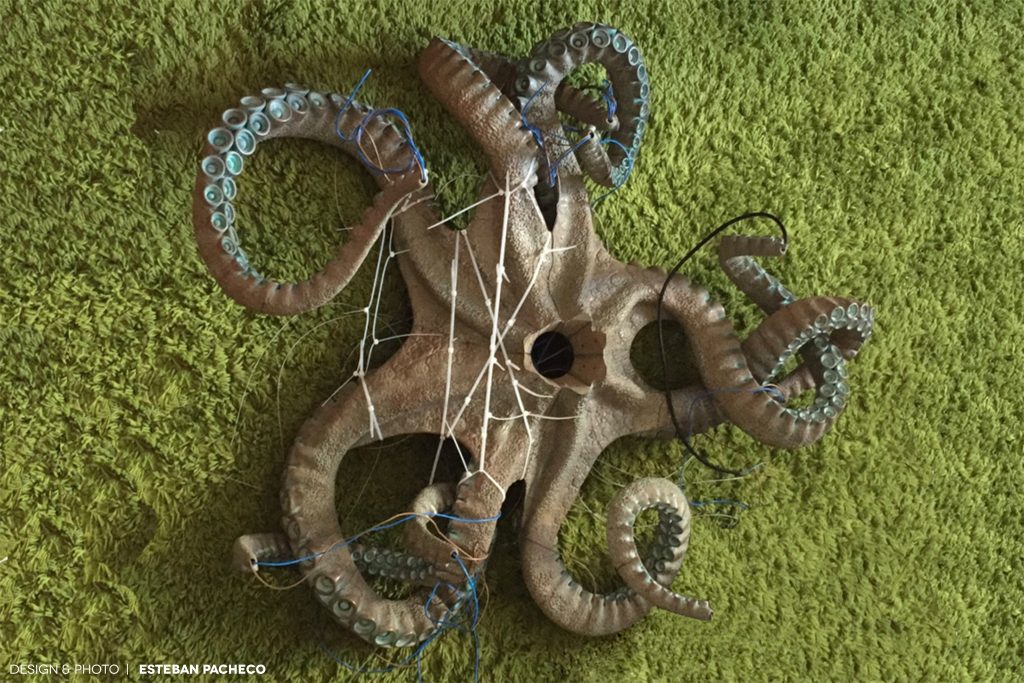
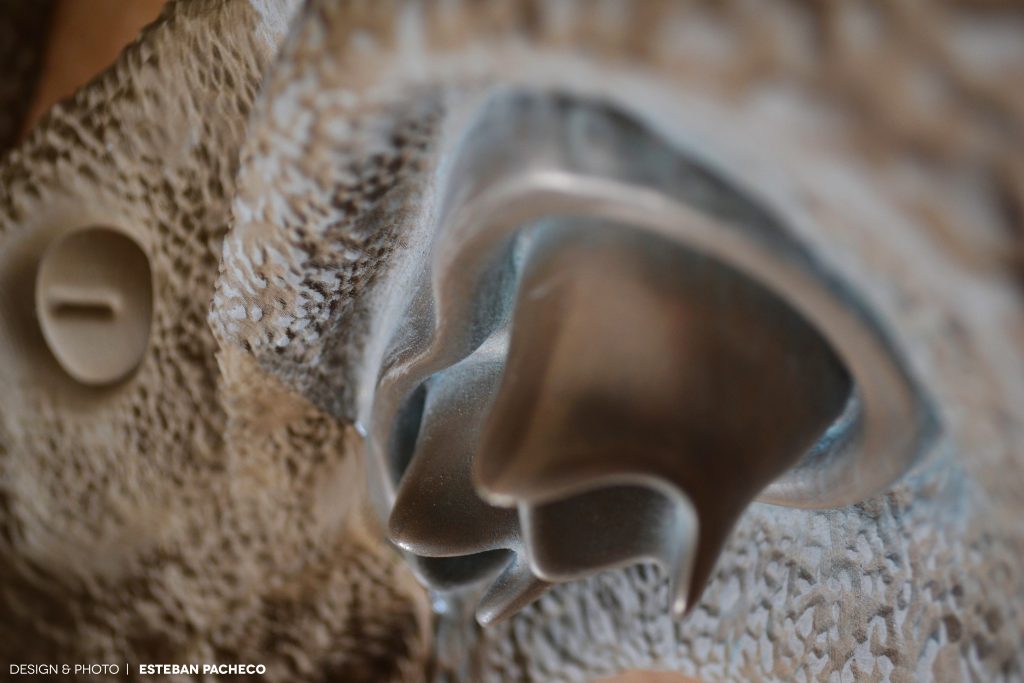
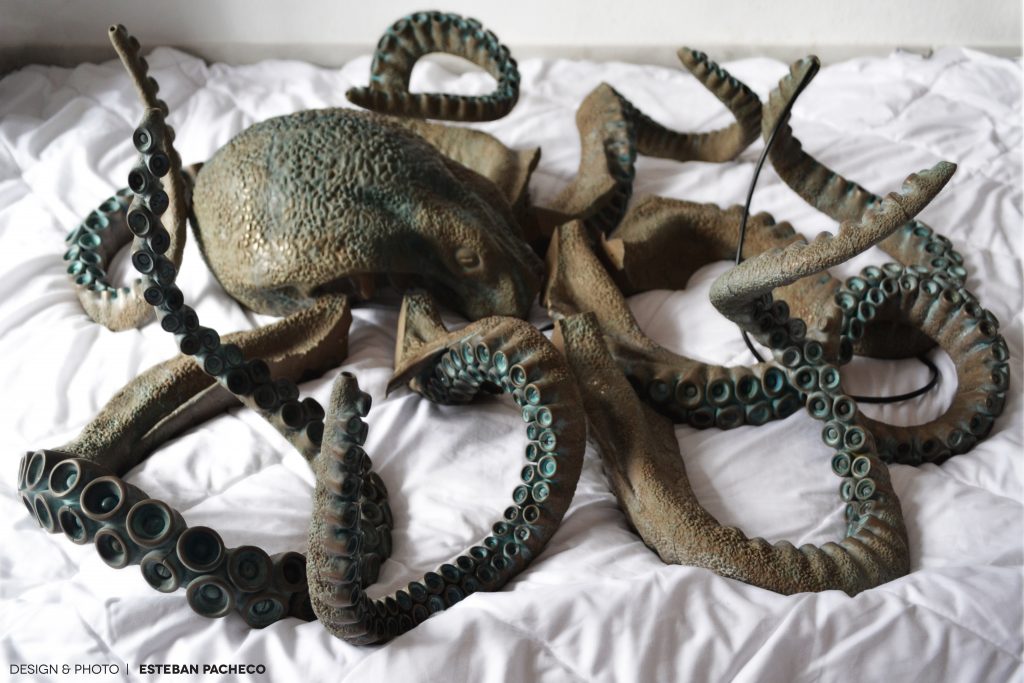
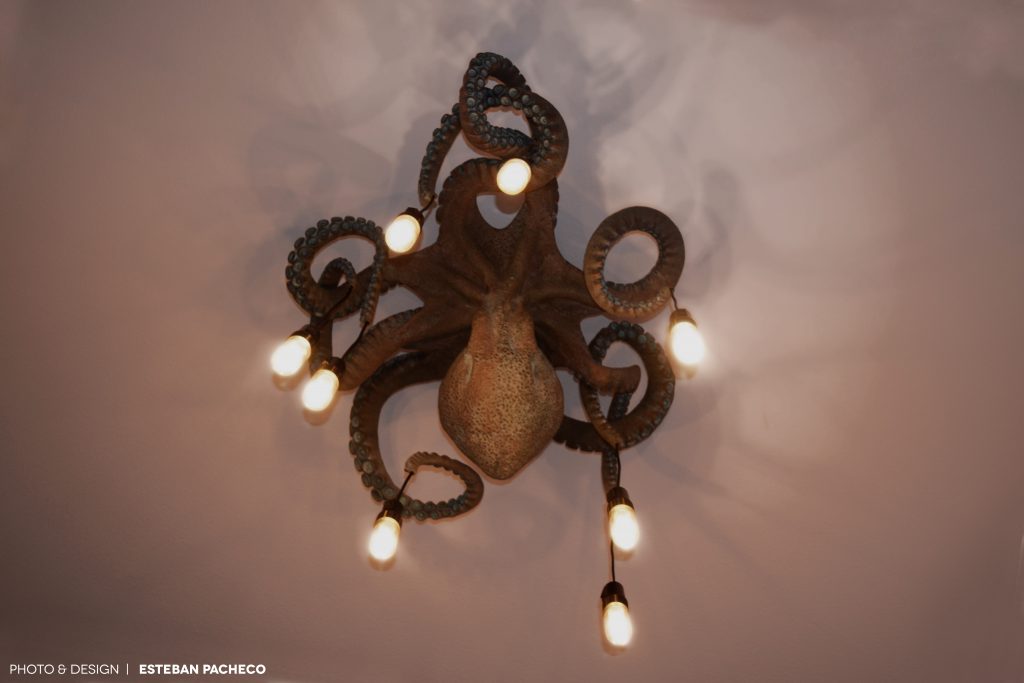
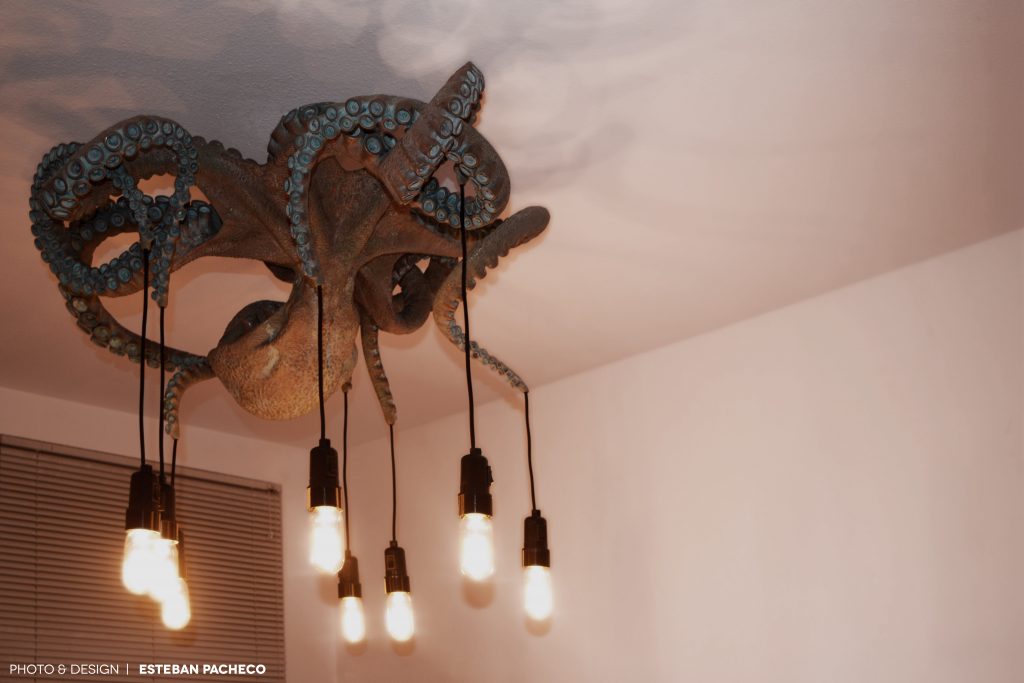
At colorFabb we know a lot of cool things are made with our filaments. We see a lot of them on social media and what our users share with us via email. We love seeing how the materials we make are being used to make useful, functional and beautiful prints. But every now and again we come across a project that is just plain awesome, like a huge, entirely printed bronzeFill octopus – now known as the Octolamp!

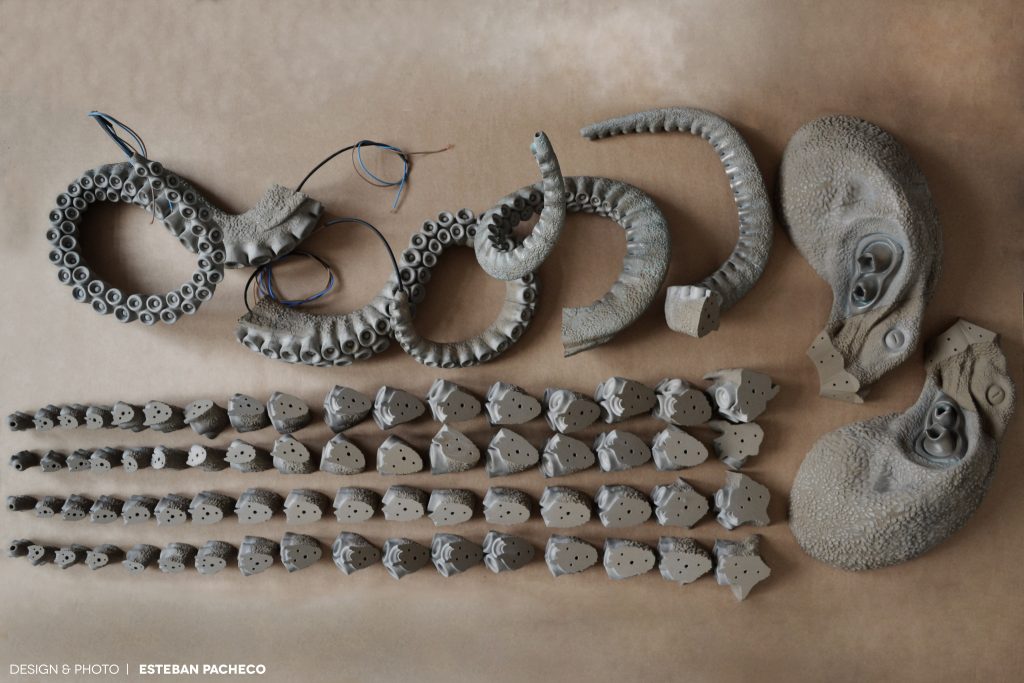
Esteban Pacheco contacted us last winter and told us about the project he was working on. In his initial email he wrote: “It’s a huge figure of an octopus (around 1m x 1m x 0.4 m) that I’m producing to work as a Roof lamp – the head is pointing down, so it looks like the octopus is attached to the ceiling by the tentacles. There’s a total of 156 pieces. I’m finishig to print all the pieces, and im polishing them.”

By the description alone we knew it was a huge project and undertaking. Last week we received the pictures made by Esteban and we were blown away. We asked Esteban to tell us more about himself and the Octolamp project:

“My name is Esteban Pacheco born in Panamá. I am an Architect working and living in Germany since 2008. I got my Master’s Degree in Architecture in Germany. I’m fascinated about digital technologies and fabrication processes in Architecture, 3D parametric form finding methods, and non-conventional geometries.”
About his motivation he says:  “The reason for this project was to test my modelling and printing skills. Since a new ceiling lamp for my studio was needed and I personally consider the class “cephalopoda“ really astonishing due to its characteristics, I decided to mix both ideas to create something called  “Octolamp”.”

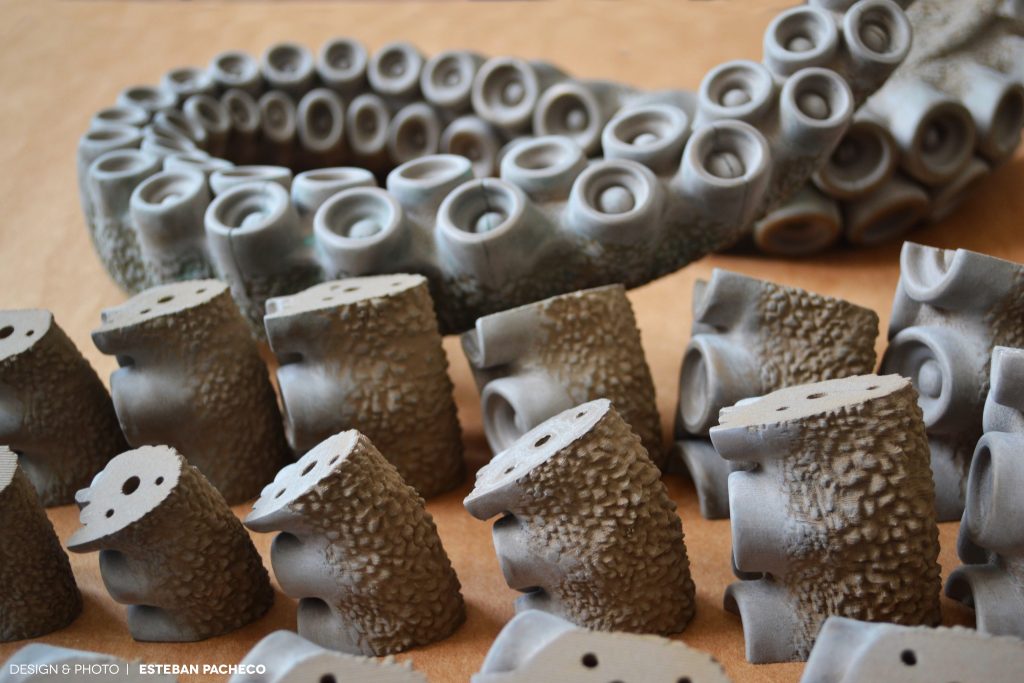
The Octolamp 3D model took around 13 months to complete. Because of its geometric complexity, the 4 million polygons and around 4 GB File was sliced in 156 unique parts to make it printable. Each one of the parts was checked to find errors like: invalid mesh faces, non-manifold mesh faces and naked edges among others. This task took one month to complete.

Of course he needed a reliable printer and through his 3D Hub he already had extensive experience with the Ultimaker 2+. Esteban explains:  “An Ultimaker 2+ was used due to its reliability and nozzle diameter flexibility. This allowed me to print with several different layer heights and outline thickness, depending in the grade of detail needed.”

The software used for generate the toolpaths was Cura 2.4, but for a few specific parts Simplify 3d was used. Esteban used the following printing parameters:

Print speed: 40 mm/s

Temperature: 230 C°

Material Flow: 108%

Support: 25 % [Grid pattern]

Infill: 30 % for arms / 20 % for head

Retraction length: 4.5 mm

Retraction speed: 45 mm/s

Esteban is a fan of colorFabb filaments and bronzeFill in particular, especially since this special filament fits this project perfectly.

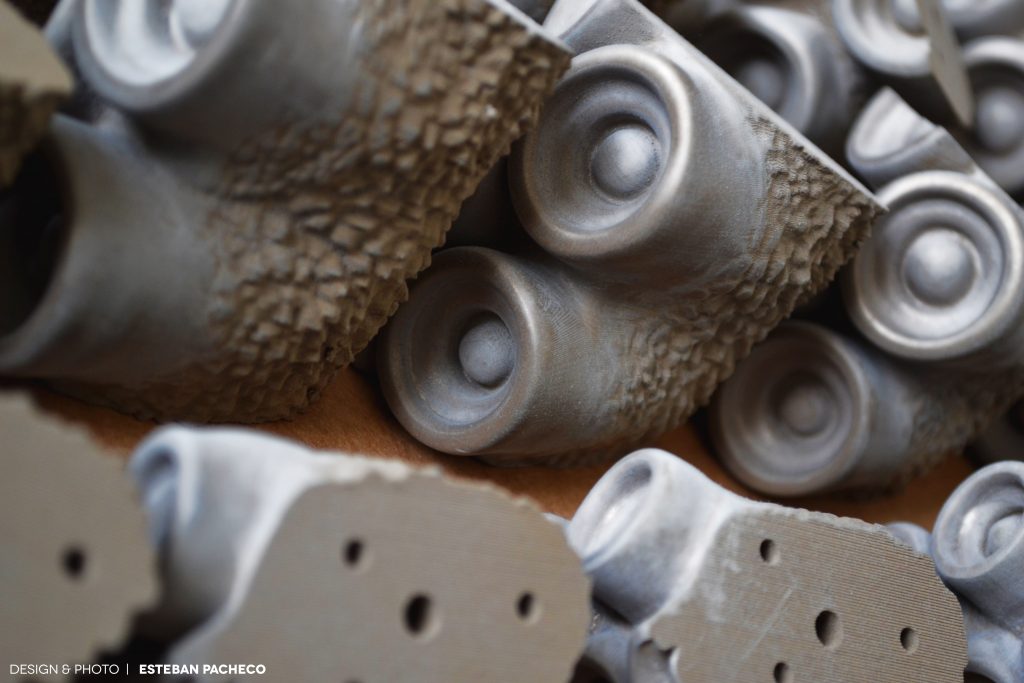
“ColorFabb’s bronzeFill was selected because it can be post – processed to achieve a noble finish, in contrast with normal PLA. This material can be polish to a high glossy level and also is able to oxidize to acquire an antique – eerie greenish – looking overlay. This feature fits totally with the concept of an octopus. It just adds “Character” to the end result, like a piece recovered from an old sunken ship. For this specific project a total of 18 spools of material were needed, in other words, around 27 Kg of filament. That amount includes support material and print failures. And the end the lamp total weight is 23 kg.”

bronzeFill was our first truly special filament, launched 3 years ago and still one of our most popular filaments. The added weight and unique aesthetic properties have made this an extremely popular material. Seeing a project like the Octolamp materialize with this filament is fantastic!

If you want to have more information on how to print with bronzeFill, visit our handy tutorial: How to print with bronzeFill

Of course the trick with our metal filled filaments is the post-processing, which was a huge undertaking on its own. It took 4 months and included 3 different stages:

  1. Sanding stage: using 240, 400 and 1000 grit metal sandpaper.
  2. Polishing stage: several polishing creams were tested.
  3. Oxidation stage: for this a mixture of Vinegar and Salt applied directly to the model using a tiny brush was used to accelerate the oxidation process, in some areas.

The results are downright stunning and please keep in mind post-processing was done on all 156 pieces that were printed!! This is a dedication to the project that is rarely seen at this scale.

If you are looking for more tips and advice regarding post-processing bronzeFill and our other metal filled filaments, we have a nice collection of articles collected on our site.

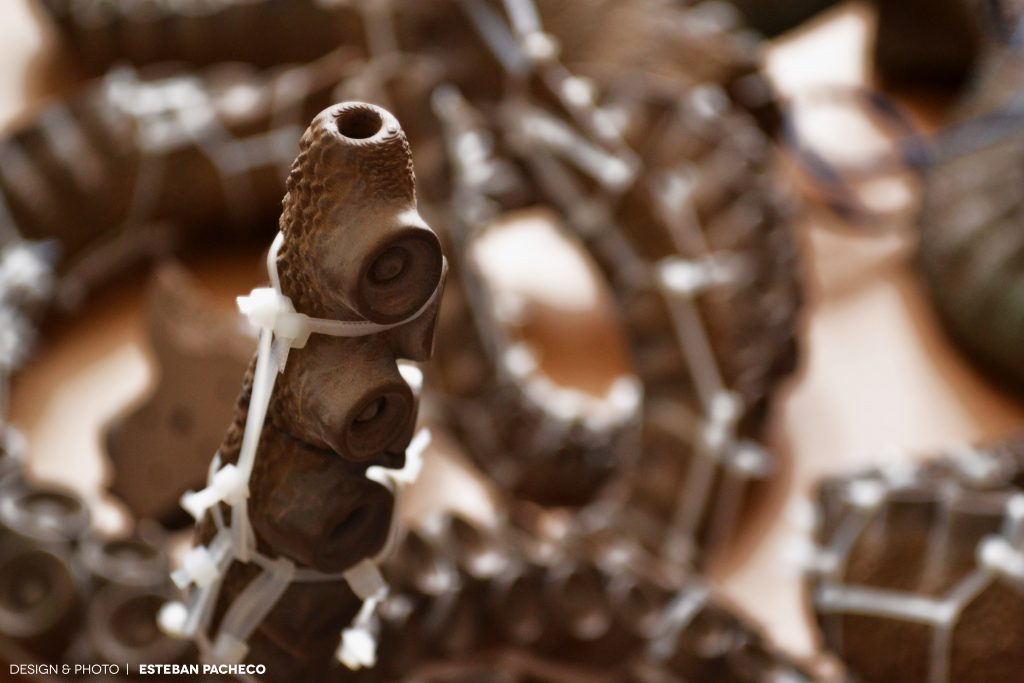
For the assembly, no screws were needed for the Octolamp itself. All pieces were glued together using very strong epoxy adhesives.

We thank Esteban for sharing this project with us. Again, we were extremely surprised to see bronzeFill being used for such a big and long term project. As said, Esteban has his own 3D Hub. He started in January of this year and he has only received five star reviews. The work and dedication he put into the Octolamp makes this easy to understand. Of course, not all projects take 18 months to complete, but Esteban knows what he’s doing and aims for the best quality in his prints. We cannot wait to see more work from him!

Alternatively, you can also follow him on Facebook.

Interested in bronzeFill? It is readily available in our webshop as 750 grams and 1500 grams spools. We also have samples available.

If you have an awesome project to share, made with our materials, do no hesitate to contact us at sales@colorfabb.com

Design of the Octolamp by Esteban Pacheco (email)

All images made by Esteban Pacheco and used with permission

How to post-process co-polyesters

Of course we love our prints as they are. We put great effort to choose the best materials and the finest materials. With our “How To…” posts we want everybody to be able to create the best prints possible on a wide variety of printers. We have written before about post-processing our metal filled filaments, which literally truly shine when processed the right way. More links to blogs about post-processing these special filaments can be found here.

Beyond the special filaments, which have great aesthetic properties, we also have our range of co-polyesters: nGen, colorFabb_XT and colorFabb_HT and we received quite a few questions about post-processing these materials. To find our more about the materials themselves, check out the blog we have written before by clicking here.

Developed by Eastman Chemical Company, Eastman Amphora™ 3D polymers are the basis of our co-polyesters and offer a low-odor, styrene-free choice that is uniquely suited for 3D printing applications. With Amphora, items can be created that are more functional, more durable, more efficient, and attractive. With superior melt strength and dimensional stability, our range of co-polyesters deliver advanced bridging capabilities to create stronger and more detailed items—with low odor and low emissions.

678778

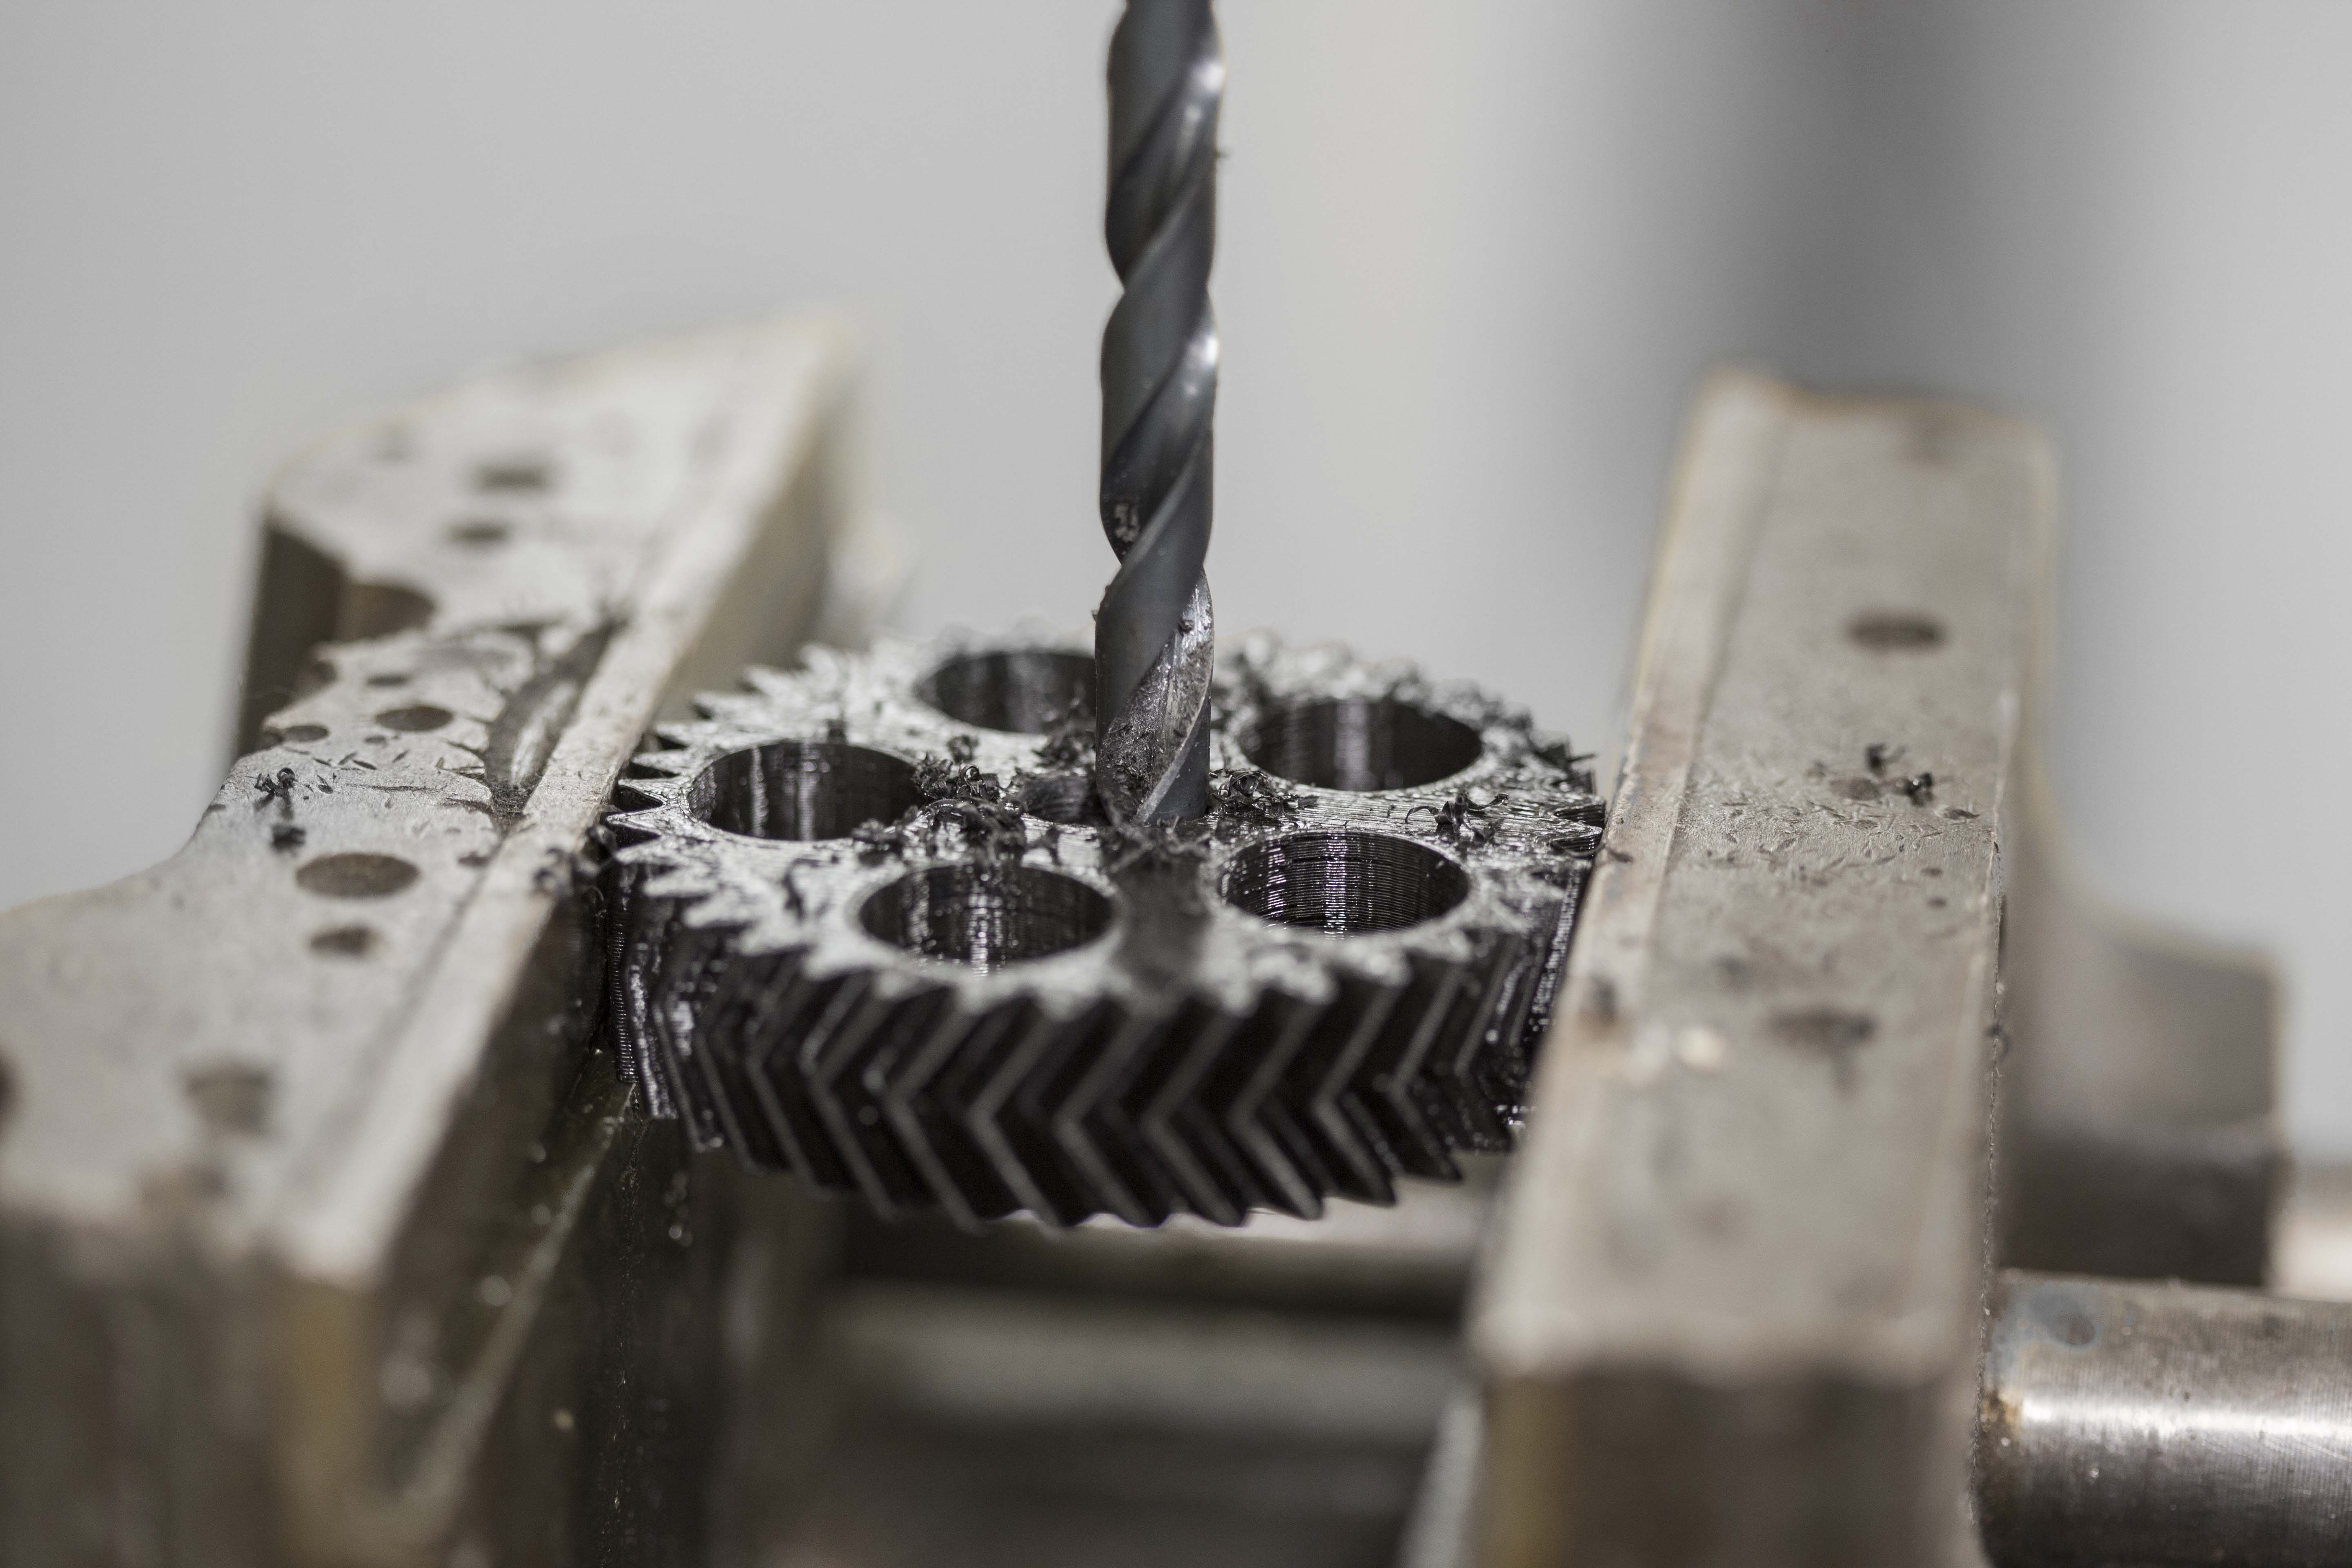
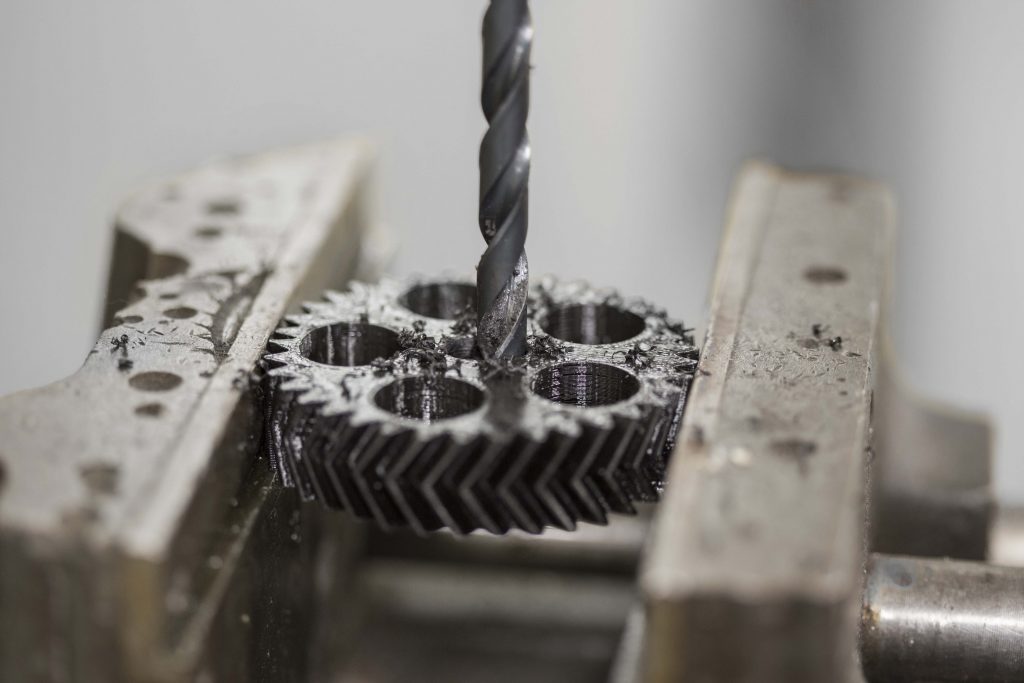
Now, once a print comes of the printer and you want to be doing something truly functional with it you may need some kind of post-processing with it, also called secondary operations. Be it painting, drilling or glueing there are multiple ways to work with a printed object once it has been printed, but before you can use it. You can truly bring 3D printing into your life by making useful applications.

For instance, you need to drill into a part. This should be no problem with co-polyesters. We recommend drills specifically made for plastic. Steel drills are possible, but only when grounded. Tips like these are to be found in the brochure that Eastman has prepared and which you can find by clicking here.

678782


Click on the image below to find the full guide prepared by Eastman Chemical Company:

operations-guide


Our range of co-polyesters are available online.

colorFabb gift box

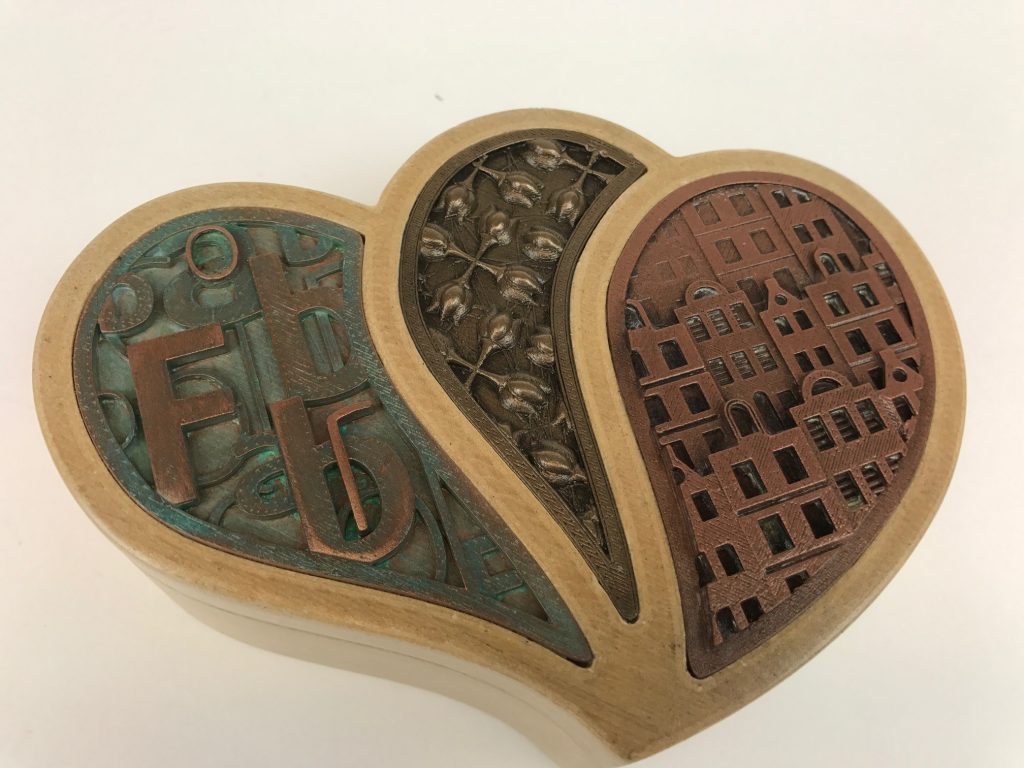
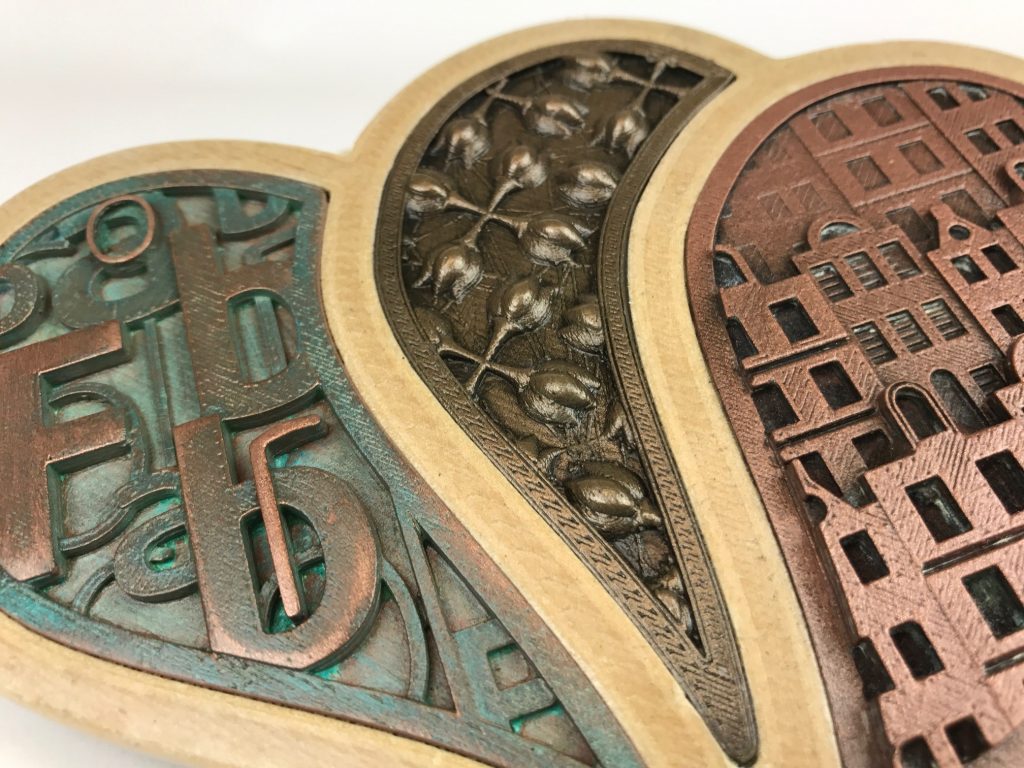
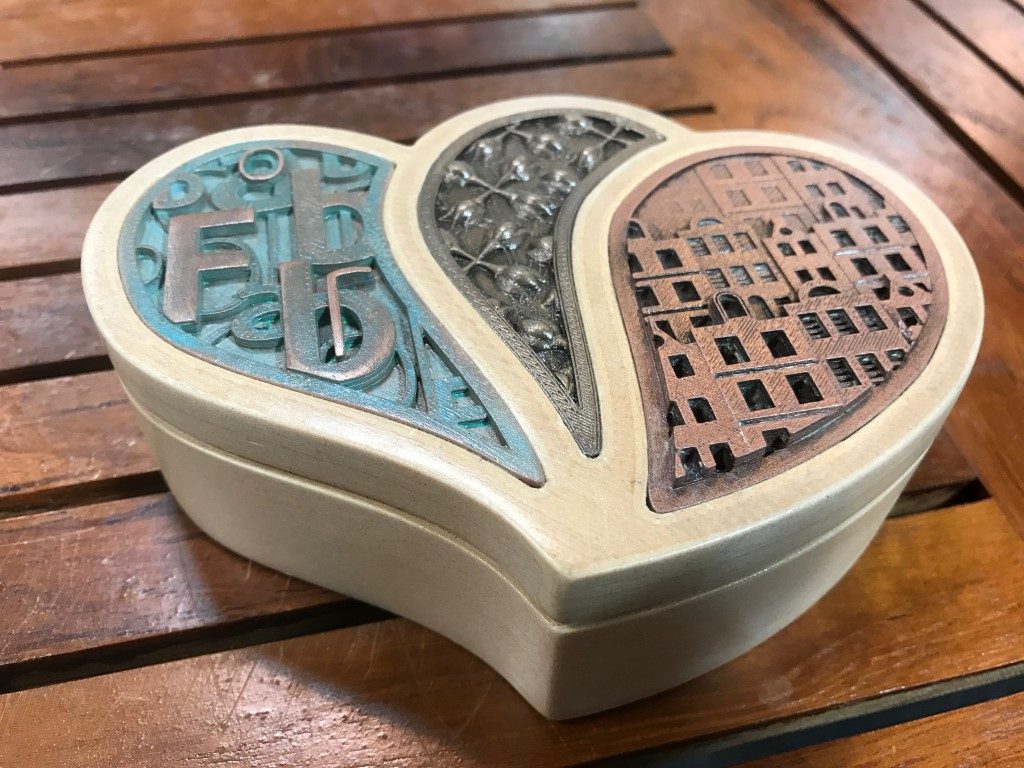
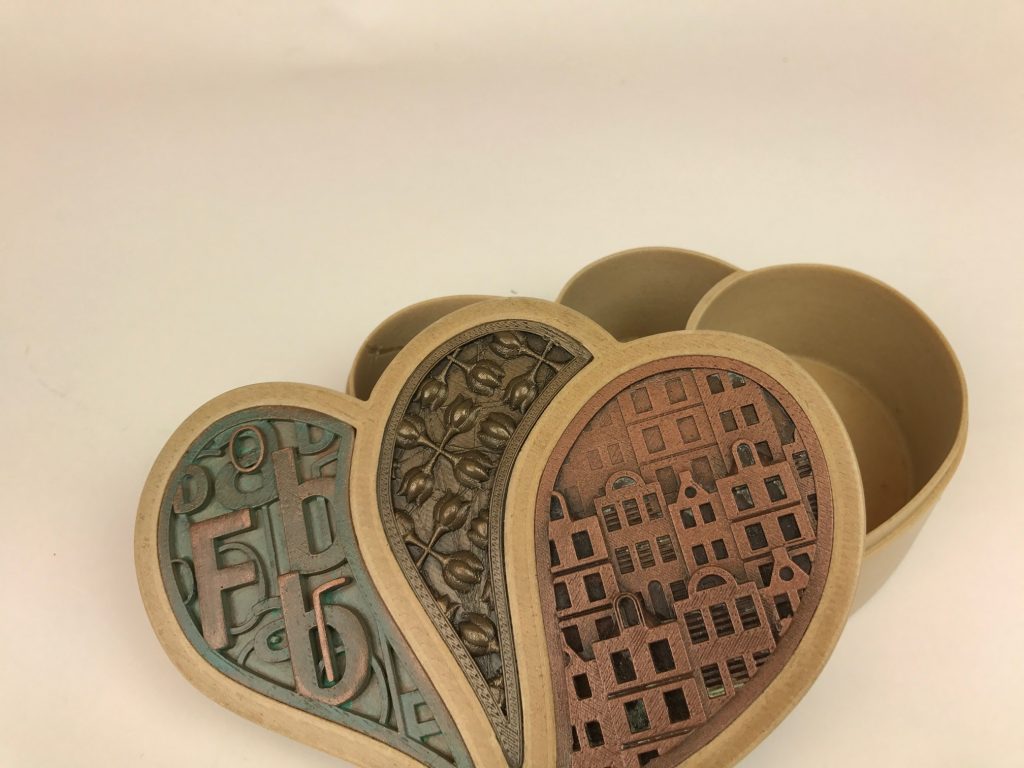
Recently at the TCT Show we finally caught up with Tony Short. Tony has been using colorFabb’s special filaments with great effect and we have been following his impressive work for quite a while now. You can find a few examples of his work on Twitter: here, here and here. We are always happy to meet up with our users at shows, but Tony had a surprise for us in store: a printed giftbox made with our special filaments, based on the colorFabb logo. A typographer by trade, Tony put in his best effort and came up with a truly stunning print:

box-2

We’ll let Tony explain in his own words how he made this beautiful gift box:

“Since I began 3D printing I’ve been a big fan of Colorfabb’s more exotic materials. I’ve been creating artworks with them for the last year or so, and I was very pleased to find that colorFabb loved my designs / prints as well. I decided to make one of my printed fancy boxes, using CF’s wood and metal filaments. Normally my work has a typographic flavour (given that’s my background) but in this instance I designed a box using the ‘petal?’ device from the CF logo.”

“I designed the box using Moments of Inspiration (MoI3D) software. Starting with the ‘wooden’ shell first, and creating the holes for the inset ‘metal’ panels.  On my Ulitmaker2 printer the Woodfill filament has always been slightly less than perfect, but I don’t mind that because it gives the finished job some defects, which makes it look more natural. They are printed at 0.3mm layers with a 0.6mm nozzle, so don’t take much time. Afterwards the minimal supports for the inset holes are removed, and because they will be covered with panels I don’t need to worry about the surface finish there.”

“I finish Woodfill prints with multiple passes of sandpaper, usually 120, 180, 400, 1500, 4000 grit, and then a couple of coats of acrylic lacquer.”

box-5

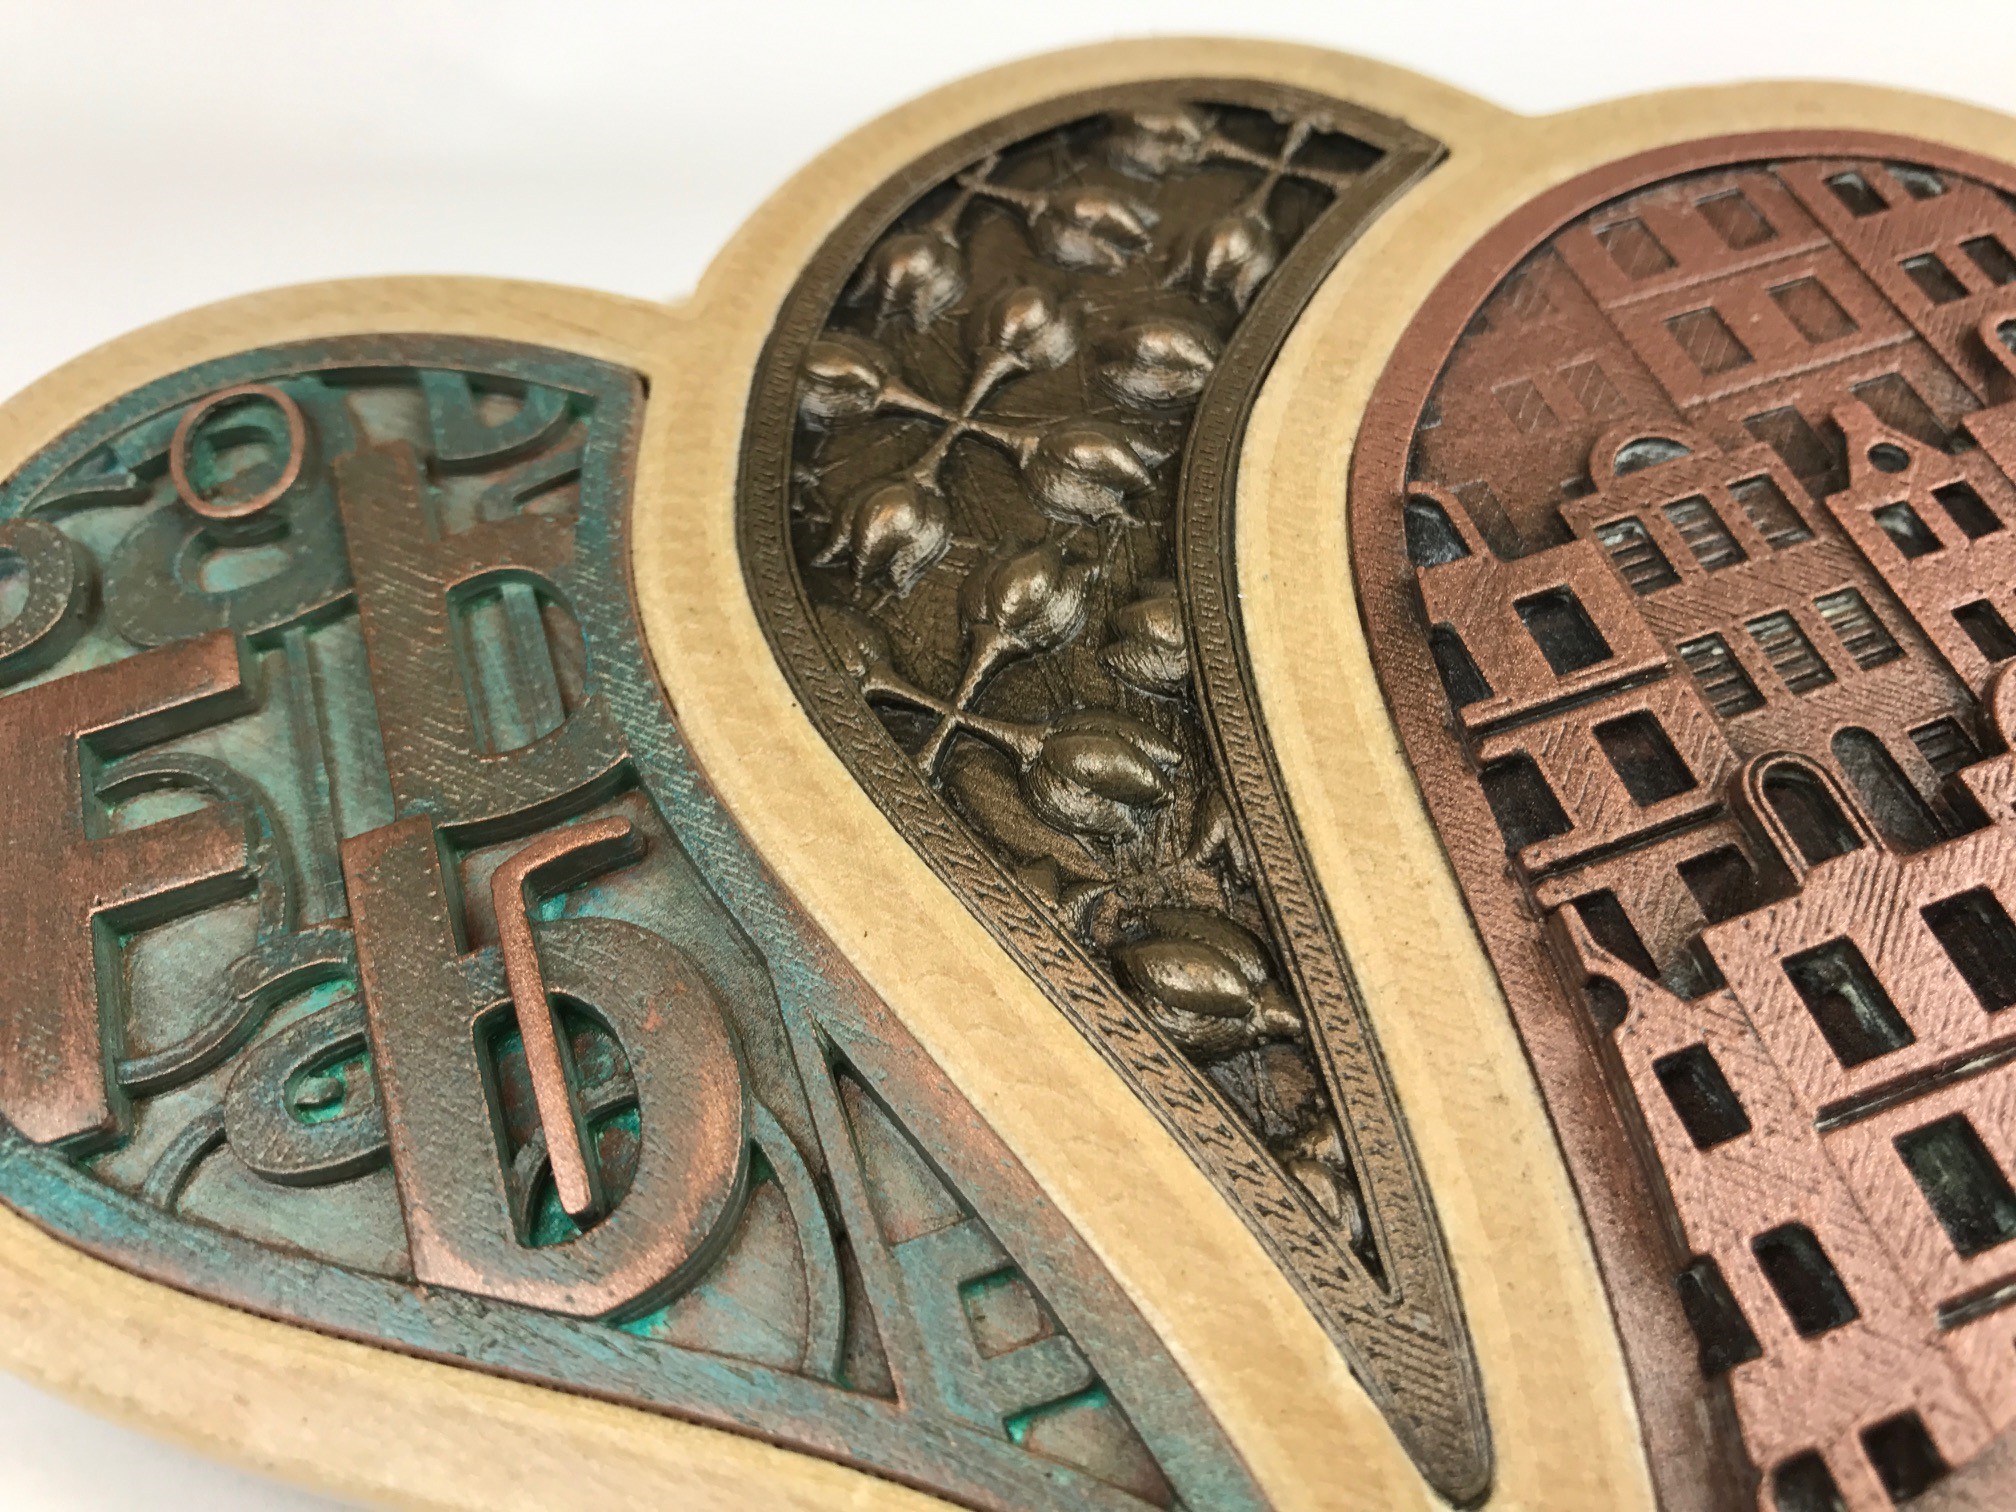
“For the three metal panels I wanted to create patterns that related to CF, ending up with a Dutch townhouse scene, a more traditional tulip pattern and an abstract design based on the CF logo letterforms. I did think that using tulips might be a bit stereotypical, but given that CF use windmills on their packaging I thought I would be fairly safe.”

“All three patterns we built as 3D objects in MOI3D, then repeated, merged and flattened to create the finish 3D files. They were printed in Copperfill and Bronzefill, 0.1 layer height, 0.4 nozzle. No supports are needed, and finishing is a lot easier than the Woodfill sanding!”

“The townhouses and tulips were given a rough sand down to remove any stray bits and blobs. Then sprayed with black matt paint, fairly thick to get into all the nooks and crannies. This is then wiped off with a rag, whilst still wet, to give an aged look. Once dry these are then brushed with a brass wire brush, and finished with some high grit paper. The lettering panel was roughly brushed, but then treated with some oxidising liquid which accelerates the ‘verdigris’ process. Left overnight it was bright green the next day, so some strategic sanding and polishing knocked back the effect to look more realistic.”

img_5140

“The metal panels were simply glued into their holes, and the box given a final coat of lacquer to protect the metal finish, and stop any additional oxidisation. I use a lacquer designed for covering gilding with metal leaf, but I guess any would do.”

“The way the box is printed with Woodfill gives a realistic wood grain effect, and the 3D printing means you can make designs that would be very difficult using traditional techniques.”

box-4

We once again thank Tony for his beautiful gift box and using our materials to such a great effect.

We have seen great use of our special filaments and post-processing possibilities. We have collected several blogs about post-processing metal filled filaments in one place, which you can visit here.

Tony’s work can be followed on Twitter, via his account. Follow him and be amazed by his work.

Our special filaments are available online and throughout our worldwide distributor and reseller network. Enquire locally for availability. We also offer a special filament value pack online, where you can choose 8 special filaments in one package.

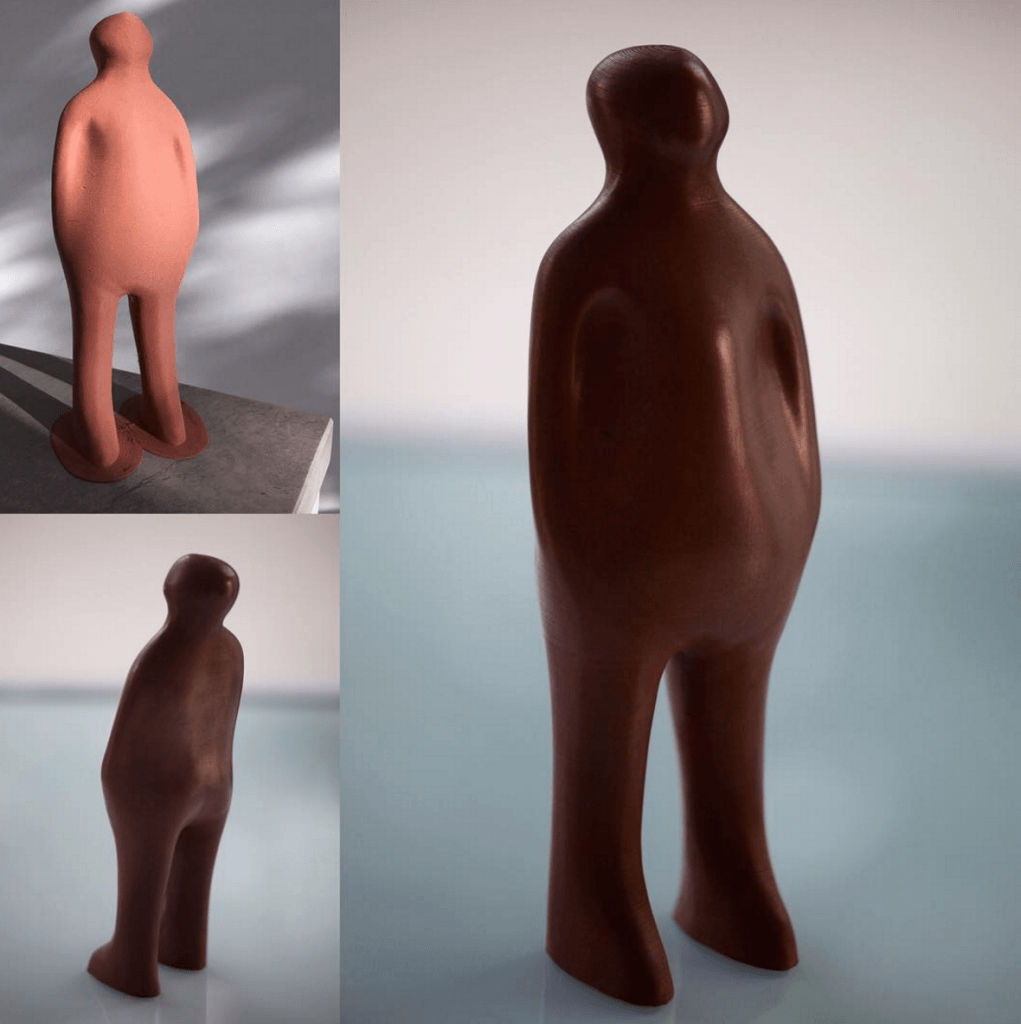
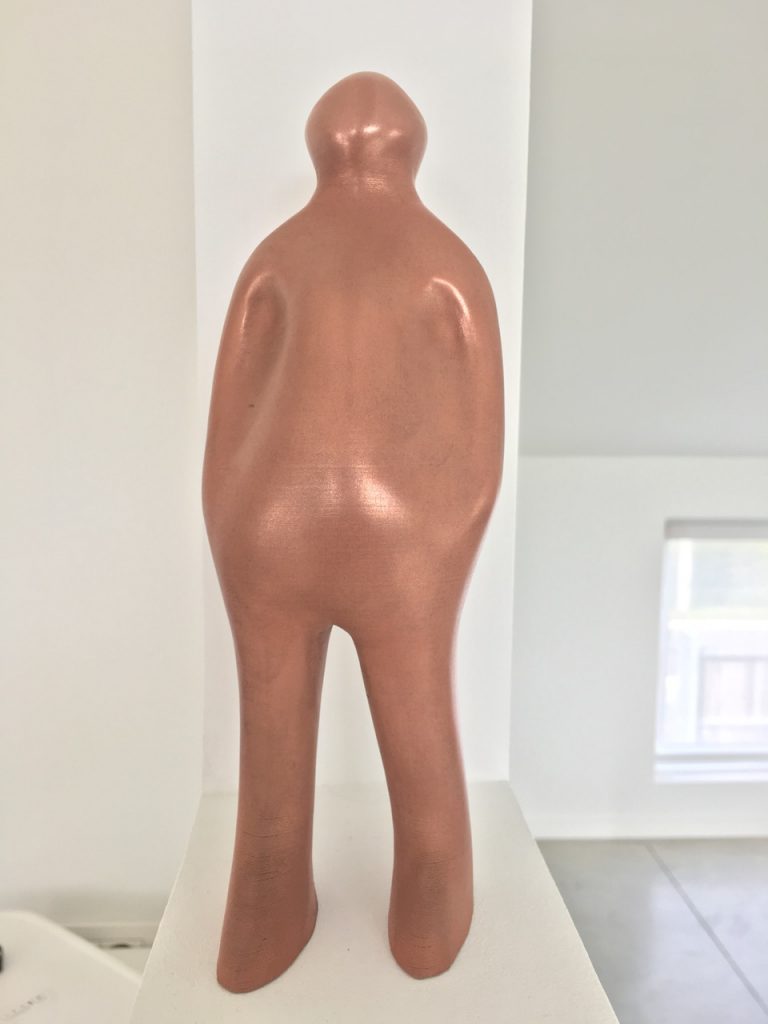
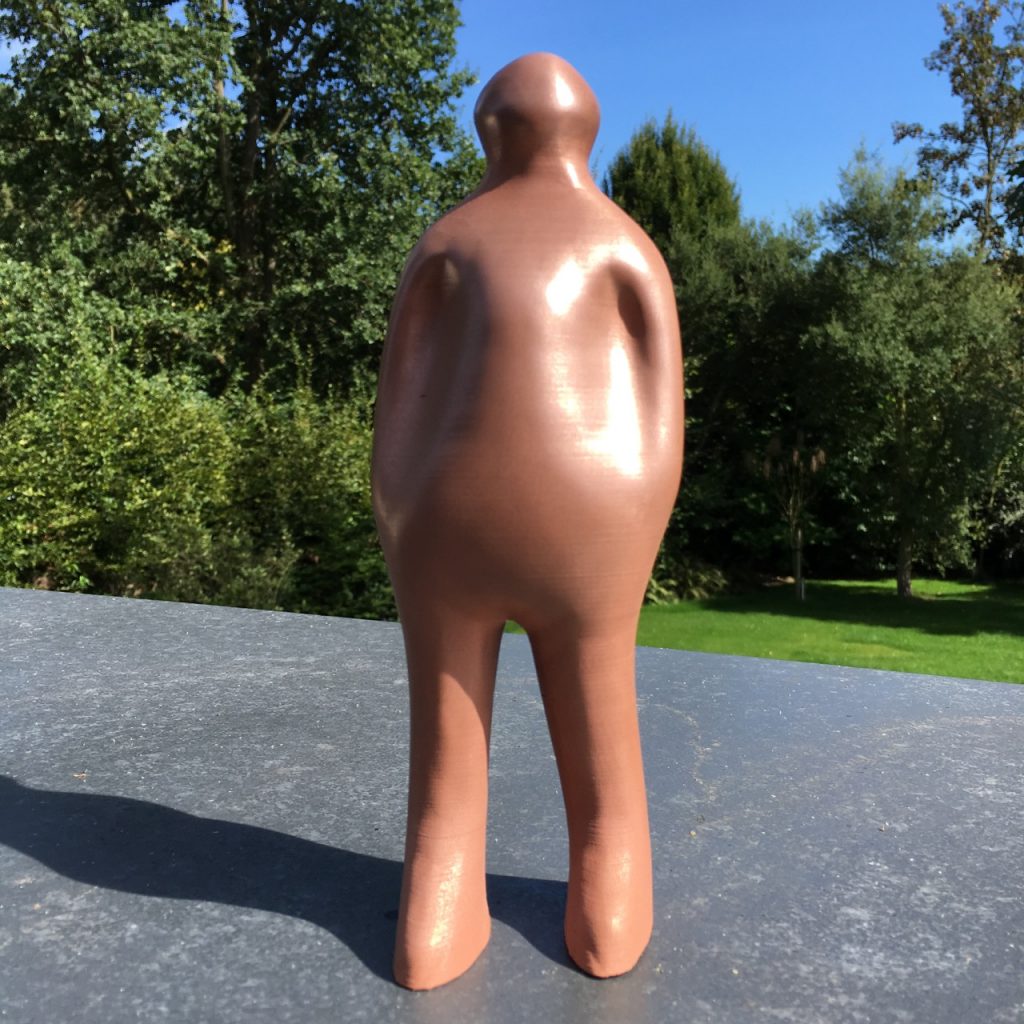
“The Visitor” in copperFill

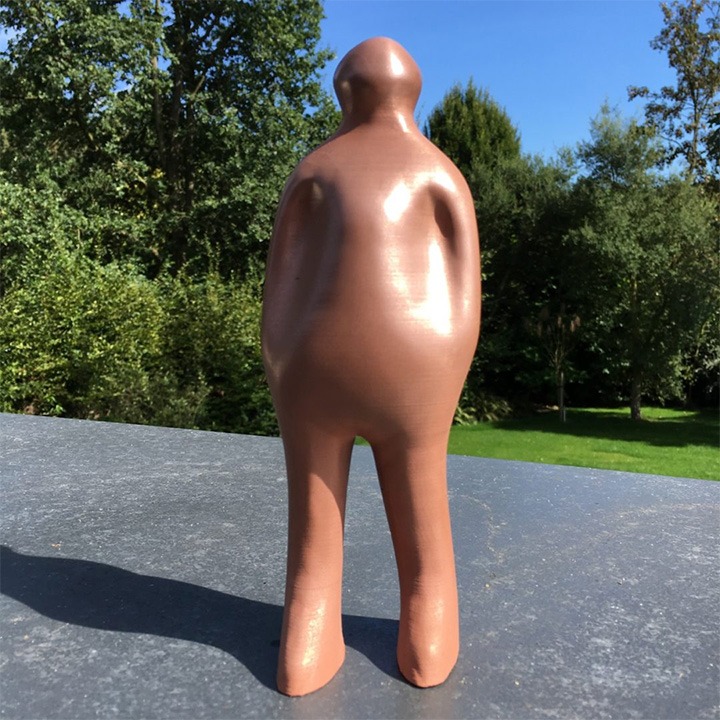
The Ultimaker forums are a great place to find cool prints and sometimes we come across a fantastic print made with one of our materials. This week we found Frederiek Pascal’s print of “The Visitor” printed with copperFill on an Ultimaker Extended 2+ and post processed. Post-processing happened manually with steelwool and copper cleaner, which resulted in a perfect result!

screen-shot-2016-09-18-at-08-05-11

The settings used were:

Nozzle diameter: 0.40 mm

Layer resolution: 201-250 micron

Print time: 8-12 hours

Temperature: 205˚ C

Speed: 40 mm/s

Shell thickness: 1.6 mm

Height: 250 mm

B/T thickness: 1.2 mm

Fill density: 20 %

You can find the original post on the Ultimaker forums here: https://ultimaker.com/en/community/prints/5079-the-visitor-made-with-copperfill

Frederiek updates his Instagram account regularly with his latest prints: https://www.instagram.com/frederiekpascal/

copperFill is one of the metal based filaments colorFabb has released. Presented to the world in the fall of 2014 we have seen stunning results with copperFill, with Frederiek’s print being one of them. You can find out more about working with copperFill and post-processing other metal filaments here:

https://learn.colorfabb.com/post-processing-gcreates-rocket-ship/

copperFill is available in both 1.75mm and 2.85mm and in two weight varieties: 750 grams and 1500 grams.

img_0003 img_0467