
At the Birmingham TCT Show we talked to Steve Cox, Education Ambassador CREATE Education – Ultimaker (GB). He was showing some of his great 3D printing projects and sharing great tips&tricks. This week however a very special project by Steve, commissioned by Fuel3D, was presented at the CES2015.
“Those who know me will testify that my philosophy is that while I believe 3D printing is a great technology it’s one for which we need to keep finding new applications, and one where we need to keep pushing at the boundaries.” Steve Cox, Education Ambassador CREATE Education - Ultimaker (GB)
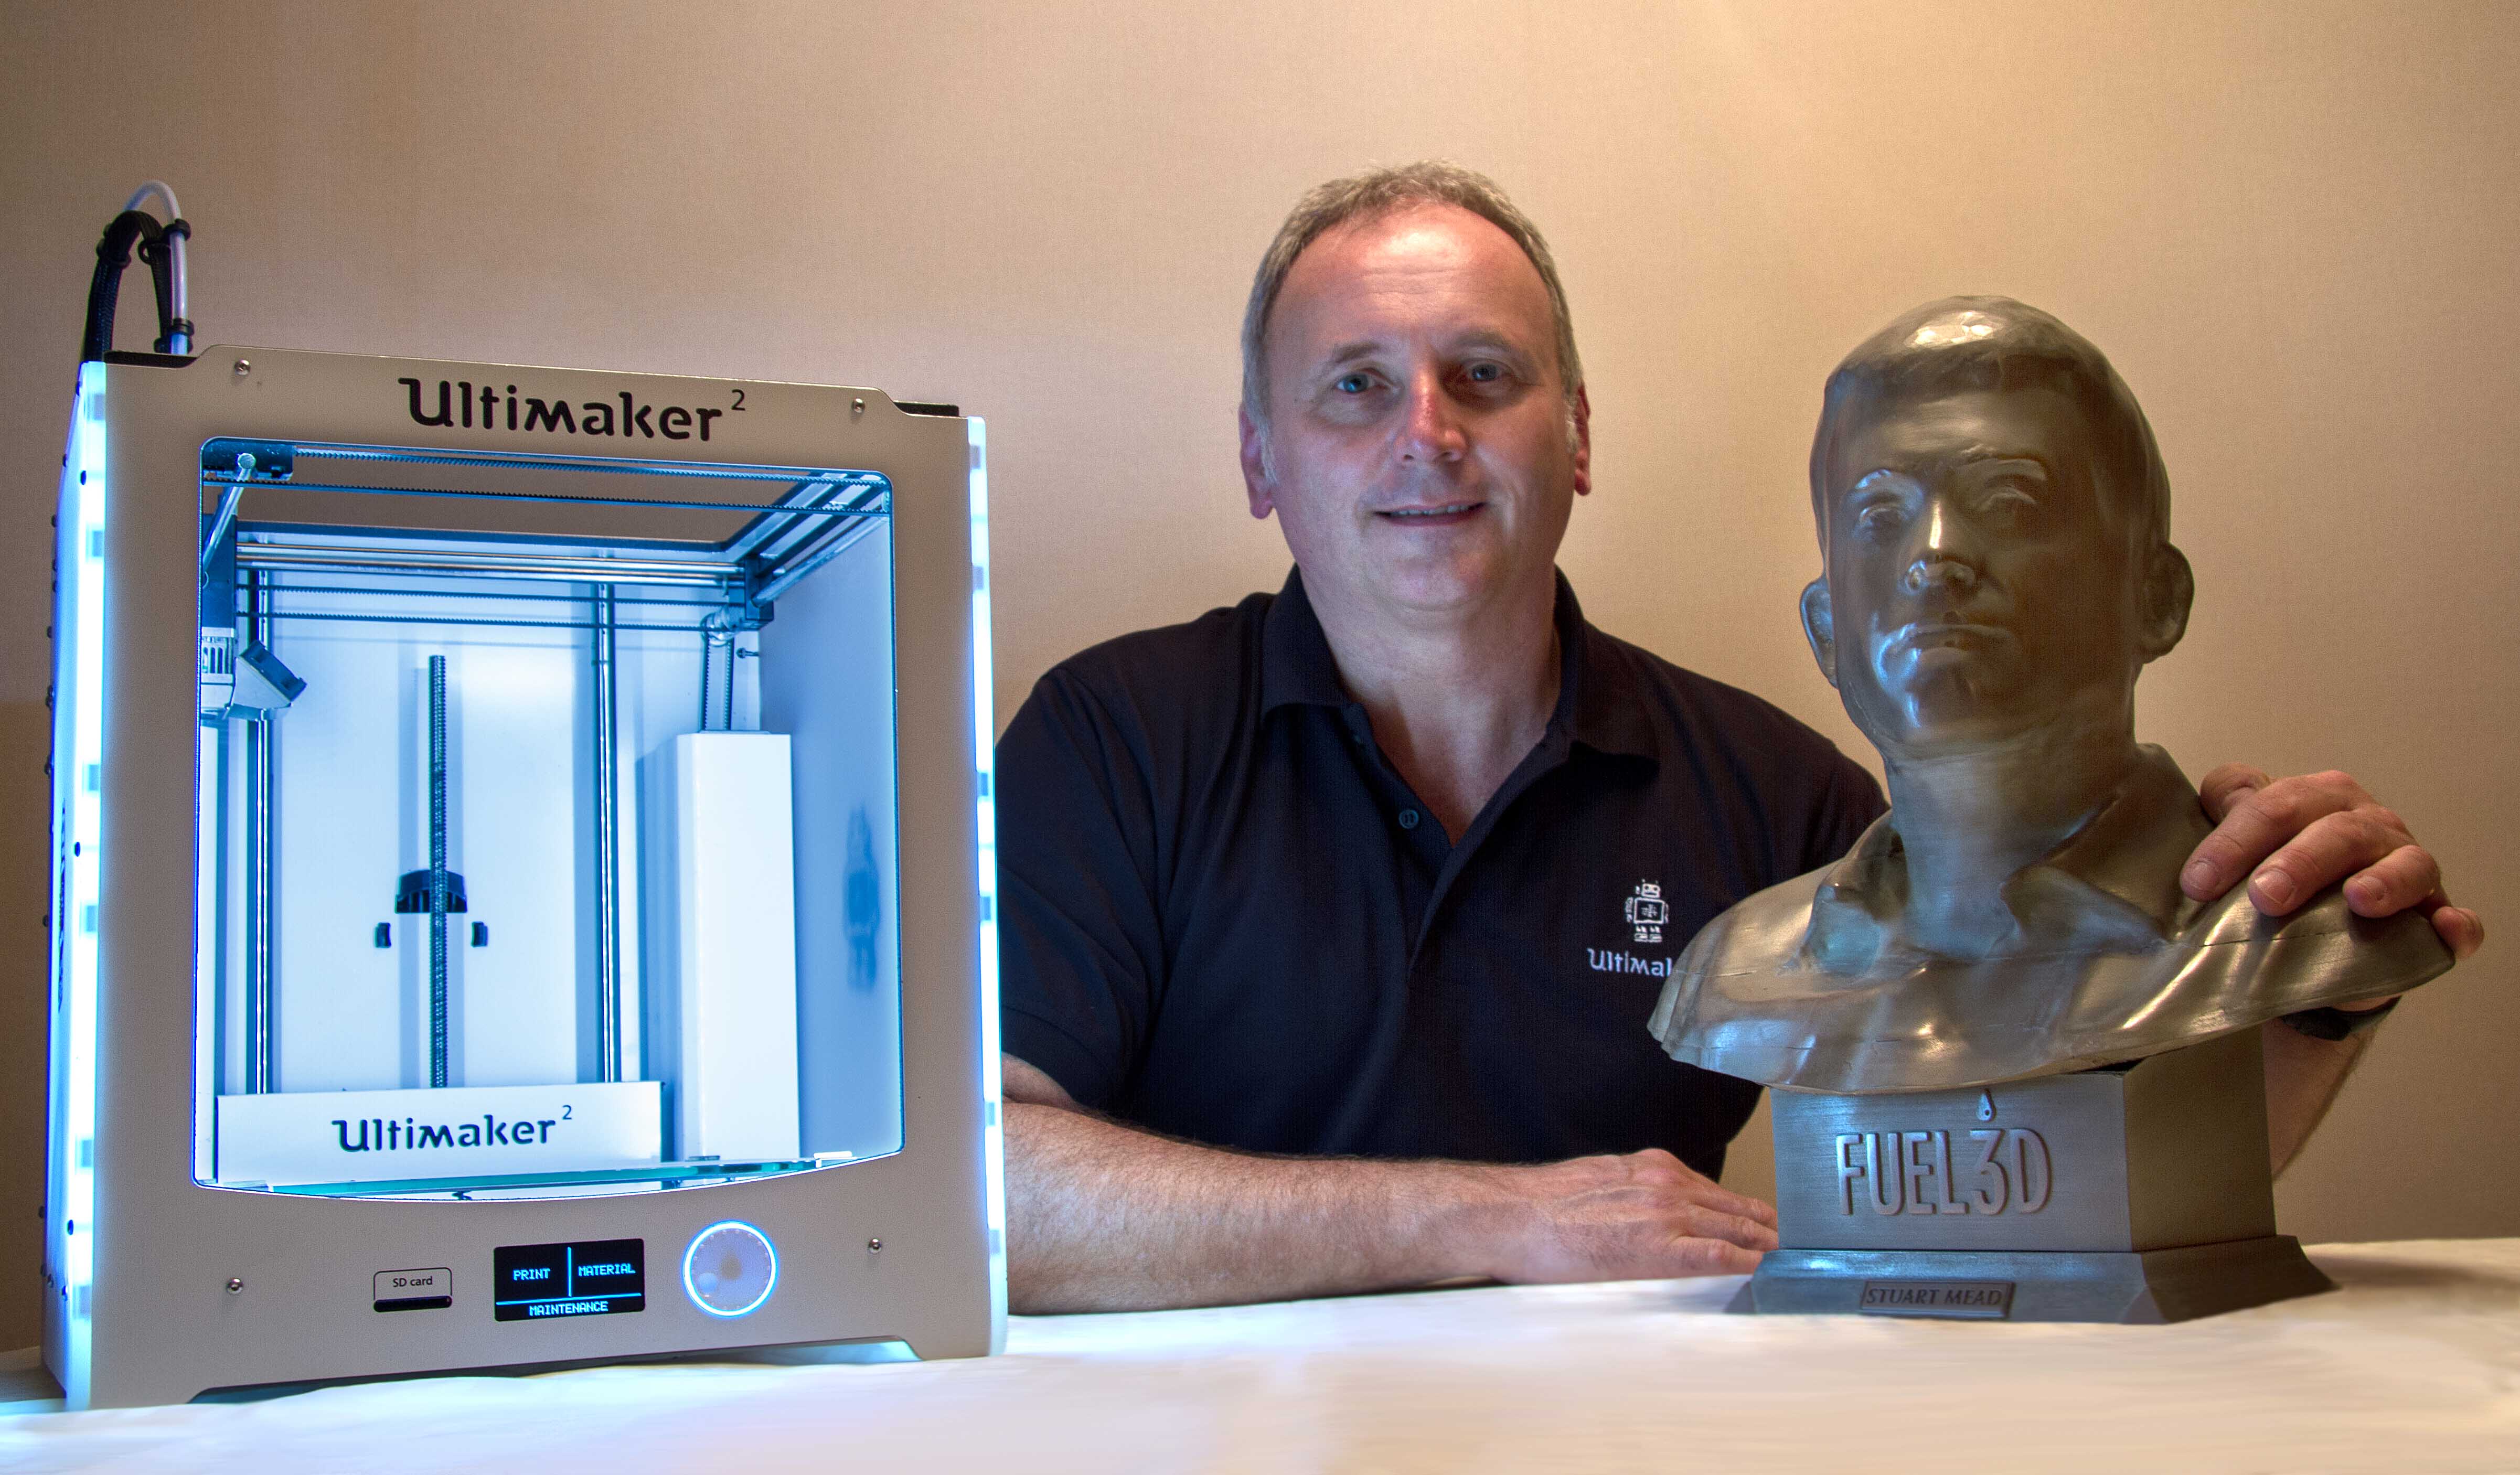
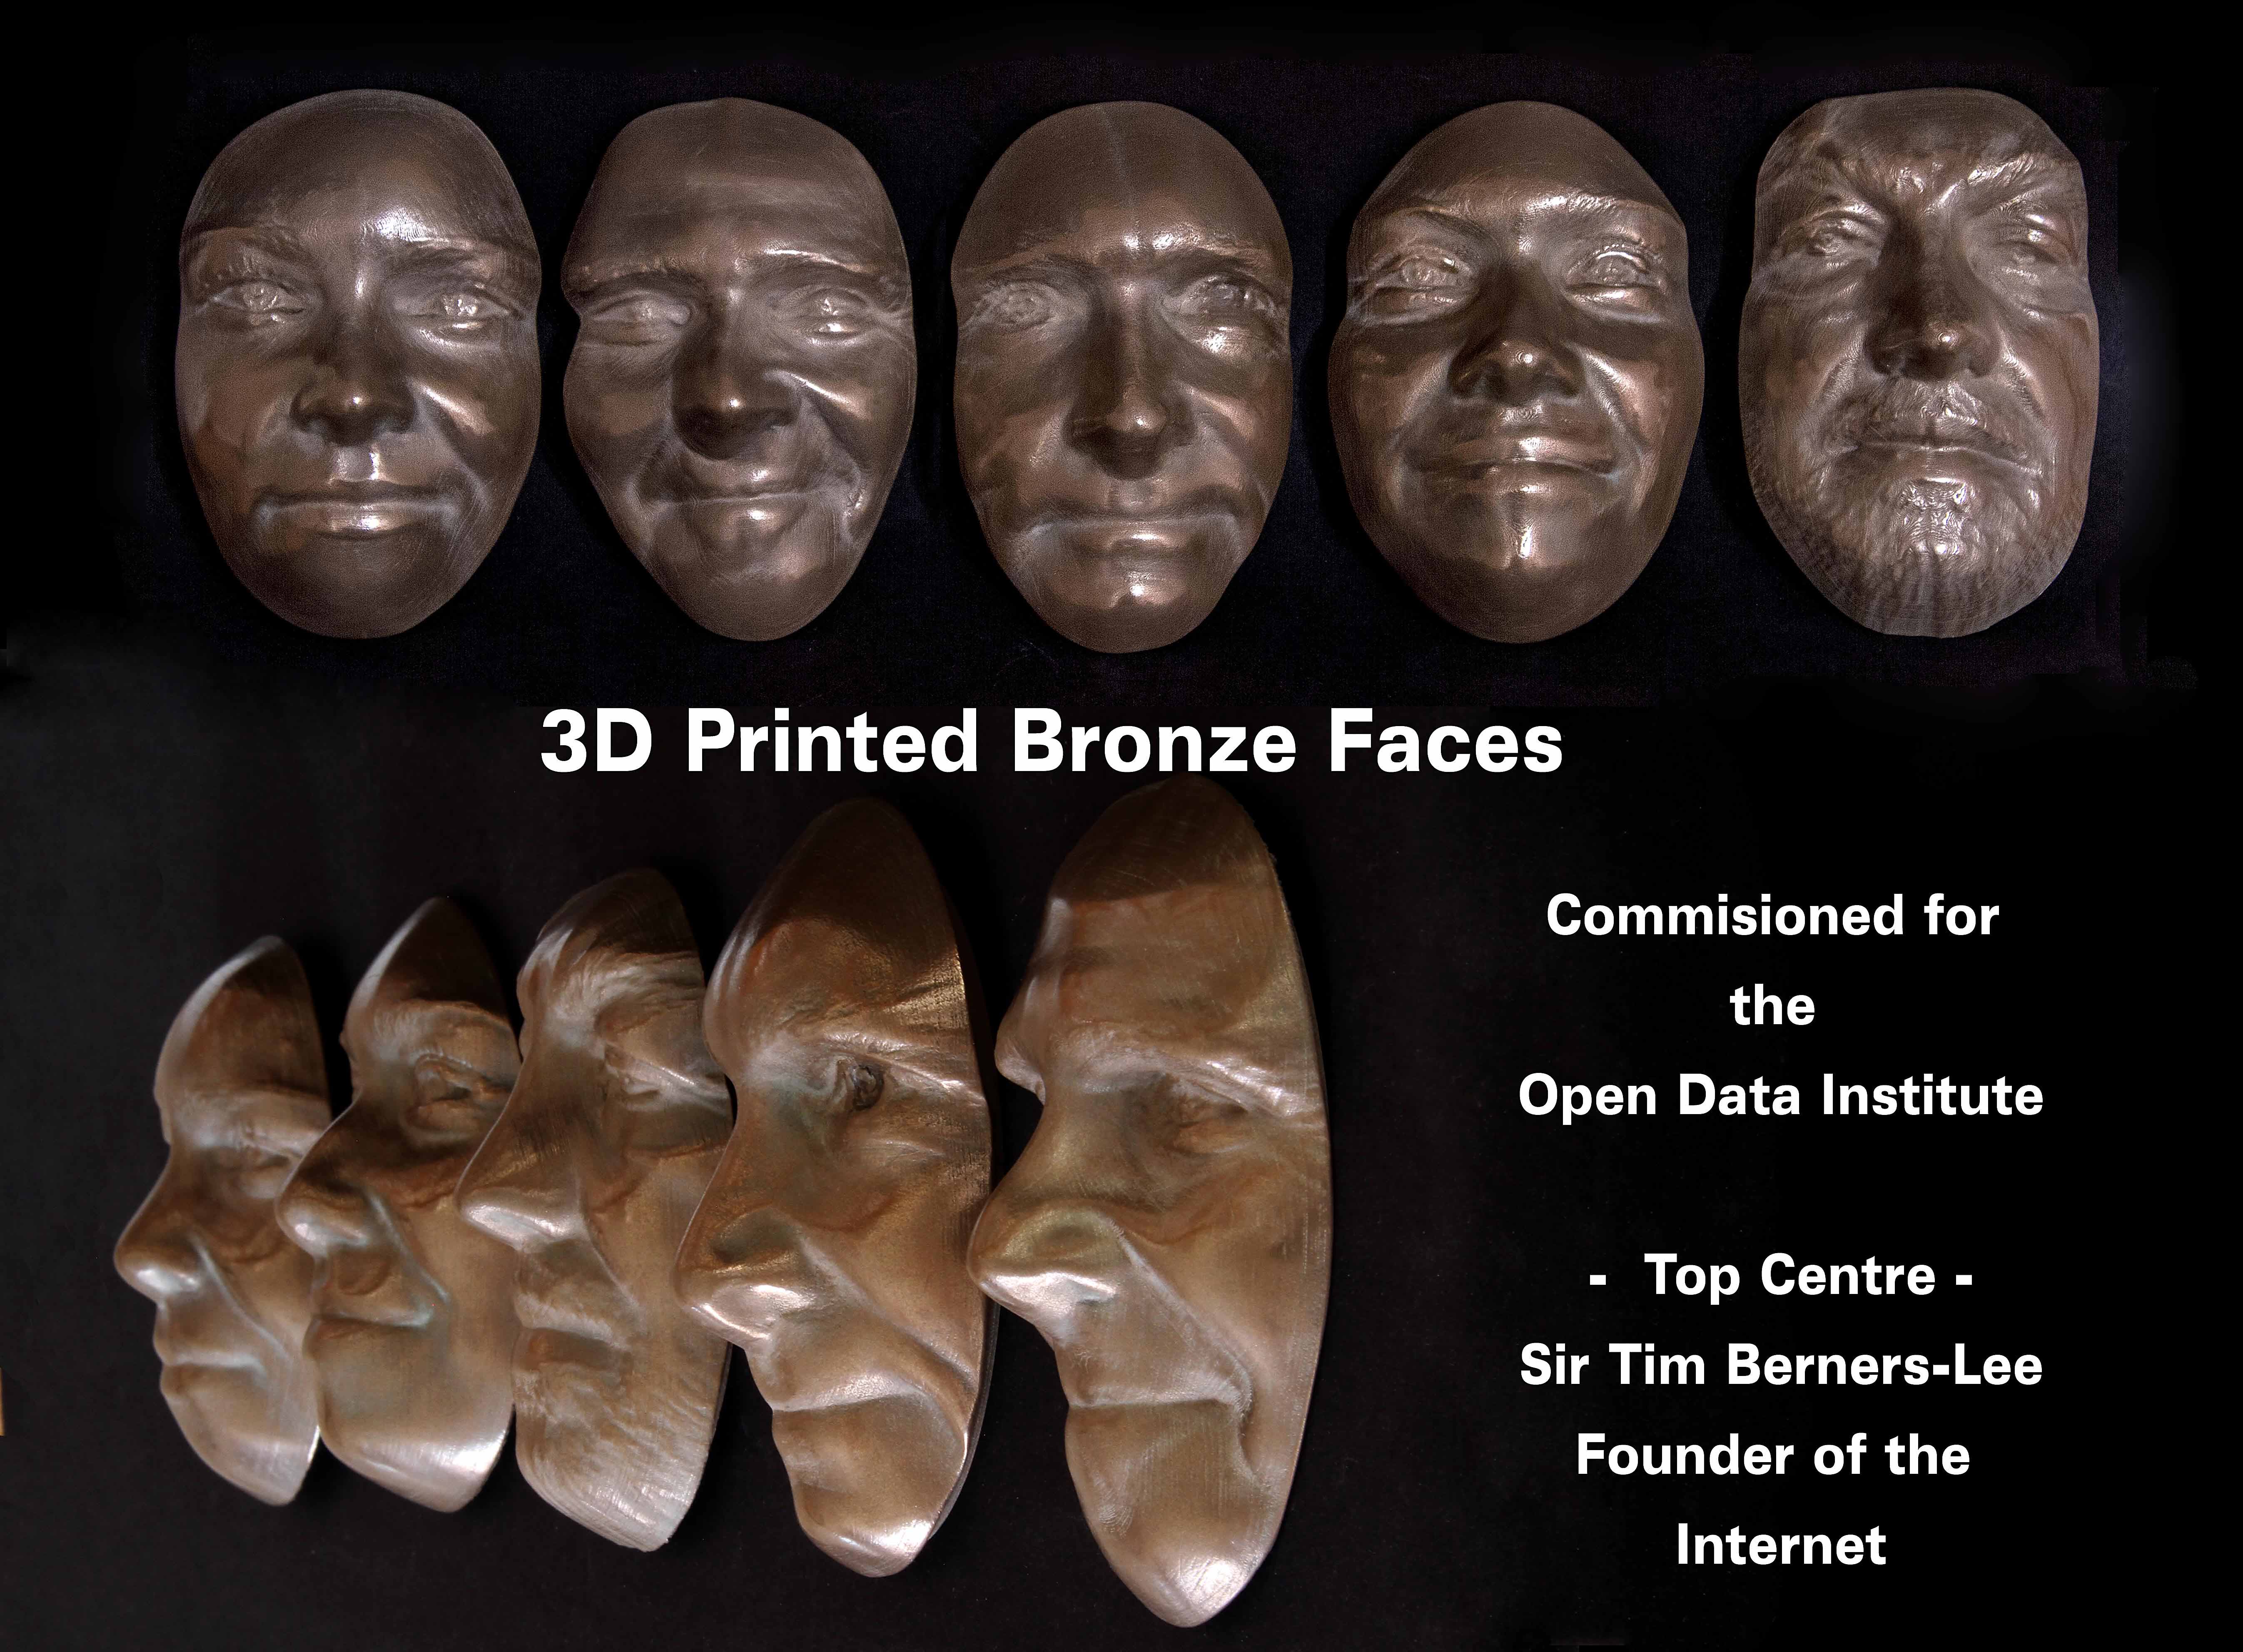
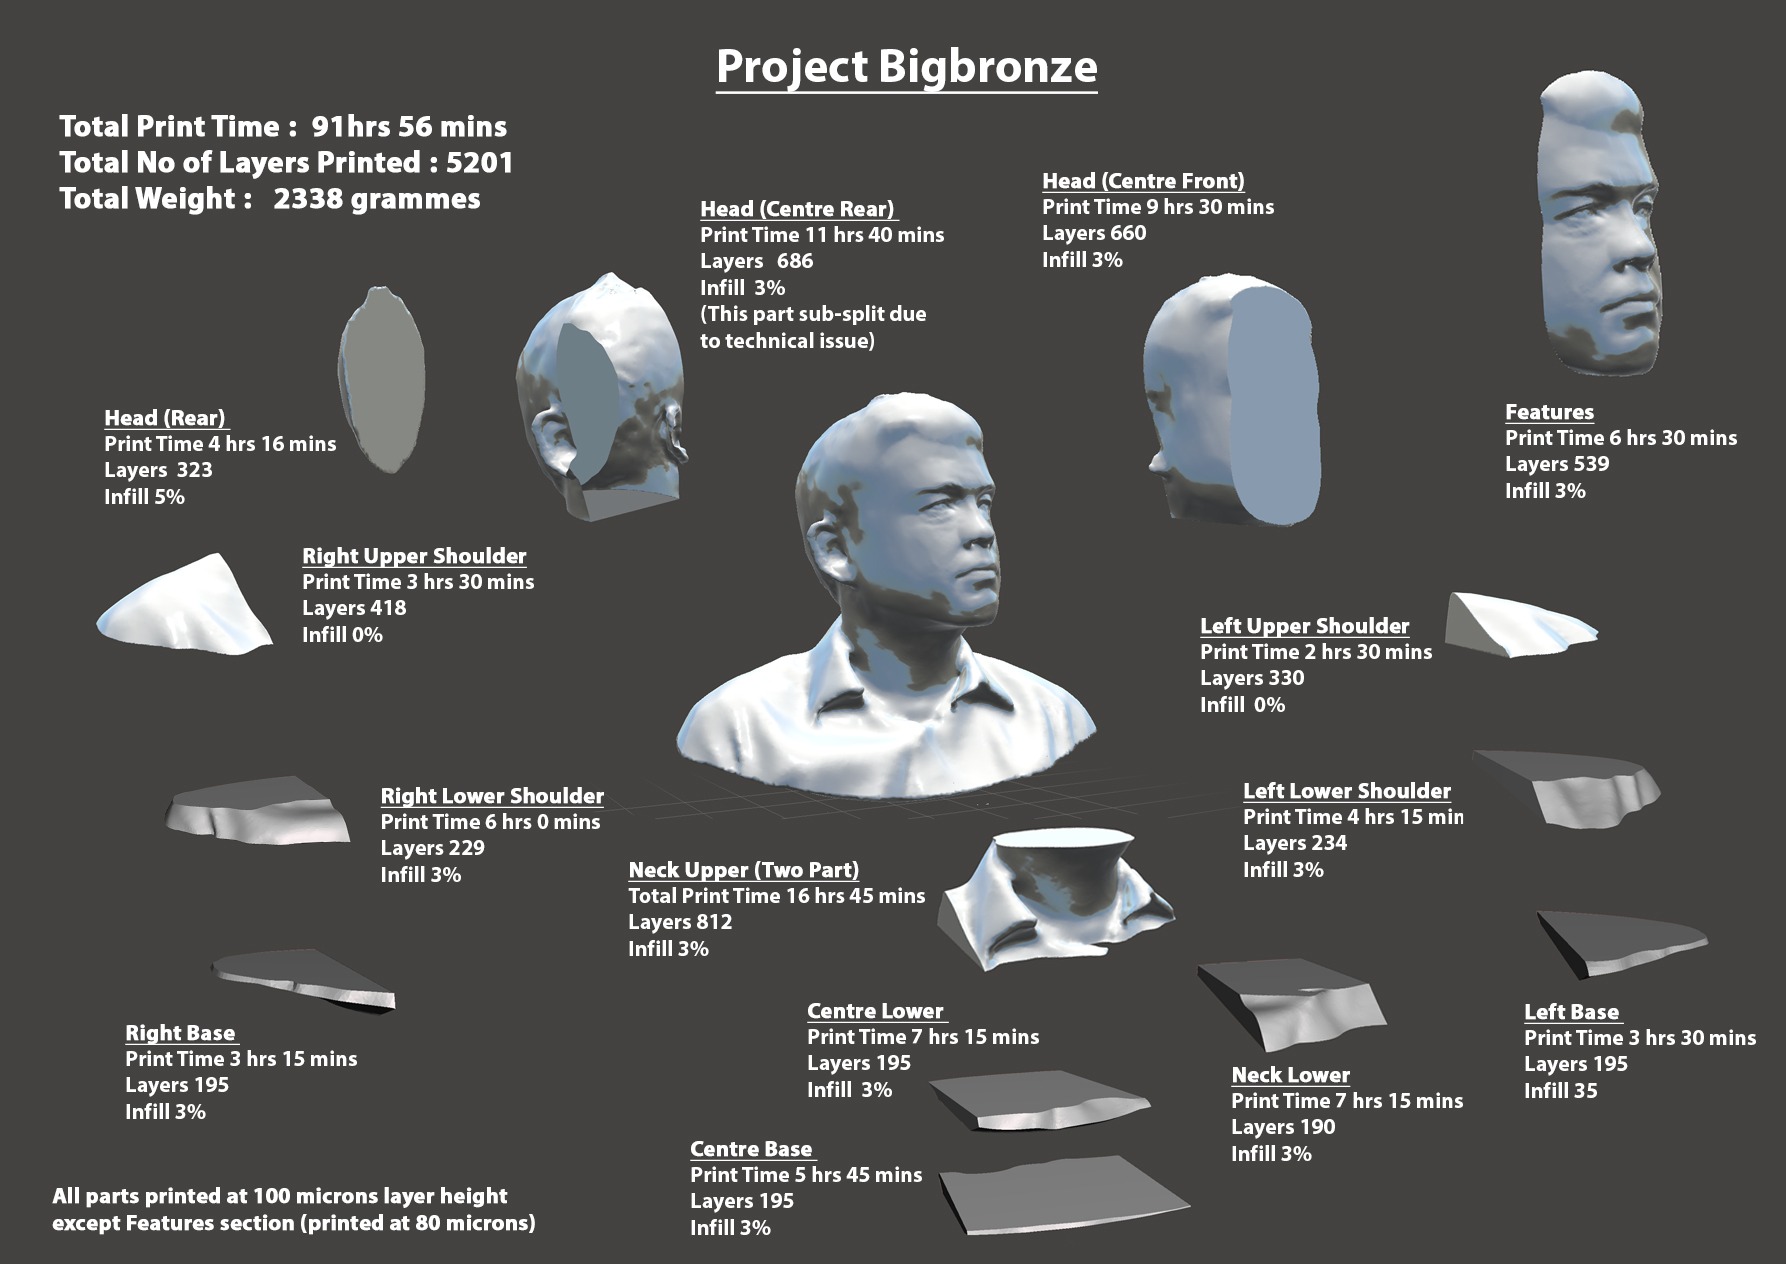

Fuel 3D proposed to print out a life-size bronze bust of their CEO, Stuart Mead. This is one of the biggest (if not the biggest) bronzeFill projects we’ve encountered. Steve had to split the entire model into 16 separate pieces, which in total took 92 hours of printing on the Ultimaker 2.
“In total there was almost 2.7 kgs of bronzeFill used in this model, so my 10% ColorFabb discount through 3D Hubs really did come in very handy!”
Truly impressive work by Steve and we hope to see a lot more of his 3D printing projects!

6 Comments
i am a newly owner of a um2 printer i am a sculptor my questions are as folows
1: why did you split the bust into 16 parts,is it because you didnt wanted any supports?
2:how did you assambled all the parts together and what kyontuncind of glue you used?
3:how did you rendered all the joints?
4: did you use cura for slicer?
yours truly
e.yontunc from turkey
Hi Engin,
As you can see we have not printed this ourselves, so you will have to ask Steve Cox (@SteveCox3D) for the specific details.
Splitting up a bust like these can be done to use specific settings for specific parts, like the infill variations. But also to split up risk of a failed print, to use up left-over material, or to make processing the model easier to use on the computer.
For assembling the parts you can use Cyanoacrylate adhesives (fast acting) or a 2-component epoxy for example.
Splitting up a 3D model can be done in a large variety of 3D software packages, but I personally prefer Meshmixer for this kind of work.
Hello!
Tell me, please, which way of processing bronzefill do you use?
Thank you.
This print has not been made by us, so I can’t tell you the specific methods used.
But this looks like a lot of sanding and polishing with a polishing wheel and maybe some wax.
We’ve done some preliminary testing with this as well, take a look at Ines’s blog here: https://learn.colorfabb.com/lets-polish/
Other options with the bronze and copper is the patina effect.
We’re seeing this more and more done by the community, take a look here for a good example: https://www.3dhubs.com/talk/thread/bronzefill-patina-processing
Very cool! Where can I find other unusual filaments, ie. faux marble etc.?
Hi Leonard,
Take a look at our special composite filaments here: http://colorfabb.com/special-filaments.
They include among others: BronzeFill, CopperFill and BrassFill.
Though I haven’t heard of marble filament yet.