steelFill: available today

“Steel yourself”
Today we are happy to announce the release of our new metal based filament:
1

Iron Man Bust by Geoff.W – http://www.thingiverse.com/thing:571321

Announced at the AM Show in Amsterdam end of June this new specialty material is available as from today.
With steelFill we are adding a fourth metal based filament to our portfolio after succesfully announcing bronzeFill in 2014, copperFill later that year and brassFill in early 2015. As with these other filaments, the key is post-processing and you can use similar techniques as with our other special metal based filaments.

Print Settings

Probably the biggest difference compared to 3D printing our other metal infused filaments would be our advice to change your regular brass nozzle for a steel or hardened steel nozzle. The steel powder we use for steelFill can affect the brass nozzle after printing enough of this material, for better reliability on the long run a steel nozzle is recommended.

Other settings such as, printing temperature, heated buildplatform, layerheight, cooling and retraction will be covered in our tutorial.

Check out the tutorial: https://learn.colorfabb.com/how-to-print-with-steelfill 

3

ColorFabb Cannon – by Labern – https://www.youmagine.com/designs/colorfabb-cannon

Post Processing

After printing steelFill will have nice matte drak gray finish. With similar polishing techniques used on bronzeFill, copperFill and brassFill it’s possible to smooth out the outer surface and expose the metal particles. Now the surface start’s to resemble a dark glossy steel look. SteelFill won’t rust, since the powder is stainless steel.

steelFill is the latest addition to our expanding range of special materials.
steelFill is available now: http://colorfabb.com/steelfill

What we talk about when we talk about co-polyesters

Two years ago, in the summer of 2014, we announced our partnership with Eastman Chemical Company. Eastman is a worldwide specialist on co-polyesters, a material we recognized to have benefits for 3D printing. In the past two years we have launched three filament grades with Eastman’s raw materials, branded as Eastman Amphora™ 3D polymer.

Why co-polyesters?

The way we see it, FDM 3D printing filaments will be all about functionality in the future. How you are going to use your prints in the real world will define what material you choose. We have found a lot of characteristics in Eastman’s range of Amphora co-polyesters that offer functionality, durability and efficiency. Added benefits compared to ABS are the low-odor while printing and that Amphora based filaments are styrene free.

Compared to PLA, Amphora features a much better heat resistance, starting at 75C for colorFabb XT, 85C for colorFabb nGen and 100C for colorFabb HT. You can find the comparison between our co-polyesters, ABS and PLA in the table below:

More information about emissions during 3D printing can be found in the brochure that Eastman has prepared after some extensive studies. You can find the pdf extract of this study by clicking the button below:

Continue reading

Time-lapse contest 2015 finalists (CLOSED)

Important notice

We have noticed in the past few days that during the voting process for our time-lapse contest irregularities have arisen. We have deliberately chosen to keep the voting process as open and accessible as possible, hoping that every vote would count equally. Unfortunately advantage has been taken of this open policy. Therefore we have chosen to close the public voting system.

All 12 finalists will be judged by our own internal colorFabb jury to avoid any conflicts of interest and make sure that everybody has an equal chance of winning. We regret the fact that we have to take this step, since we found the option of an open and democratic voting system especially appealing.

We will announce the winners on Friday.


Right before Christmas we came up with a time-lapse challenge for everyone with a 3D printer: print something cool, something functional, something special. Make a time-lapse and send it to us. Prizes were quite substantial:

1st prize
4 spools of your choice for 12 months! In all, 48 spools and we spread it out so you can benefit from the new materials we will release in 2016 as well!

2nd prize
2 value packs!

3rd prize
1 value pack!

All contestants will receive a sample pack of our filaments soon as well!

And in the past few weeks a lot of people went to work and the results have been amazing! We were blown away with all the time and effort the contestants put into their time-lapses and prints. Especially in the final 72 hours we received over half of all the entries.

We want to thank everybody who has entered the competition for all the work they did, everybody for sharing and watching the videos.

And now… it’s your turn. We are a big fan of democracy here and let you, the people, the decide who will eventually win.

We have pre-selected 12 videos of over 90 entries. Below you can view them again and vote for your favorite: select the video and hit vote. That’s all.


[total-poll id=1094]


We will print you!

Hi,

Here is my last blog report. I proudly can announce that the project is finished and the service for metal prints is coming. The name of our service will be „ we will print you“ and will start as a B2B sevice. 3D scan companys and designer can order their busts and products at our website which is coming soon. If you are interested in a bust of yourself or a friend, please get in contact with our partner ScanLounge from Amsterdam. There you can already get information about getting scanned and options of the result.
If you have a scan company yourself and you are interested in including metal bust into your range of products please contact us via our website www.wewillprintyou.com when it is ready. If you want some more infomation just contact the staff of Colorfabb. We are also interested in testing prints for your special need.
If you are a designer or a prop master and you are searching for a method to get your unique product in bronze, brass or copper look? Just contact us to get additional information.

I hope you will enjoy our service and find what you are looking for.

Best wishes,

Ines


3D Printed Bike


Summer has come to the Netherlands and we all love to ride a bike here.

3D printed bike

Read more about the 3D printed bike here!

XT-CF20 bike project release

Hey you 3D printing enthusiasts!

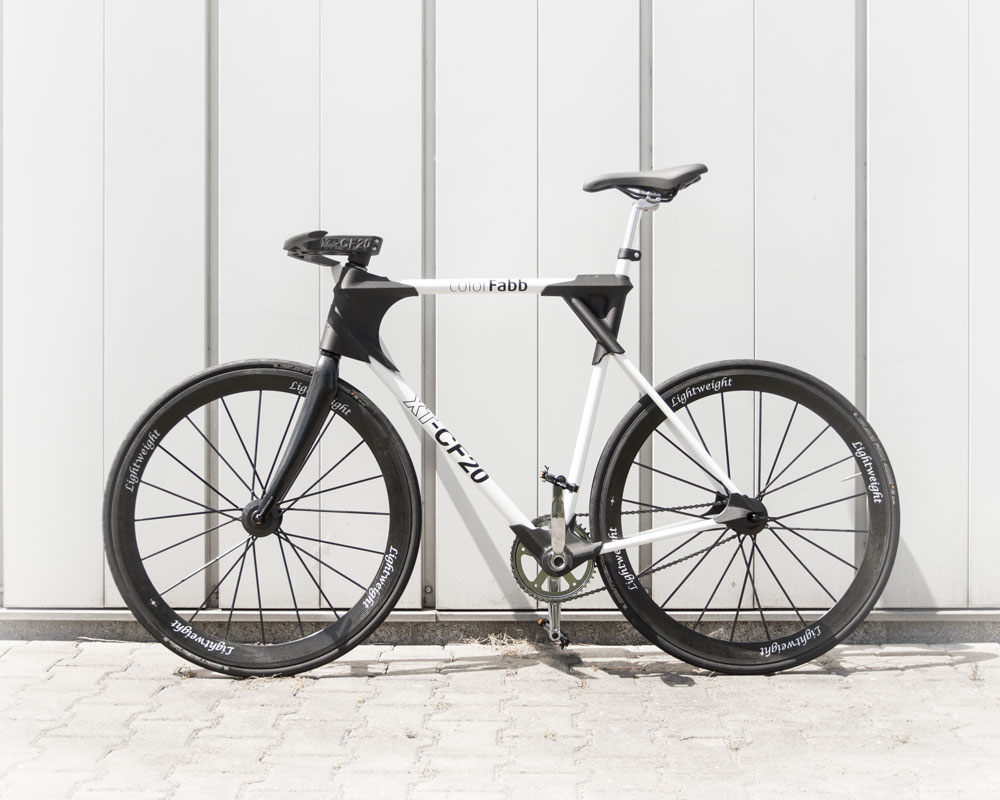
So this is what’s possible with everyday’s 3D printers and a suitable filament: the XT-CF20 bike

XT-CF20 bike
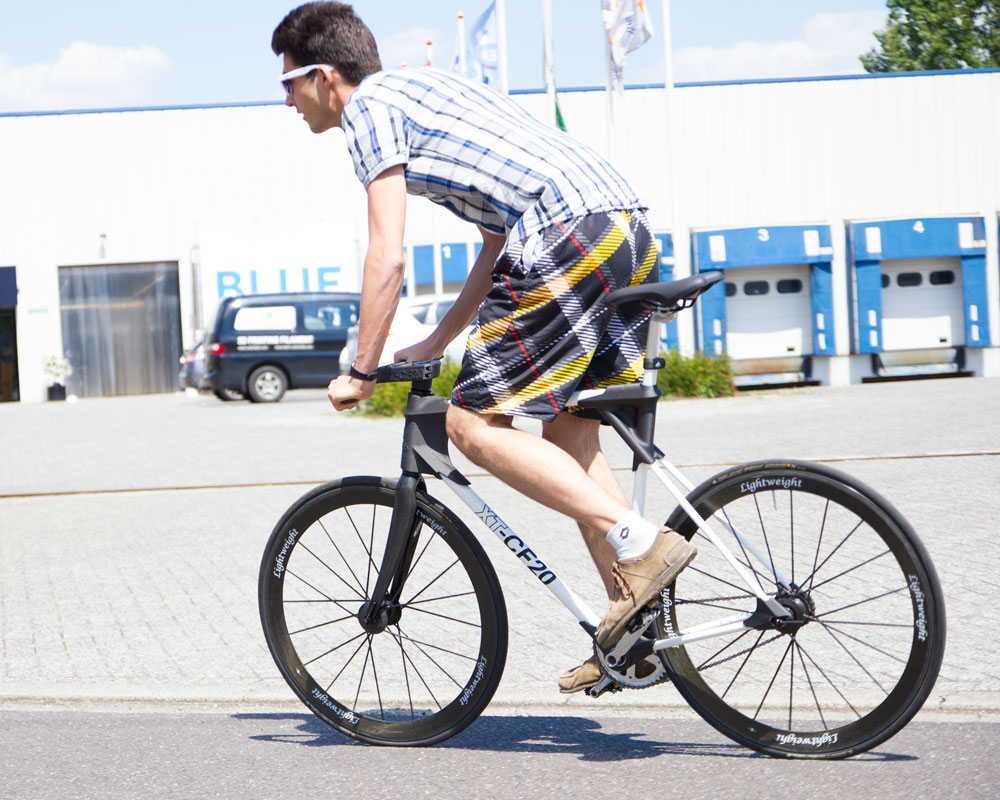
The XT-CF20 bike being driven outside colorFabb’s office

I’ve been working on this 3D printed bike during the past 5 months and now we are ready to publish this, it works like charm 🙂

XT-CF20 bike frame
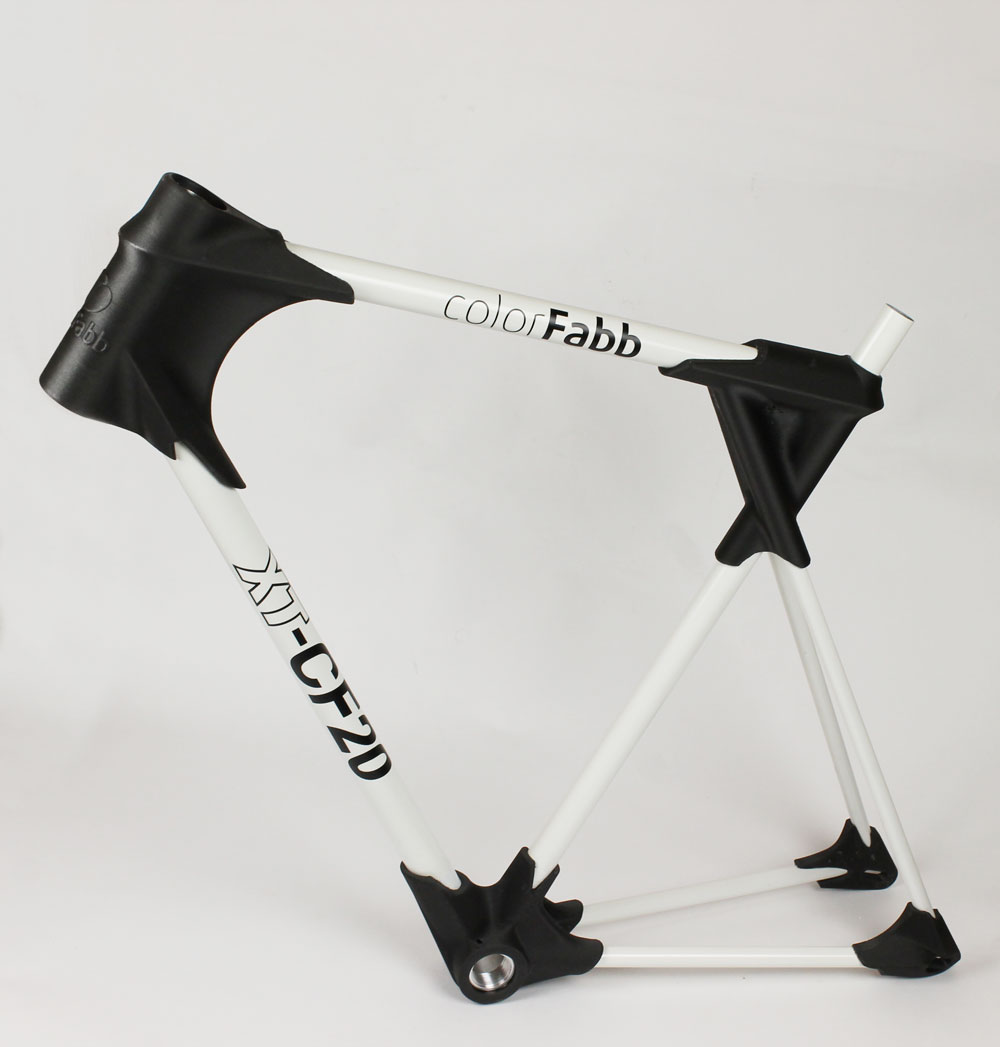
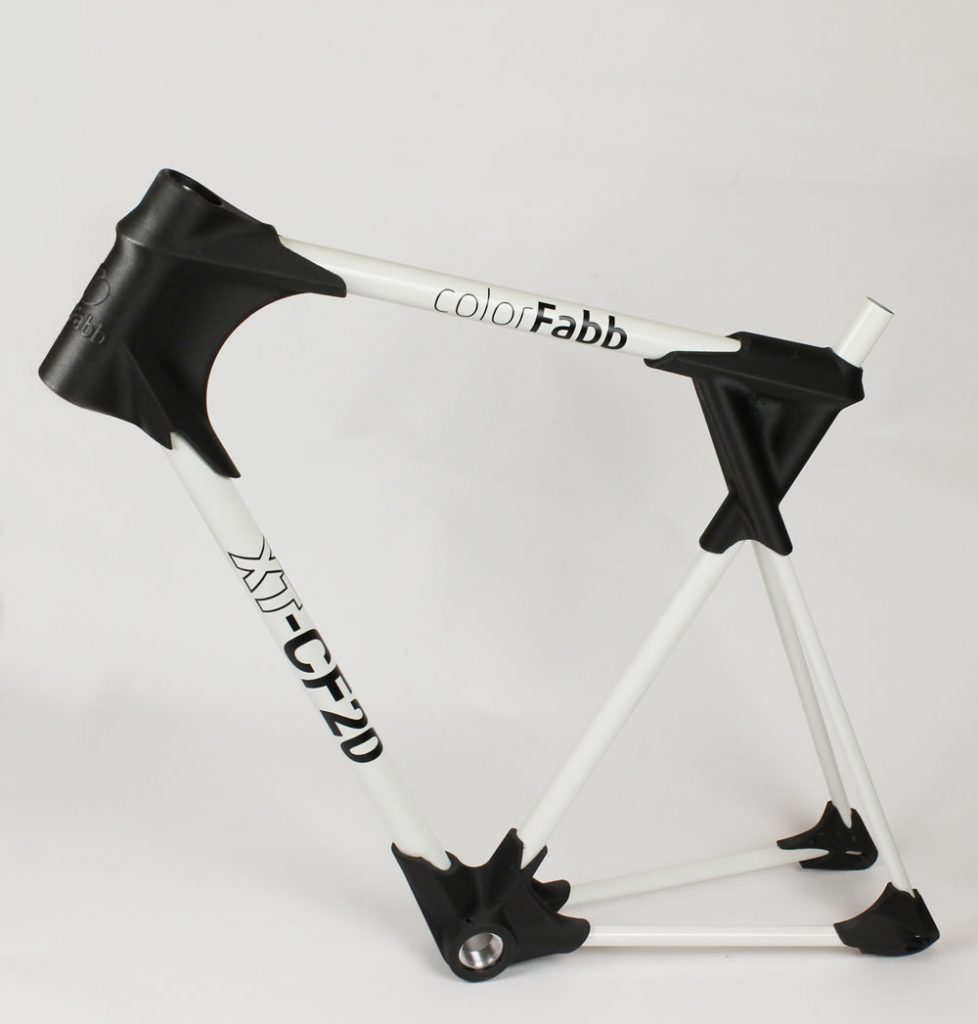
The XT-CF20 bike frame

We’ve used an Ultimaker Original Plus with a 0.8 nozzle to print these parts. Only the handle has been printed on the STACKER.

Printing the entire bike frame would take too much time and material, so we decided to print the lugs and connect tubes to them. The result is an amazingly strong bike frame at an acceptable weight.

The big benefit of making your own bike is that the sizes of the bike can be customized manually before 3D printing to preserve best ergonomics. Various types of tubing can be used including carbon, titanium, aluminum or bamboo.

3D printing allows a huge freedom of forms and allows unique features in the design. This has been used to implement a new kind of adhesive distribution system. With this technique one can assemble the bike and add an polyurethane adhesive which distributes itself to the right places without getting your hands dirty. The strength of the bike frame has been tested with a FEM analysis and, of course in real life use.

the XT-CF20 bike can be downloaded via GrabCAD: https://grabcad.com/library/xt-cf20-bike-3d-printed-bicycle-1

Youmagine: https://www.youmagine.com/designs/3d-printed-bike

Thingiverse: http://www.thingiverse.com/thing:892442


Enjoy 🙂

Stephan

Let‘s Polish!

Hi and welcome back to metal printing,

I finaly got my first busts back from the polisher. It‘s pretty impressive, the material changed fully from dull and shineless to a real metal look. Now I‘m wondering if there is the possibility to achieve this finishing at home too. I tested different kinds of polishing which everyone of us could use at home: Trumbling with screws, ceramic and steel; polishing with steelwhool and sandpaper and (my favorite!) „Dremel“- tools. I like this methode and what is possible with it. But it is still far away from professional polishing. The professional one looks like real metal and mine looks more like shine plastic.

So I would like to hear about your methodes and the experiences with it. Did you already try to polish your metal prints? And if yes how does it look and what did you find out?

blog2

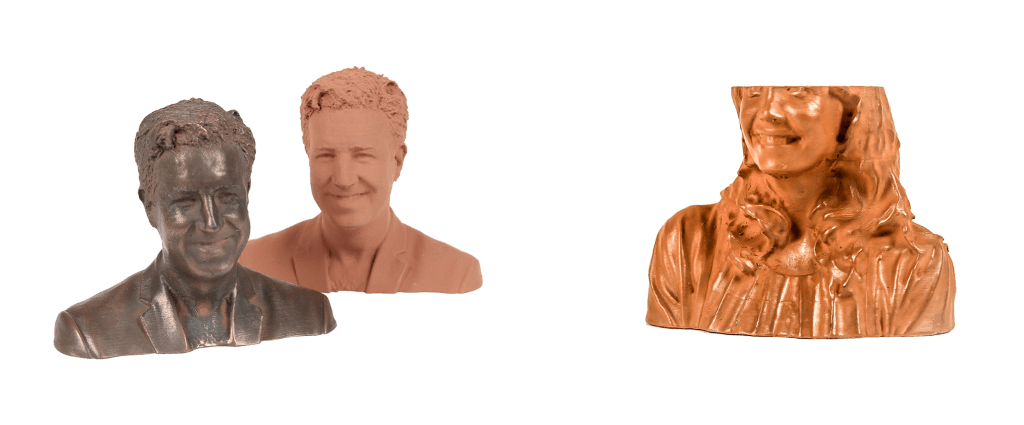
On the left side you can see the professional polished bust in comparison with an unpolished one. And on the right side is an unfinished print which I used for testing the Dremel – tools for polishing.

I‘m looking forward to hearing from you.

Your Ines