3D Printing Day

Today is December 3rd and traditionally this date is known as 3D Printing Day. It was declared 3D Printing Day by 3D Hubs last year and this year again, so technically we can speak of a tradition.

There will be events all over the world at 3D Hubs. Check them out here. Last year we had an open house day on December 3rd which was fairly well attended. The people who visited us and toured our factory & print lab even saw an early version of the material that was to become nGen_FLEX a full 10 months before it was officially released!

3dprintingday-banner

Actually, as you read this our R&D team is working hard testing new materials and making sure the future of 3D printing materials is at least as exciting as it has been in the past four years.

This year we will not have an open day (no use ringing our doorbell – we will not open the door), but instead we have collected some of the coolest prints of the year. Some of them made by us, other prints made by others. We see a wide variety of awesome prints coming by every day on Twitter, Facebook, Instagram and what you – our users – send us by email. This is by no means a complete list and we will highlight the most astonishing prints of the year at a later date, but we found that these astonishing showpieces deserved another moment in the spotlight…


The gCreate Rocket

rocket lala-5

Design: http://www.thingiverse.com/thing:427789

From our own print lab, the trick of this print was in the post-processing. Ever since releasing our first metal filled filament, bronzeFill, in 2014 we have received a lot of requests about post-processing these special materials. We finally caved in and set one of our print engineers Jos to work to print the rocket, sand it, polish it and to write about it. You can find the full blog here, but before you read it just look at the image above and wonder if this really looks printed…
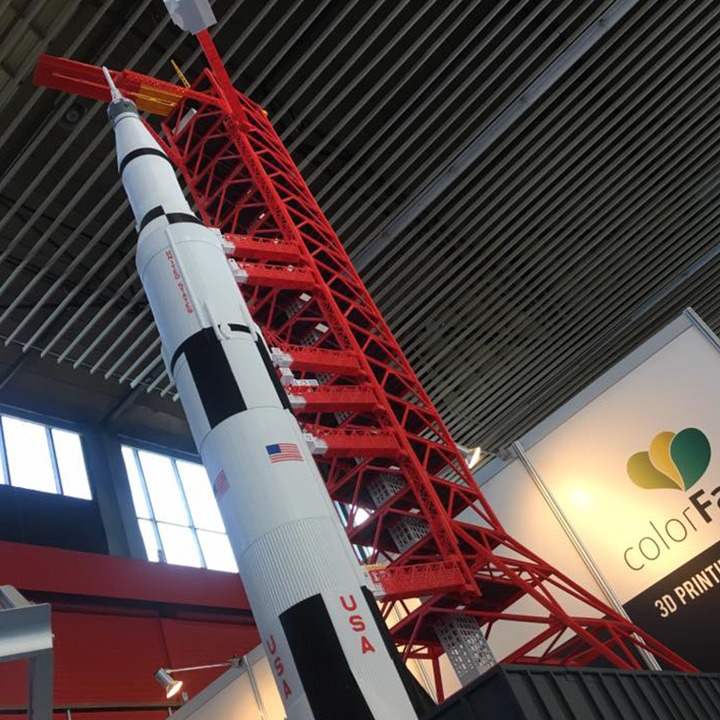
 

Saturn V Rocket

rocket-ig

Design: http://www.thingiverse.com/thing:911891

“Per aspera ad astra” as they say in Latin. Who said we can’t be pretentious? O, we do love our rockets… One of the biggest eye catchers ever is the Saturn V rocket printed by Korneel Bullens. We had this collossal print (600+ pieces, 3500+ hours of printing on 4 Ultimakers and over 2.5 meters high – thank you very much) on our stand during the AM Show in Amsterdam in June of this year. Korneel is one of our most enthusiastic users with an extremely active 3D Hub here in the Netherlans. Entirely printed with nGen, our all-round co-polyester, made with Amphora™ AM3300 polymer by Eastman Chemical Company. Korneel printed the Toyota Engine with colorFabb_XT earlier and rumors have it that he is working on another ambitious project with colorFabb filaments…

You can read the full blog on the Saturn V rocket here.
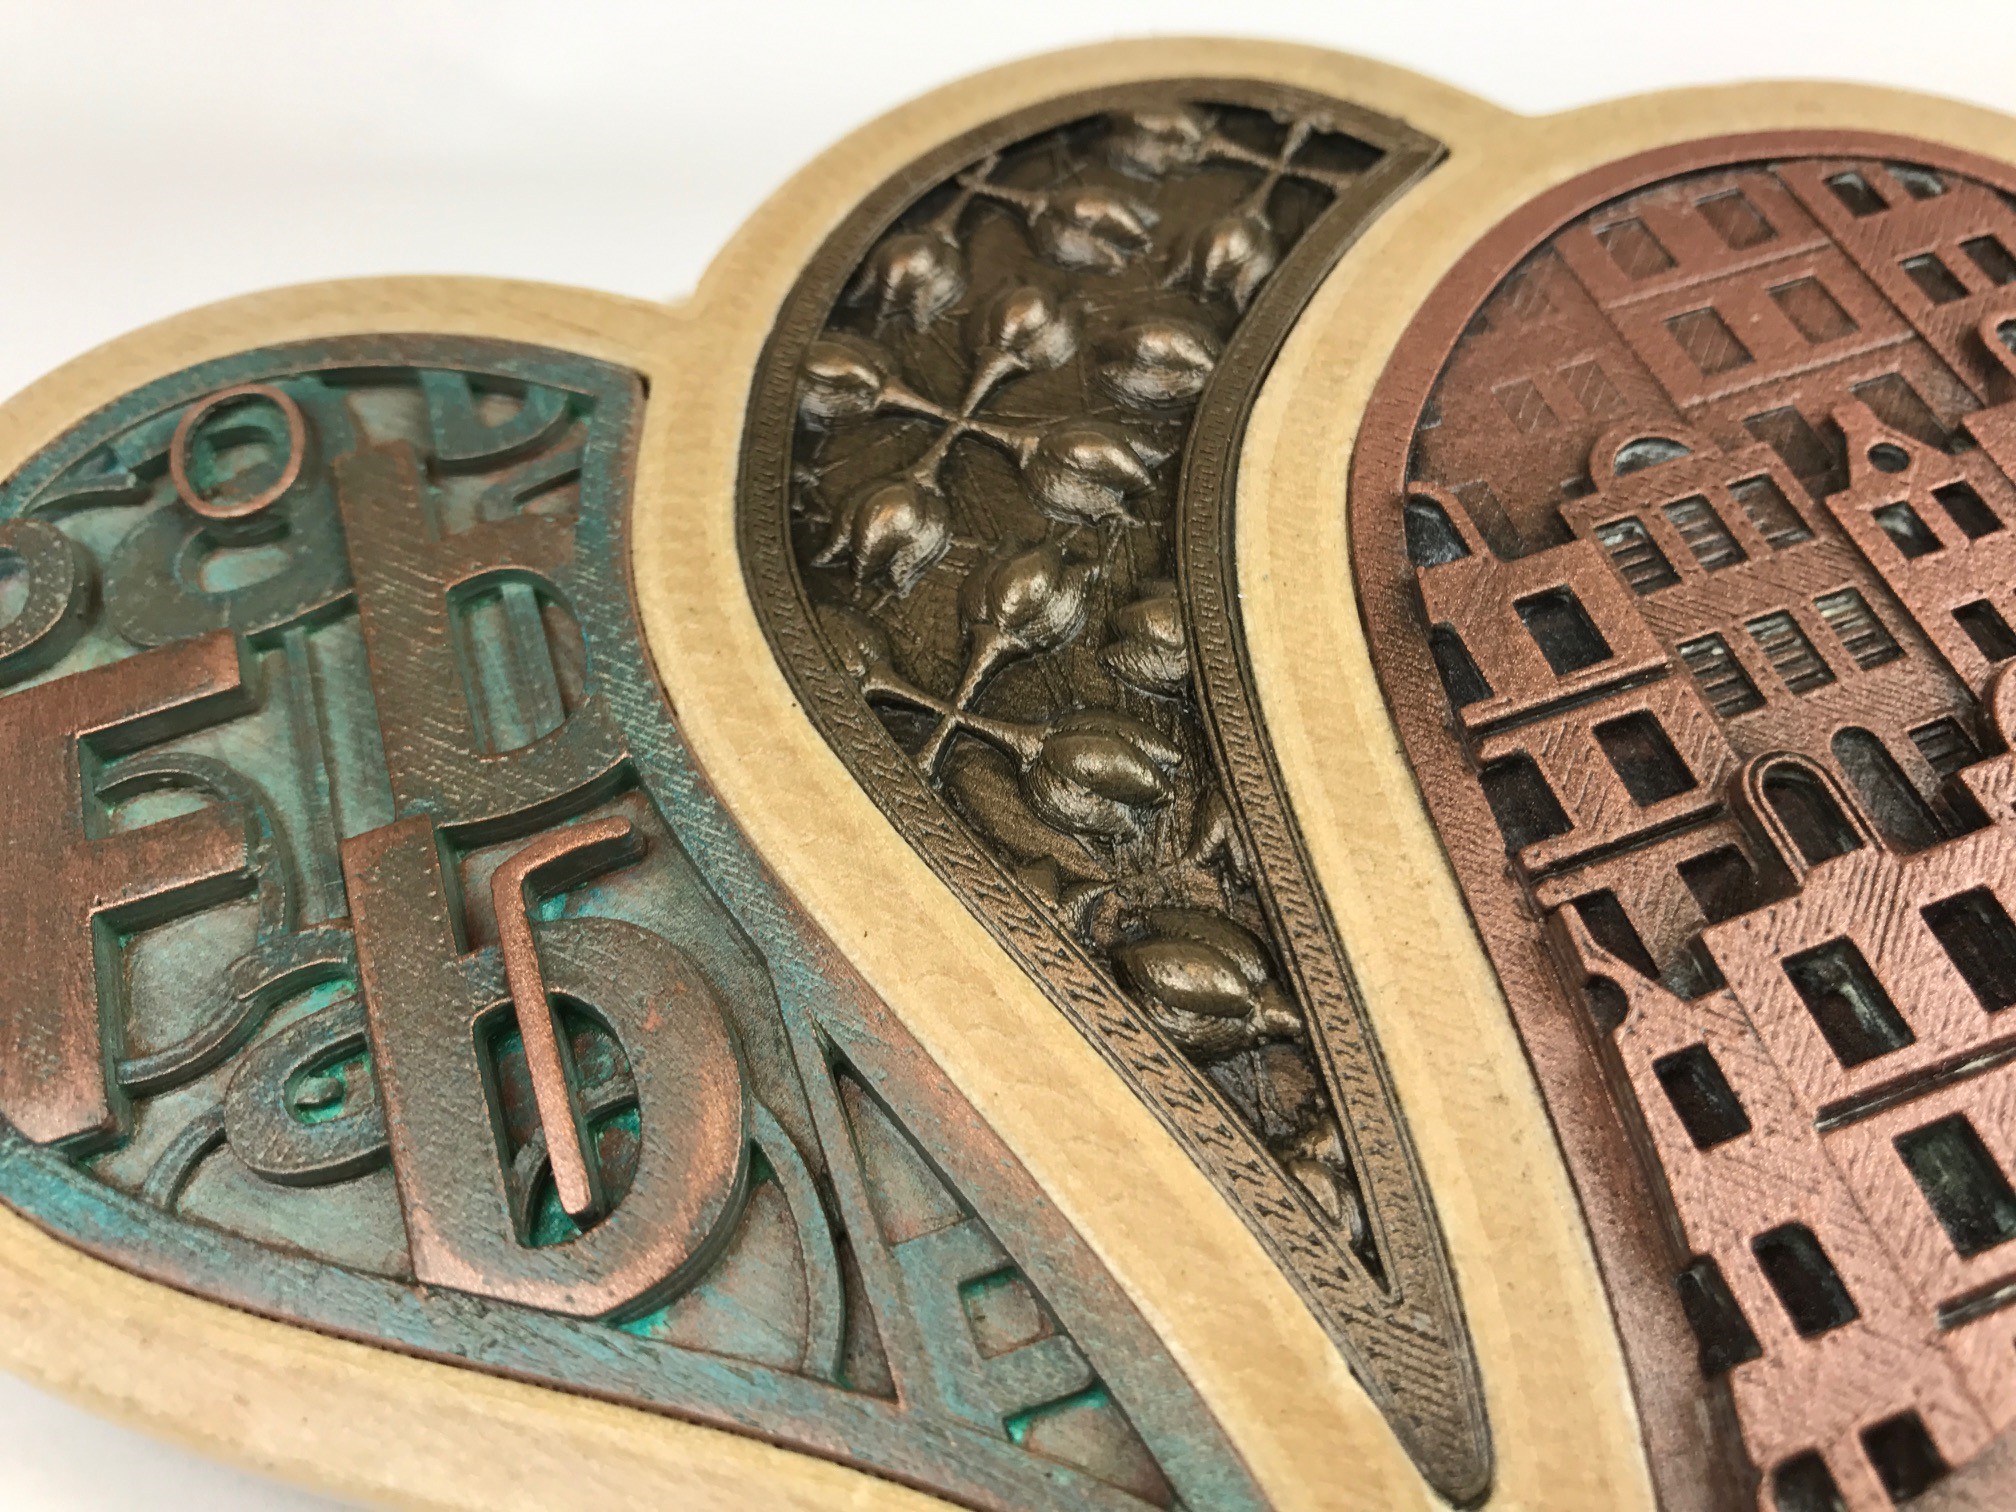
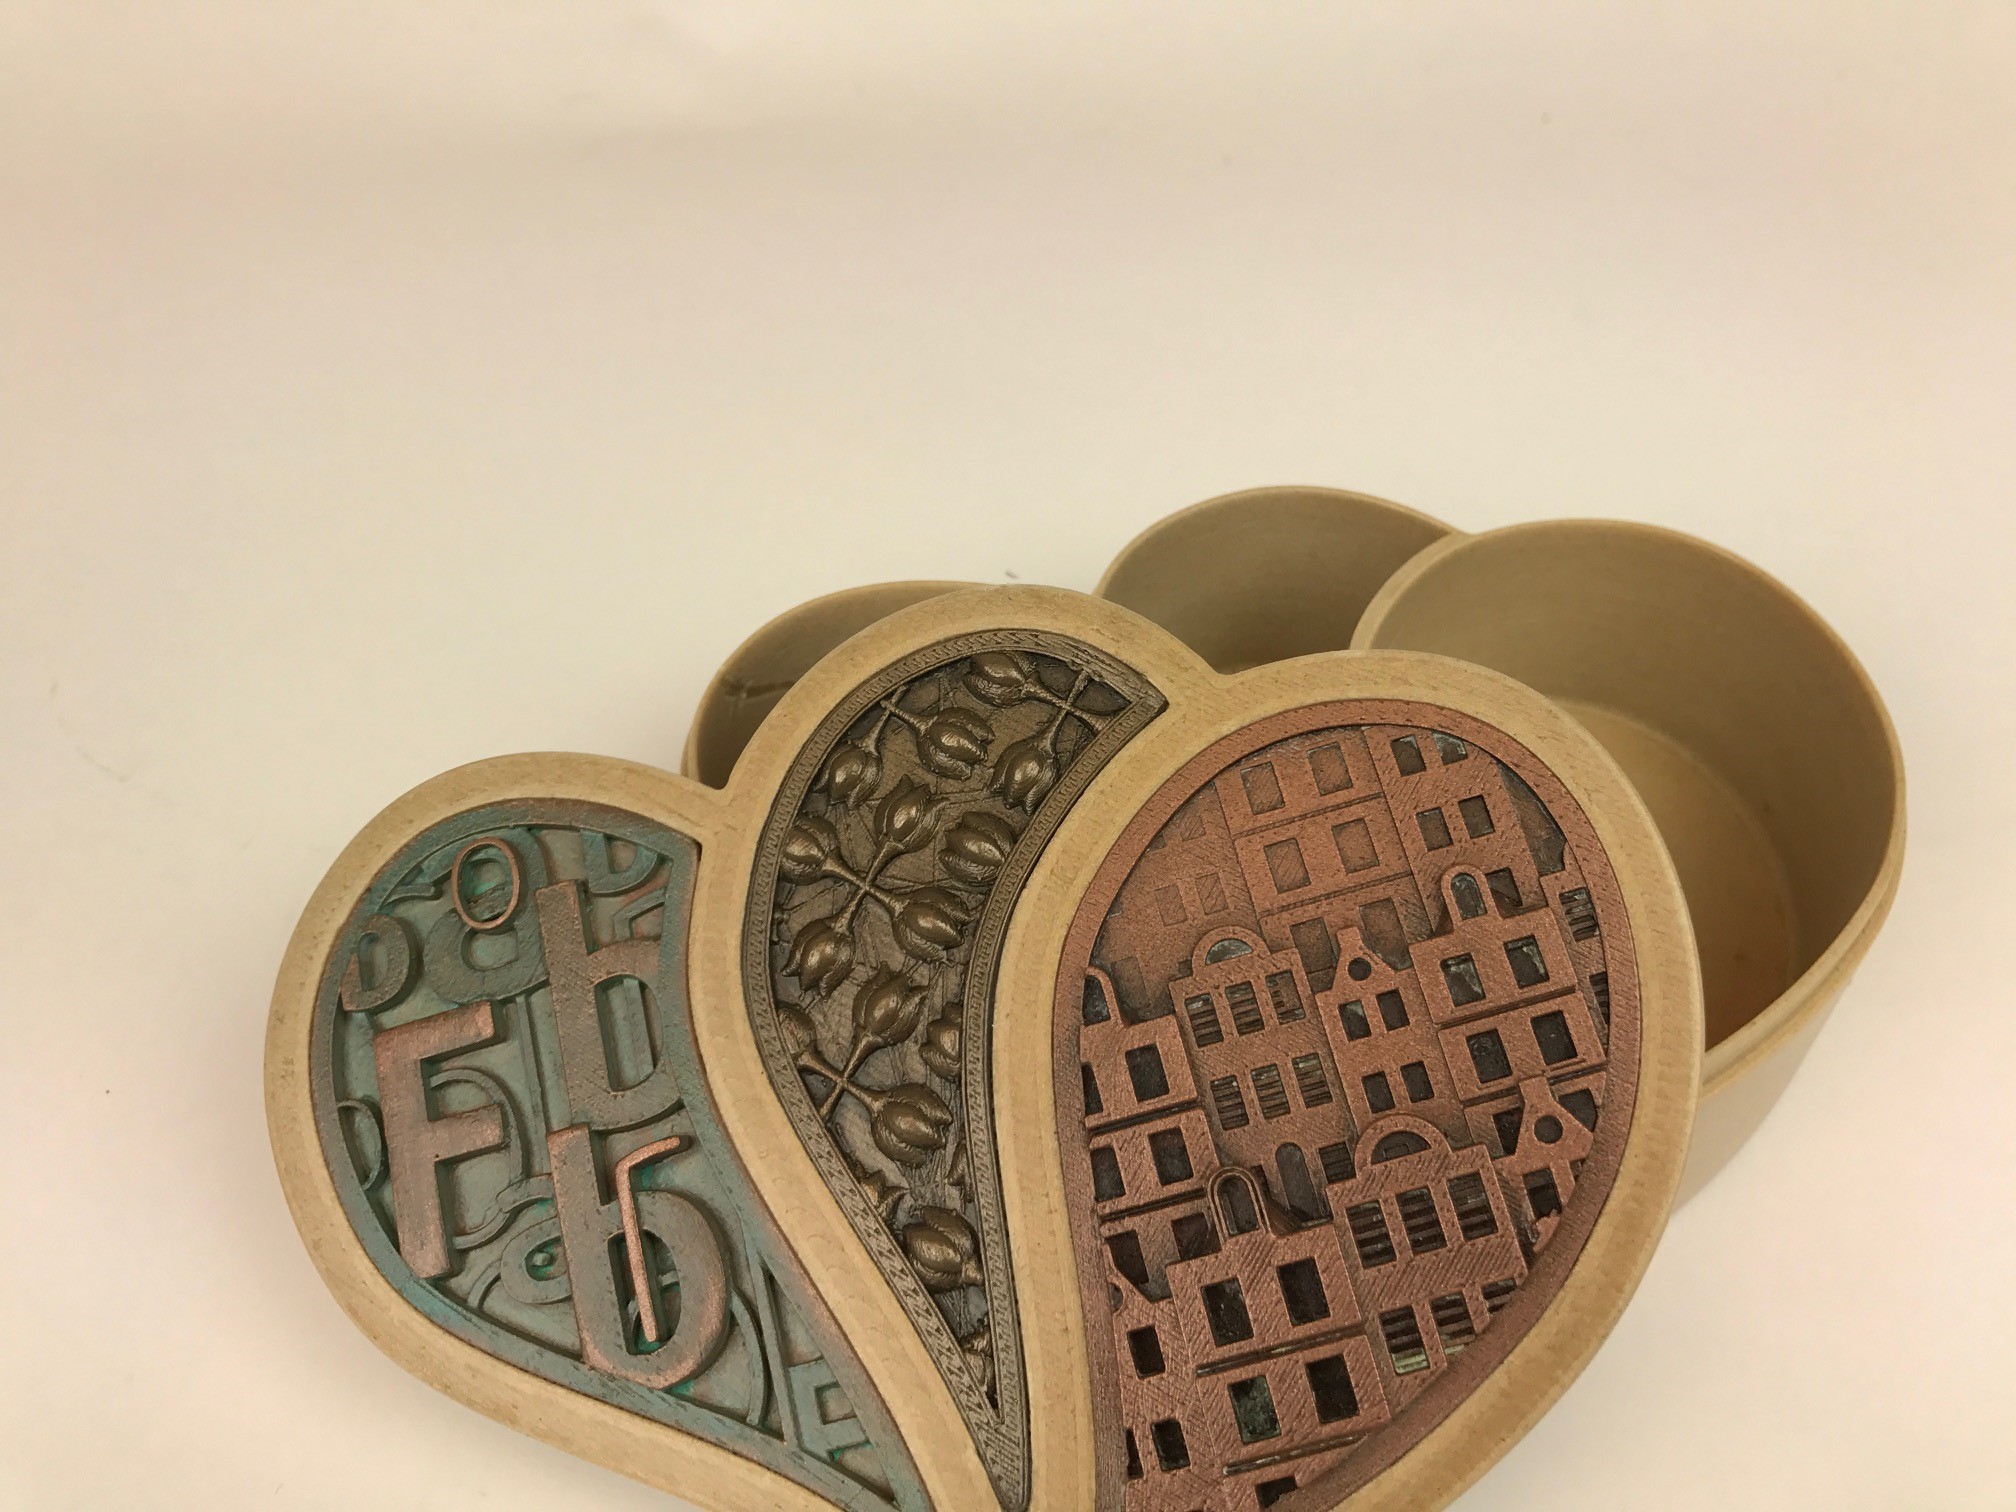
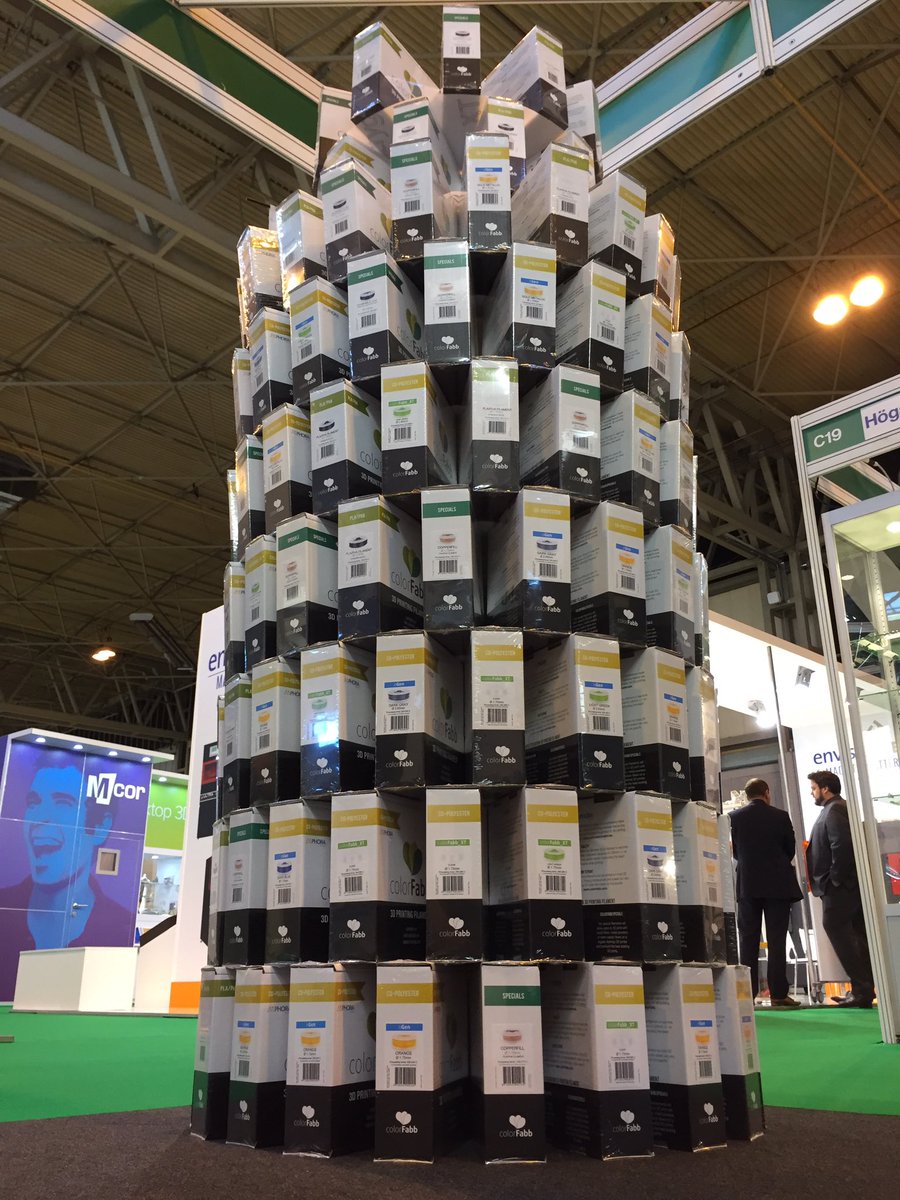
 

colorFabb gift box

box-1

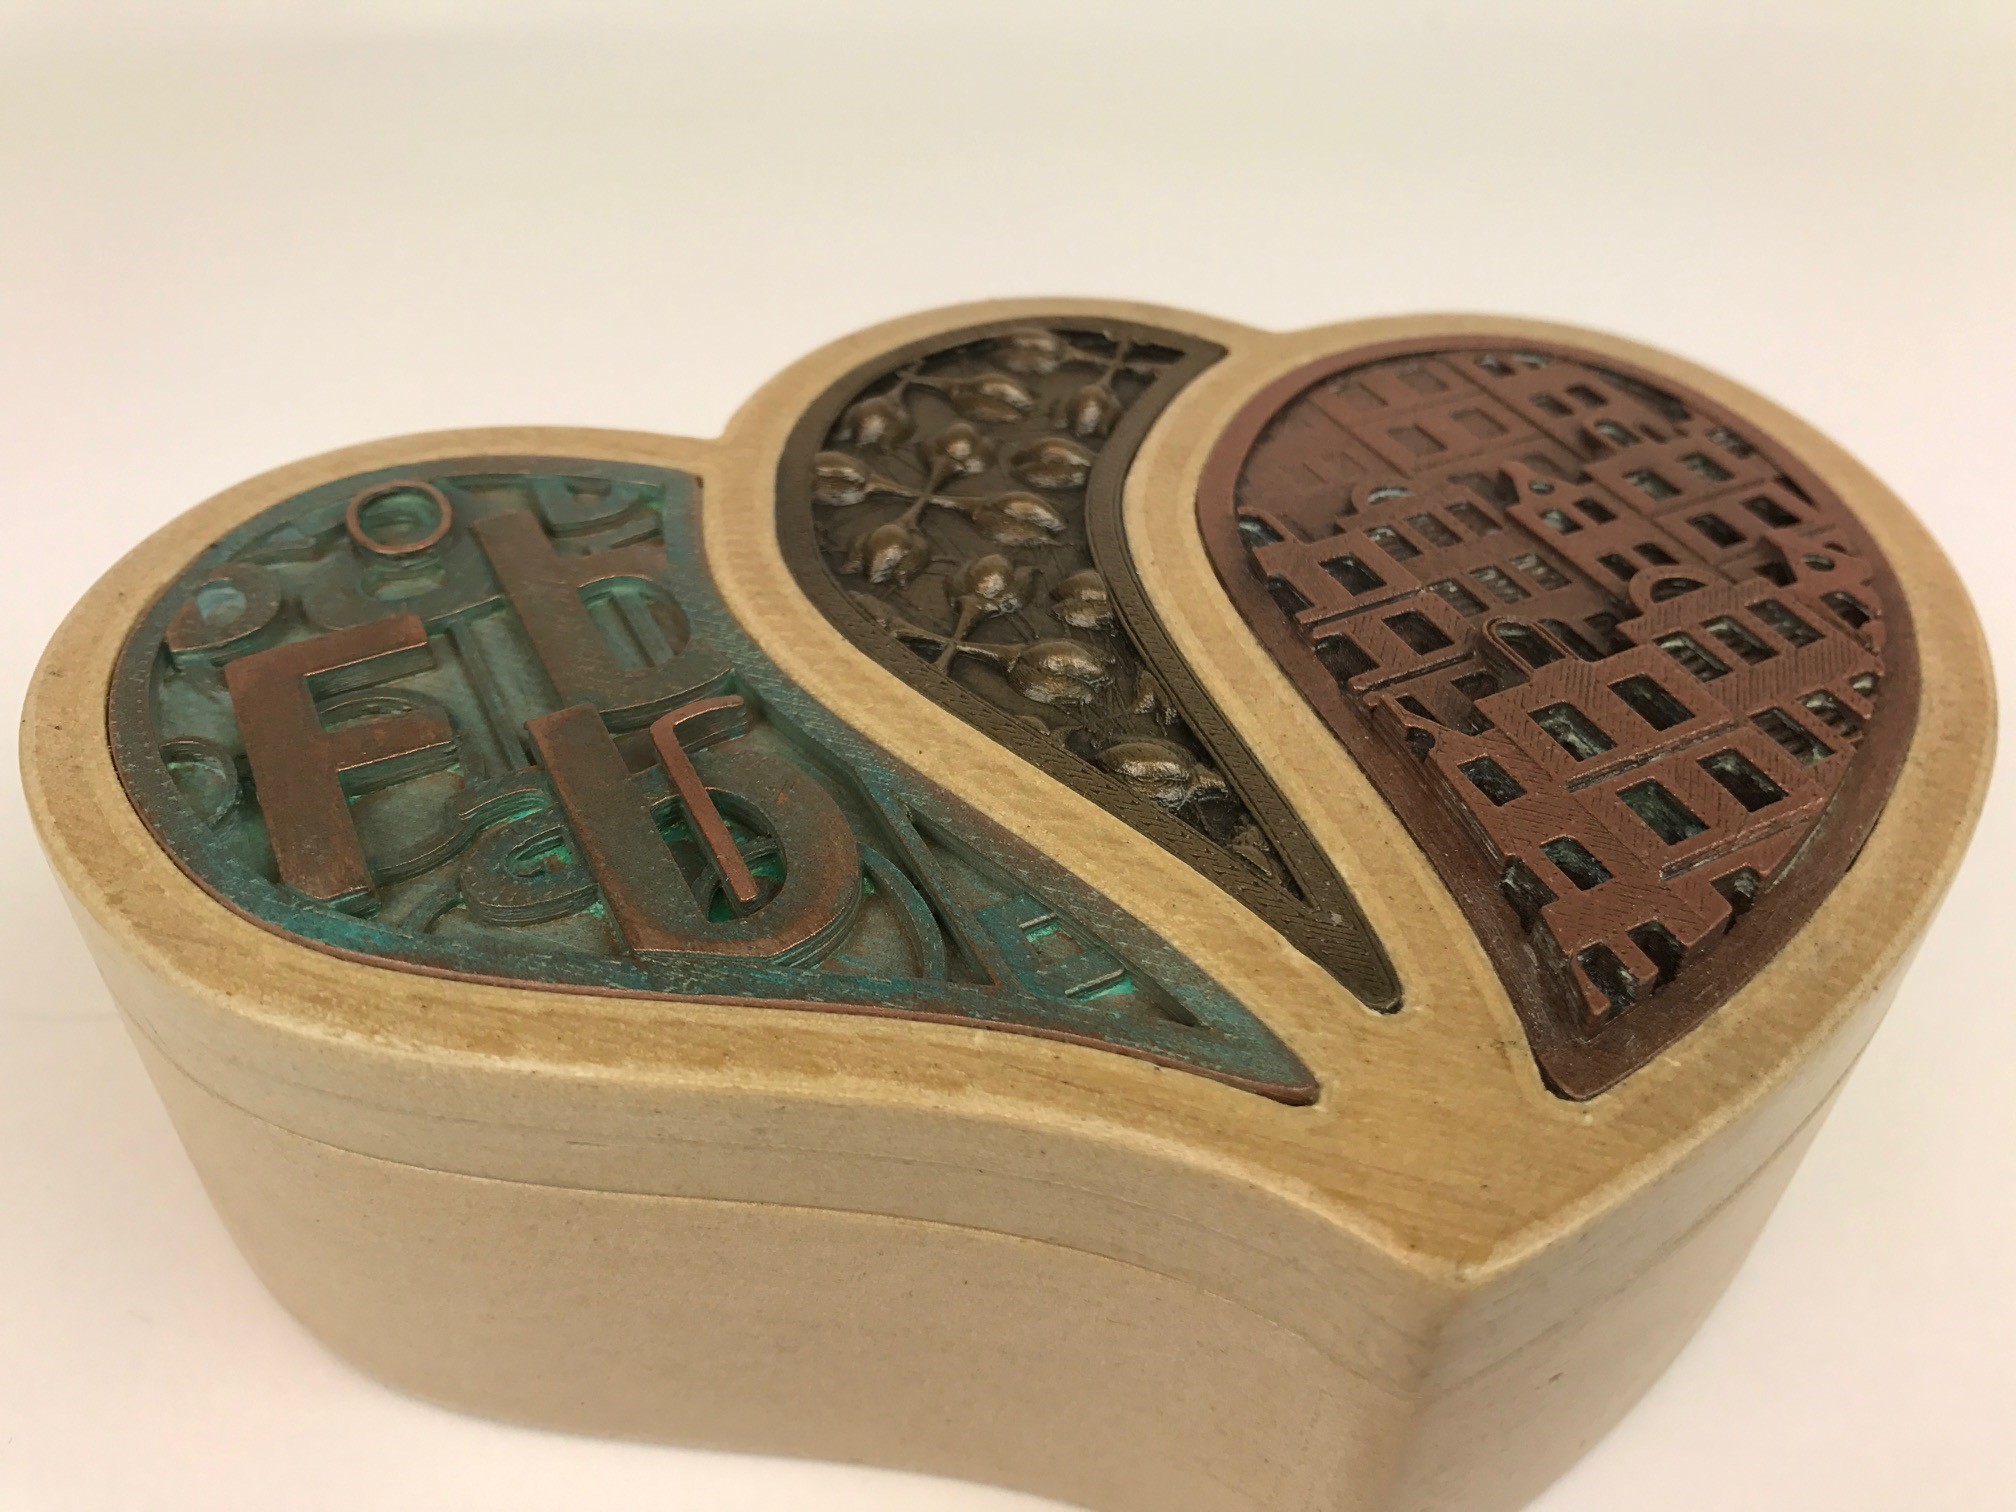
Design: custom made by Tony Short

It’s the little things that count. Things like running into one of our users at the TCT Show for the first time. Especially when that user is Tony Short and he has brought a gift! Tony’s background in typography and love for 3D printing (and especially our special filaments) have resulted in this fantastic gift box, based on our very own logo! The box is still a very much admired (and coveted) object in our office. Made with woodFill, bronzeFill and copperFill it was post-processed by Tony. You can find all the details in the blog we wrote about it a little while a go.
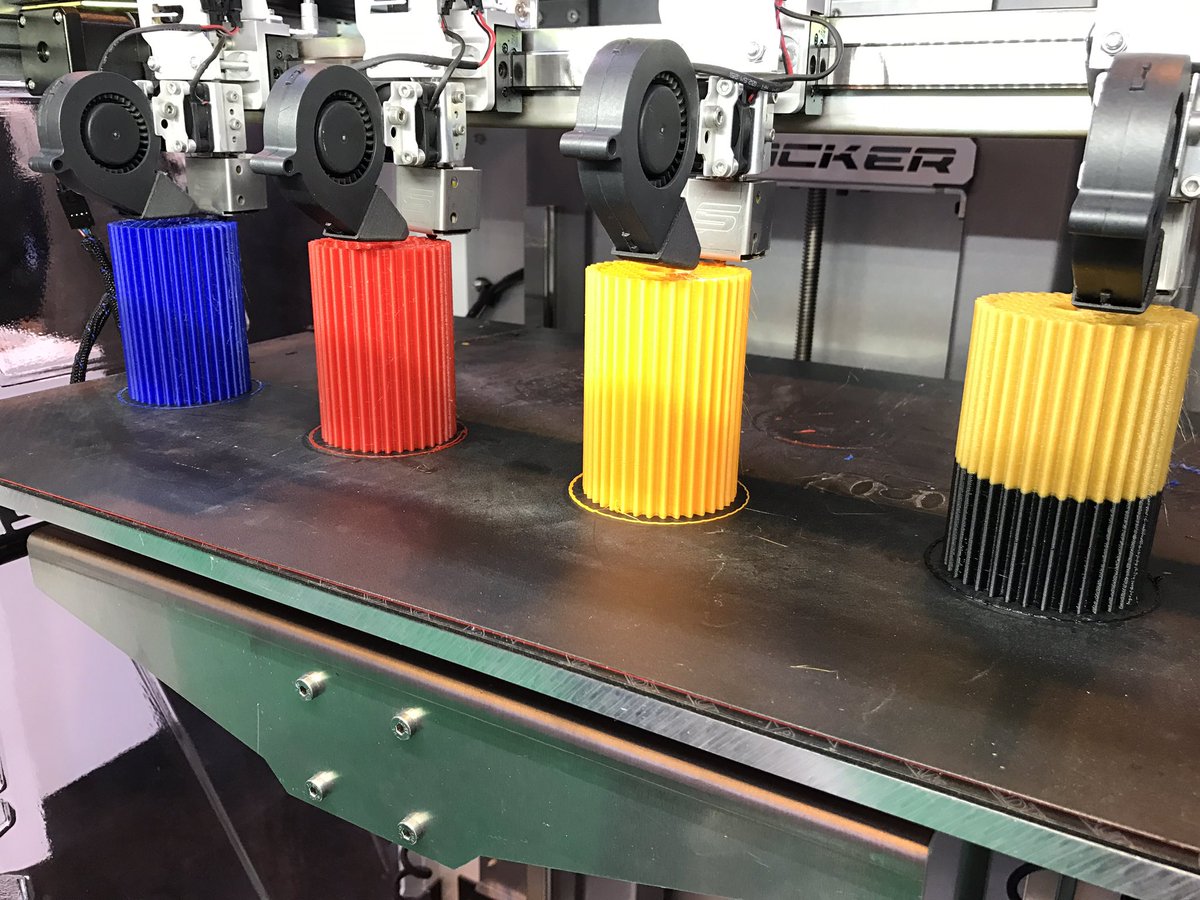
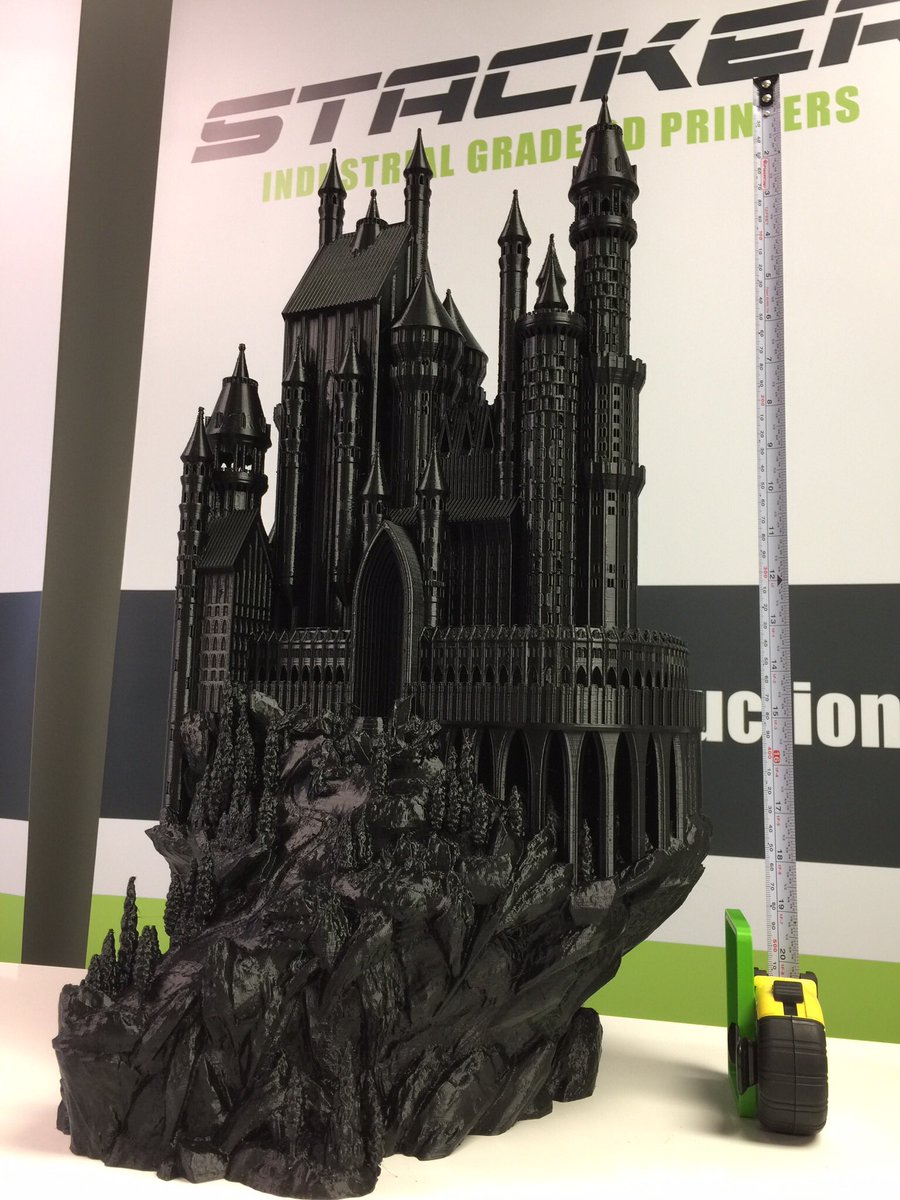
 

Medieval castle

castle

Design: http://www.thingiverse.com/thing:862724

Published only yesterday by the Stacker team, this print measures 57.5mm high and was printed on their Stacker S4. Famed for its four nozzles to accommodate small series production, you can also use one nozzle on this versatile printer to create one highly detailed and impressive print like this Medieval Castle. The material of choice is, like the Saturn V rocket, nGen, an excellent material for highly detailed prints like this one. We printed this castle ourselves earlier this year, but the size that the Stacker team achieved is just downright impressive.

colorFabb is the exclusive distributor for Stacker in Europe. Get more information here or get a quote here.


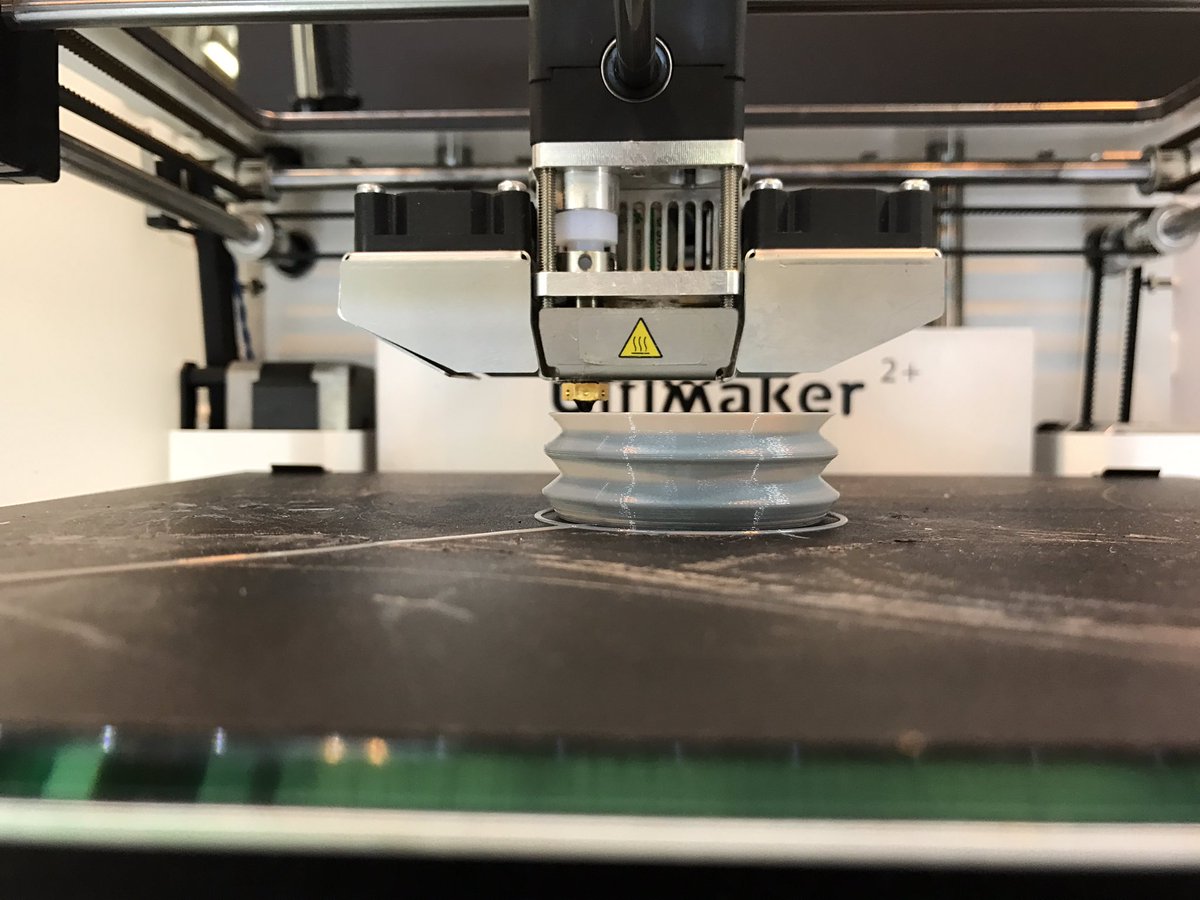
Printing transparent…

transp_ht

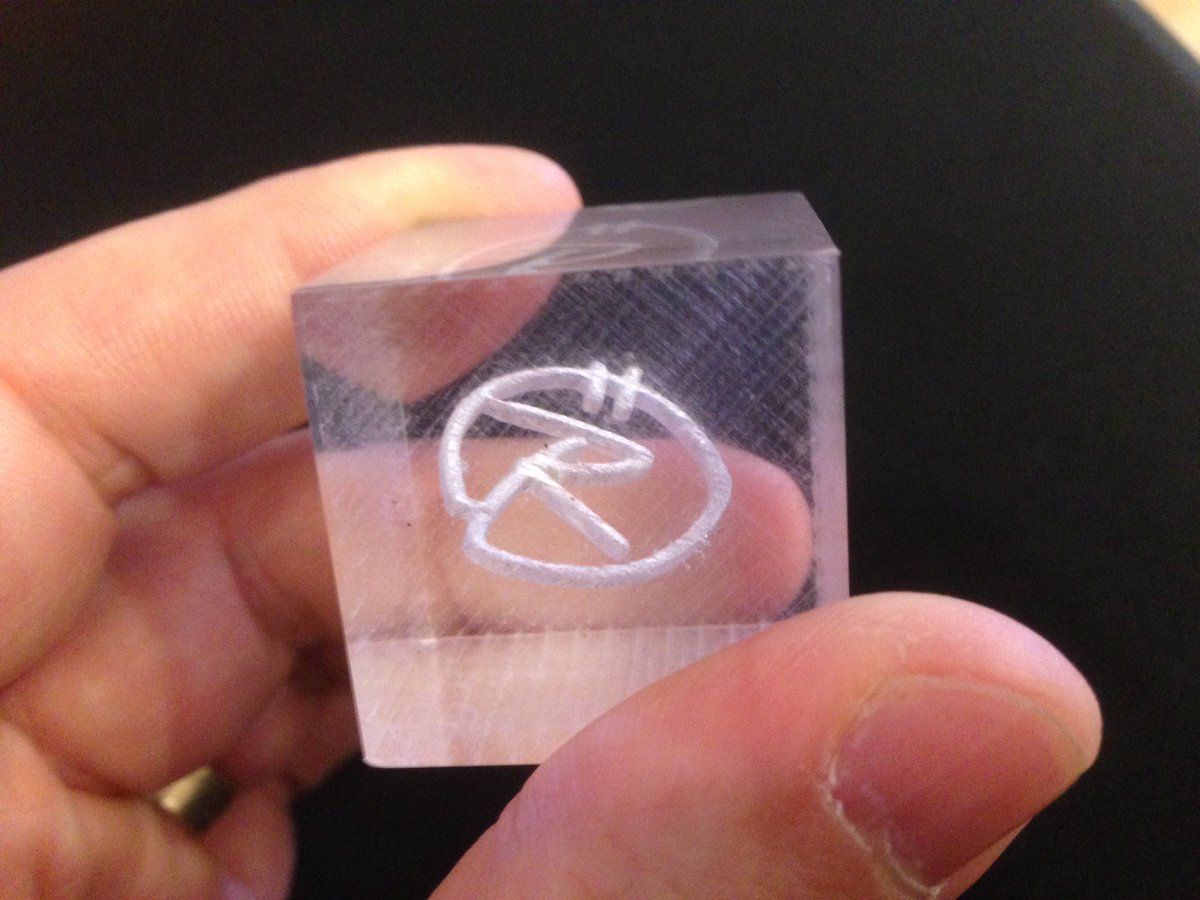
Earlier this year we already posted about how to print transparent with colorFabb_HT and recently we came across Daniel Norée’s tweet where he showcased his results. The transparent block was printed by Robert from 3DVerkstan. You know 3DVerkstan as our distributor in the Nordic region, as well as the Baltics. Printing clear products mainly relies on two key aspects: extruding enough material and getting enough heat (energy) into the new material. Optimal settings can lead to some very clear and transparent parts straight from the printer and it seems that Robert has found those optimal settings. You can find our full blog on transparent printing here.

Note: an earlier version of this blog ommited the part where we give credit to Robert from 3DVerkstan and created the impression that Daniel Norée printed this transparent block. Thanks you Daniel for pointing this out and sorry Robert!


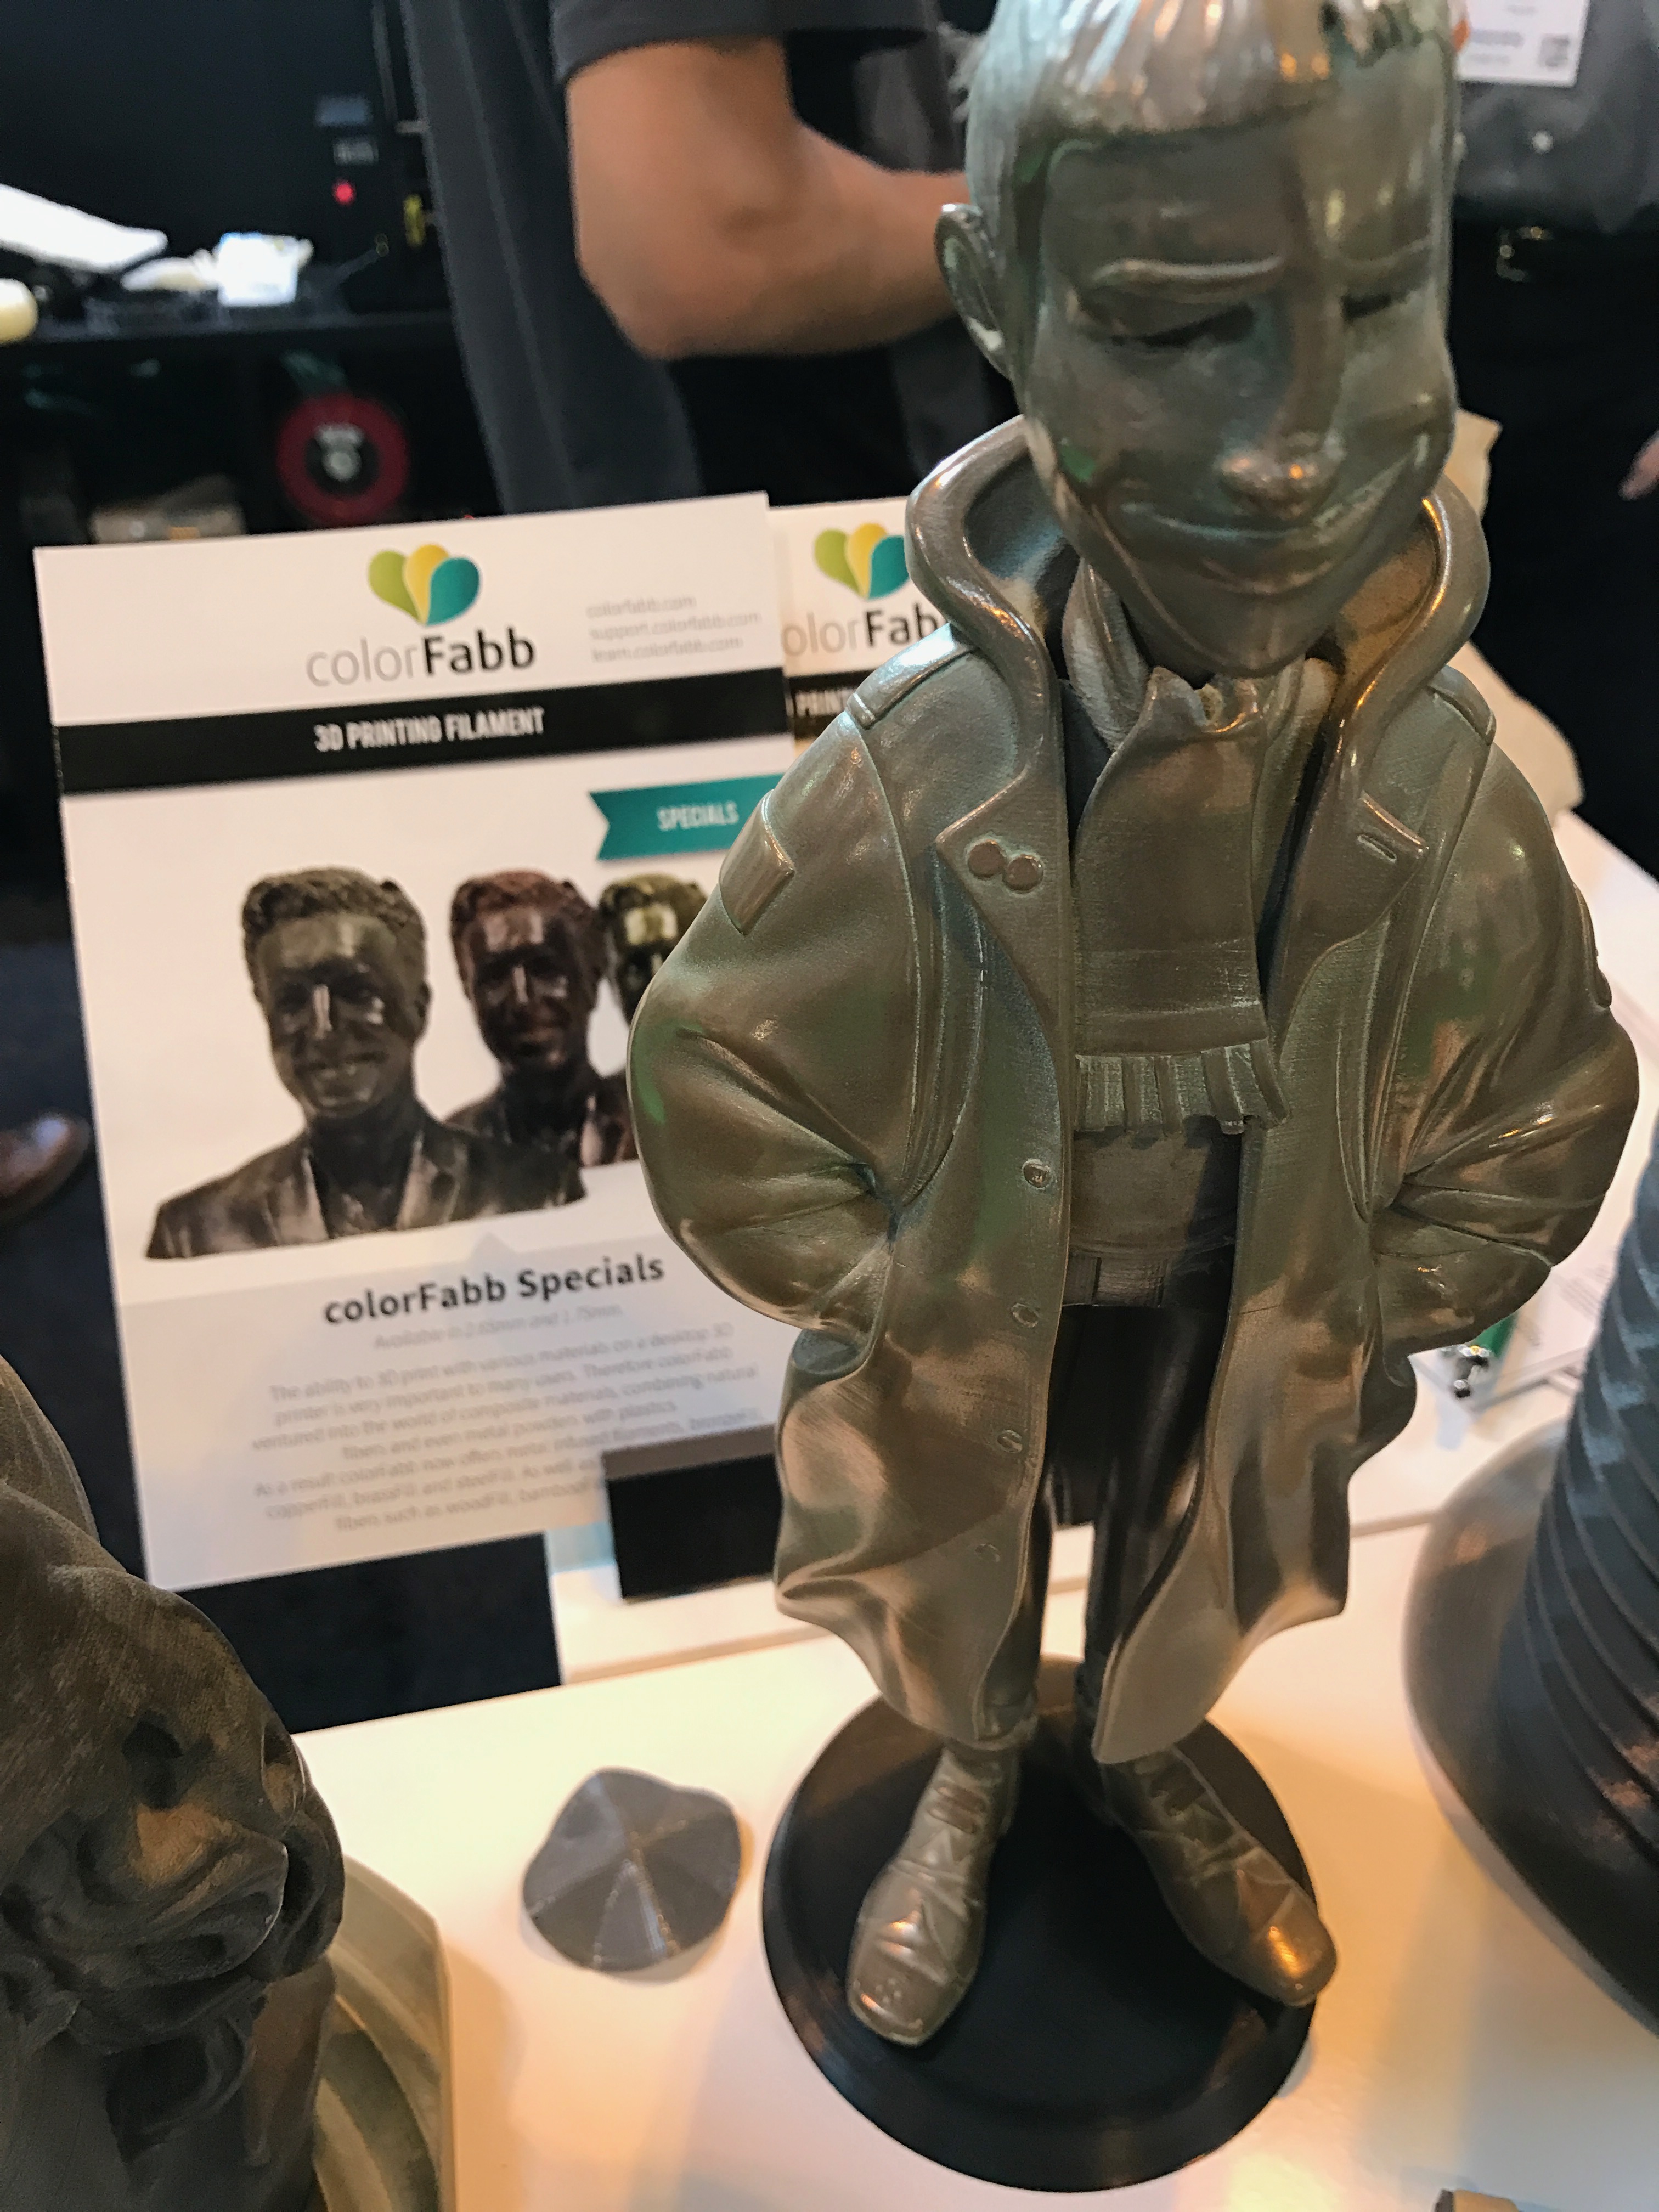
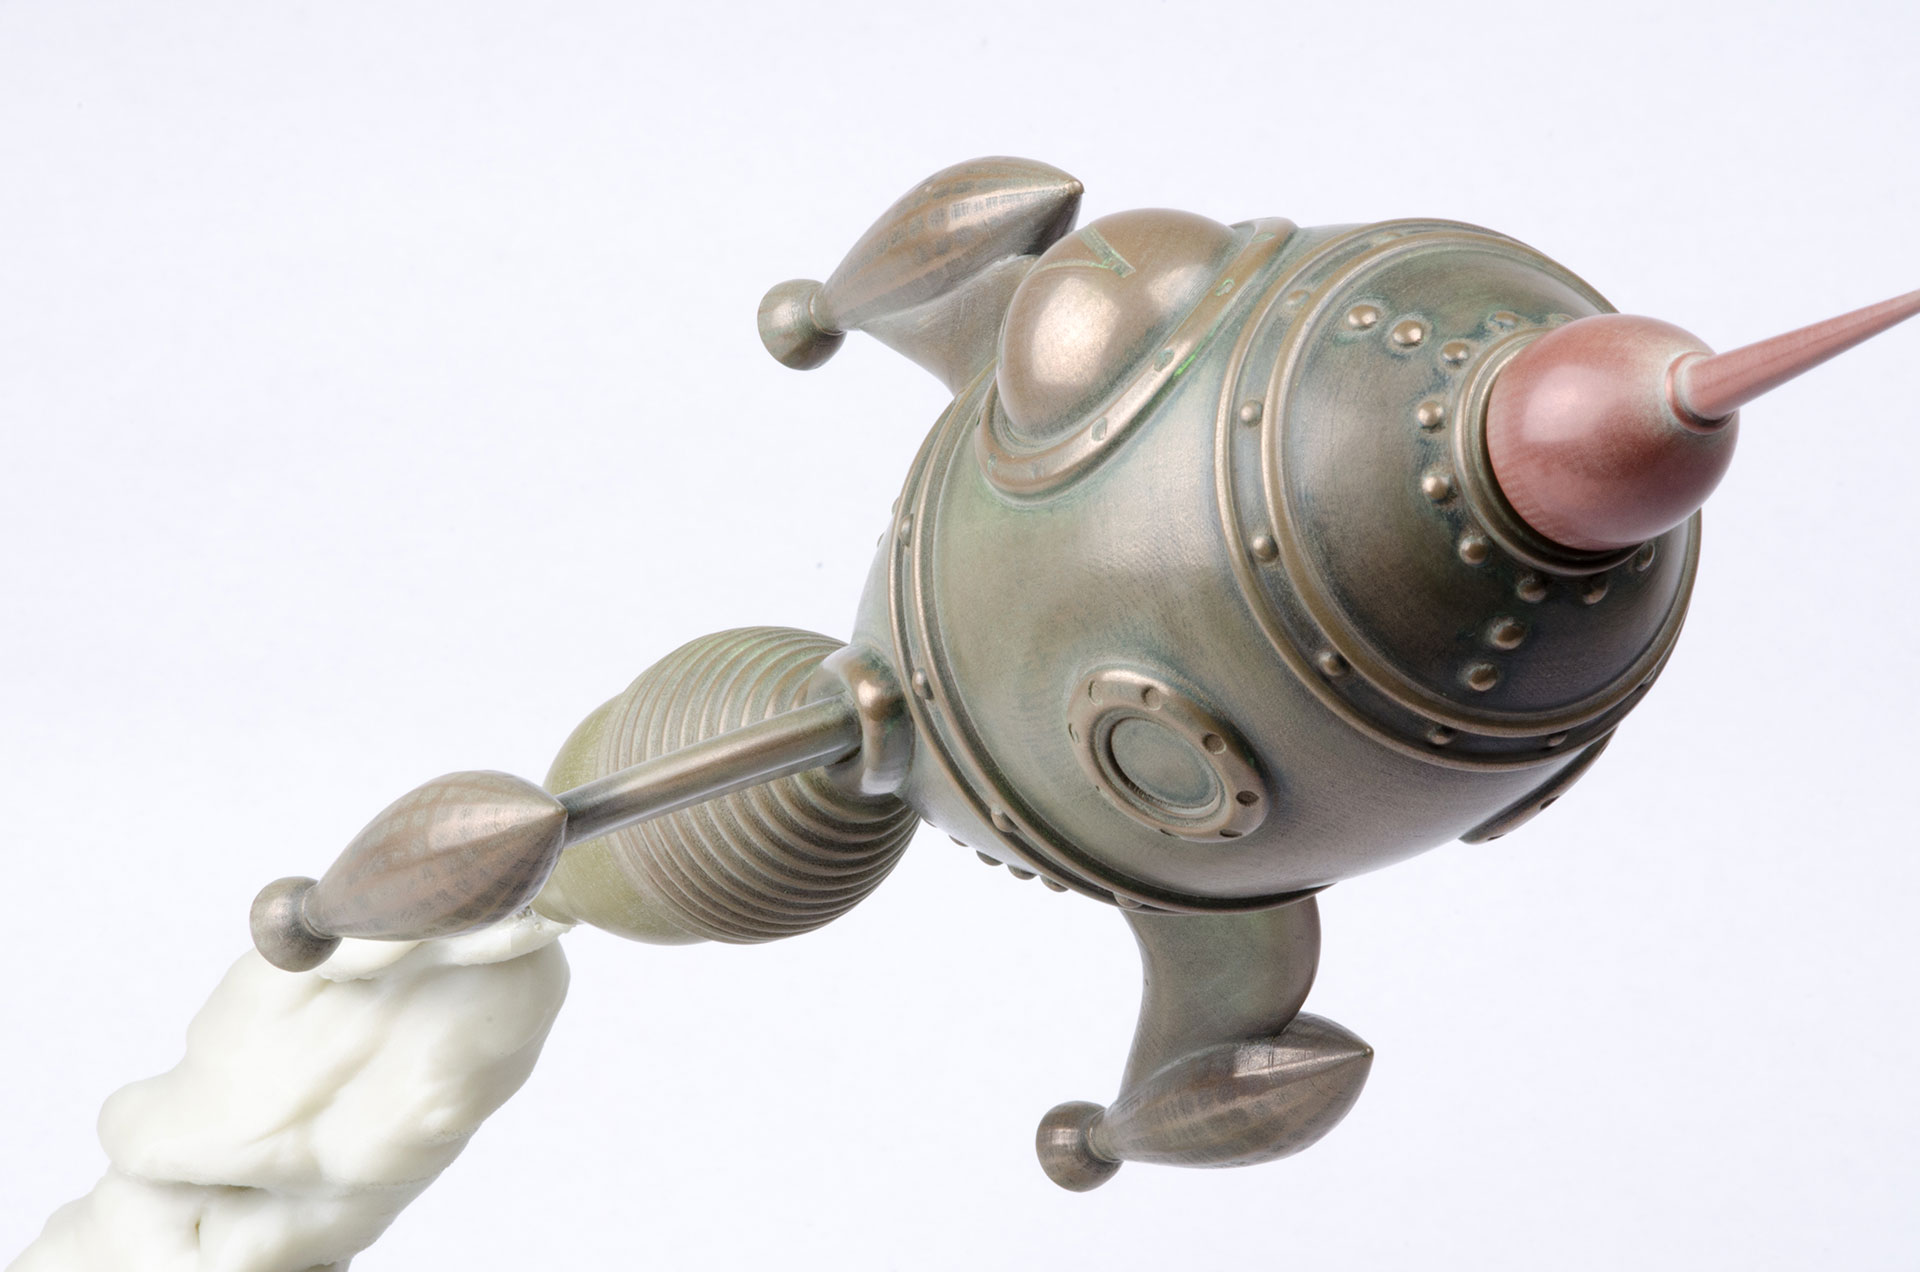
Steve Cox’ printing with bronzeFill

bronze_steve

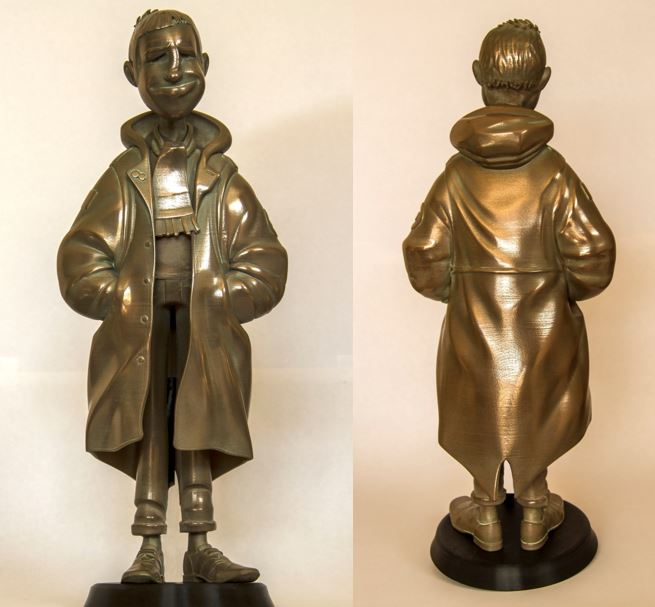
Whenever Steve Cox is printing something with bronzeFill, we pay attention. Why? Look at the image above and you know. His work is always exciting and stunning. His work with bronzeFill can be considered a standard in printing and polishing. Steve’s enthusiasm about printing and his prints are contagious and we are always happy when we run into him during shows. We were even allowed to borrow the statue you see during the TCT Show! We have written about Steve’s work before, which you can find here and here.
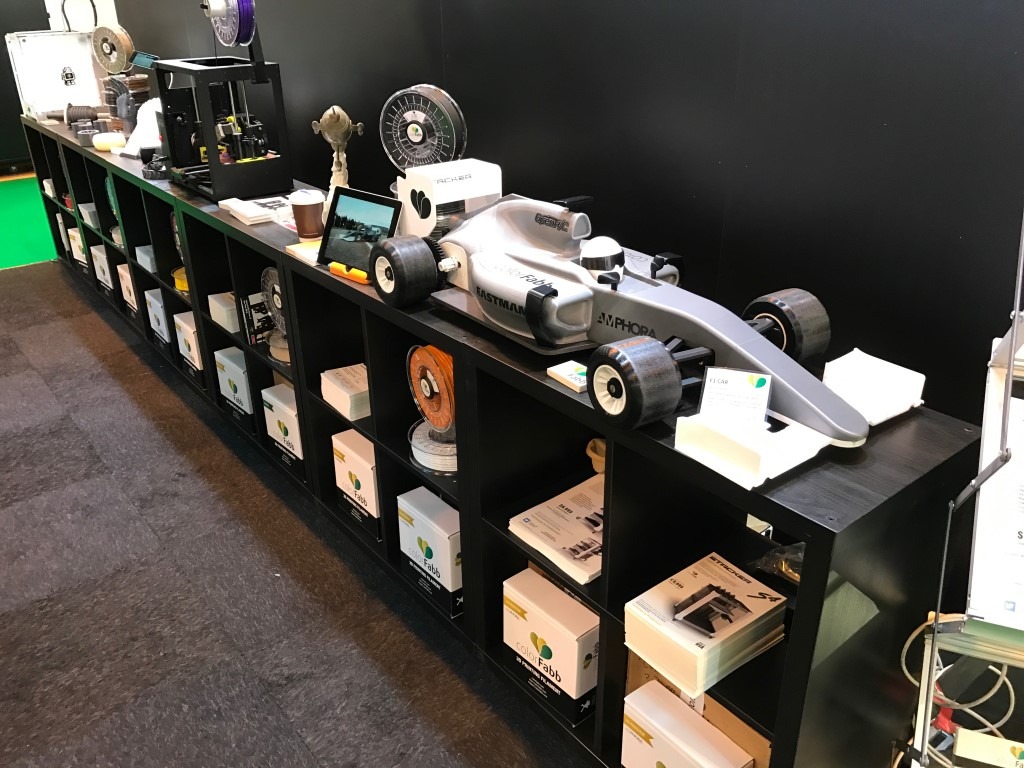
 

The Open RC F1 car

openrc_f1_shoot-4

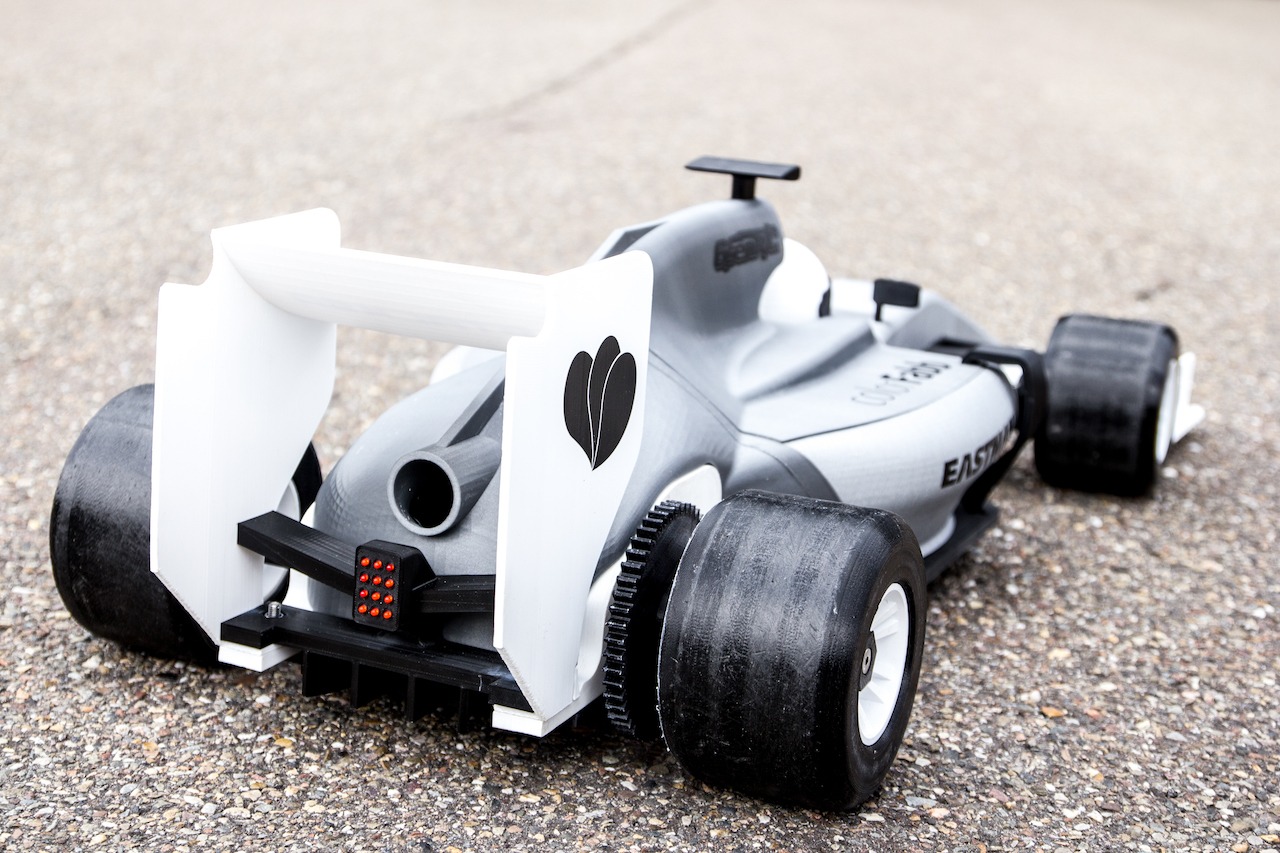
Design: http://www.thingiverse.com/thing:1834126

This comes as no surprise. We love our F1 car. Designed by Daniel Norée (yes, he of the transparent printing earlier) we increased the size with 250% and started printing with all our co-polyesters: nGen, colorFabb_XT, colorFabb_HT, XT-CF20 and the then brand new nGen_FLEX for the tires. The design by Daniel, the materials by colorFabb and printed on the Stacker S4 result in one of our most ambitious print projects. The result is stunning. We leave it to the video below to show the result:

Catch up on the full project release blog here.


As said, those are just a few of the many great prints of 2016 so far. We love seeing them coming by on social media and by email. Keep sharing them!! We keep printing ourselves as well. You can find regular updates on this very site: https://learn.colorfabb.com/category/featured-print/ 

Also, don’t forget to check out our collection of tutorials from time to time to get the best results printing with our filaments.

That’s it from colorFabb HQ for now. We hope you enjoy 3D Printing Day this year.

Happy 3D Printing Day and keep sharing your work!

– Team colorFabb


For the remainder of the year, because it is colorFabb’s fourth anniversary, we continue our Buy 4, Pay 3 promotion. Use coupon code colorfabb4you on our website to get the fourth spool you order for free! Some conditions apply though: cheapest spool is for free and samples and PLA Economy are exempt from this part of the promotion.

celebrating4years_2

colorFabb gift box

Recently at the TCT Show we finally caught up with Tony Short. Tony has been using colorFabb’s special filaments with great effect and we have been following his impressive work for quite a while now. You can find a few examples of his work on Twitter: here, here and here. We are always happy to meet up with our users at shows, but Tony had a surprise for us in store: a printed giftbox made with our special filaments, based on the colorFabb logo. A typographer by trade, Tony put in his best effort and came up with a truly stunning print:

box-2

We’ll let Tony explain in his own words how he made this beautiful gift box:

“Since I began 3D printing I’ve been a big fan of Colorfabb’s more exotic materials. I’ve been creating artworks with them for the last year or so, and I was very pleased to find that colorFabb loved my designs / prints as well. I decided to make one of my printed fancy boxes, using CF’s wood and metal filaments. Normally my work has a typographic flavour (given that’s my background) but in this instance I designed a box using the ‘petal?’ device from the CF logo.”

“I designed the box using Moments of Inspiration (MoI3D) software. Starting with the ‘wooden’ shell first, and creating the holes for the inset ‘metal’ panels.  On my Ulitmaker2 printer the Woodfill filament has always been slightly less than perfect, but I don’t mind that because it gives the finished job some defects, which makes it look more natural. They are printed at 0.3mm layers with a 0.6mm nozzle, so don’t take much time. Afterwards the minimal supports for the inset holes are removed, and because they will be covered with panels I don’t need to worry about the surface finish there.”

“I finish Woodfill prints with multiple passes of sandpaper, usually 120, 180, 400, 1500, 4000 grit, and then a couple of coats of acrylic lacquer.”

box-5

“For the three metal panels I wanted to create patterns that related to CF, ending up with a Dutch townhouse scene, a more traditional tulip pattern and an abstract design based on the CF logo letterforms. I did think that using tulips might be a bit stereotypical, but given that CF use windmills on their packaging I thought I would be fairly safe.”

“All three patterns we built as 3D objects in MOI3D, then repeated, merged and flattened to create the finish 3D files. They were printed in Copperfill and Bronzefill, 0.1 layer height, 0.4 nozzle. No supports are needed, and finishing is a lot easier than the Woodfill sanding!”

“The townhouses and tulips were given a rough sand down to remove any stray bits and blobs. Then sprayed with black matt paint, fairly thick to get into all the nooks and crannies. This is then wiped off with a rag, whilst still wet, to give an aged look. Once dry these are then brushed with a brass wire brush, and finished with some high grit paper. The lettering panel was roughly brushed, but then treated with some oxidising liquid which accelerates the ‘verdigris’ process. Left overnight it was bright green the next day, so some strategic sanding and polishing knocked back the effect to look more realistic.”

img_5140

“The metal panels were simply glued into their holes, and the box given a final coat of lacquer to protect the metal finish, and stop any additional oxidisation. I use a lacquer designed for covering gilding with metal leaf, but I guess any would do.”

“The way the box is printed with Woodfill gives a realistic wood grain effect, and the 3D printing means you can make designs that would be very difficult using traditional techniques.”

box-4

We once again thank Tony for his beautiful gift box and using our materials to such a great effect.

We have seen great use of our special filaments and post-processing possibilities. We have collected several blogs about post-processing metal filled filaments in one place, which you can visit here.

Tony’s work can be followed on Twitter, via his account. Follow him and be amazed by his work.

Our special filaments are available online and throughout our worldwide distributor and reseller network. Enquire locally for availability. We also offer a special filament value pack online, where you can choose 8 special filaments in one package.

TCT Show 2016 recap

Hi all,

We wrapped up the TCT Show 2016. Packed our goods, stacked them on the pallets and everything is heading back to colorFabb HQ again soon. We’re about to board our plane and leave Birmingham once more. It has been a great two days in Birmingham, meeting old friends and making new ones. We were there with our partners Stacker and Eastman Chemical Company, answering all your questions, showing the prints and the printers and giving away a lot of free samples of our co-polyesters.


img_5139

Two true artists dropped by: Steve Cox and Tony Short. They brought us their finest prints to showcase at our booth. Steve brought a statue, printed with bronzeFill and manually polished:

img_5133

Also, Tony Short dropped by and gave us a fantastic present: a gift box based on the colorFabb logo. You can see it for yourself. This gift is much appreciated and will get a special place at the office.

img_5140

As we said, true artists who not only know how to print, but how to post-process to achieve the highest quality possible.

Of course we had a big announcement at the beginning of the show. We launched nGen_FLEX this week and the initial reactions at show were extremely positive. Our new flexible filament has a Tg of over 125 degrees and is extremely well suited for engineering parts and prosthetics. Based on a co-polyester from Eastman, you can be assured of the high quality of the material. We have created a dedicated landing page for nGen_FLEX, which you can reach by clicking here.

We recently sent a few people spools to test nGen_FLEX and we saw an overwhelming support for our latest filament. Here are a few mentions of our beta testers:

screen-shot-2016-09-29-at-22-17-58

screen-shot-2016-09-29-at-22-16-08

screen-shot-2016-09-29-at-22-14-15

Layer adhesion is great and you can use this semi-flexible material with a Bowden tube, which we showed while printing on an Ultimaker 2+ with nGen_FLEX continuously during the show.

cthitxsxgaa39yo

nGen_FLEX is now available in black and dark gray.

The one feature print everybody talked about was the OpenRC F1 Car, designed by Daniel Norée, we published about last week. If you missed it, you can catch up here. We printed the entire car (a full 107cm long) with co-polyester based filaments: nGen, colorFabb_XT, colorFabb_HT, XT-CF20 and of course our latest nGen_FLEX which we used for the tires.

img_5115

The F1 car was mostly printed on the Stacker S4 during the summer. We had the Stacker on site during the TCT, printing technical parts – 4 at the same time! The Stacker S4 is a perfect printer for large scale projects and small series production. You can find more information by visiting our website: http://stacker.colorfabb.com/

stacker

A final honorable mention goes out to the team of Creat3D, our UK distributor. They built a big colorFabb tower at their stand!

pile

We want to thank everybody who visited us or followed the TCT Show through social media. Special thanks to Ludovic and Richard from Eastman, as well as Norston from Stacker to man the stand with us during these two busy days. It was great meeting everybody again and are too many to mention.

We hope to see you again next year!

(Oh, and don’t forget: the 10% discount code in our webshop will be valid the entire weekend. Use TCT2016 as the coupon code for a 10% discount on all spools of filament!)