
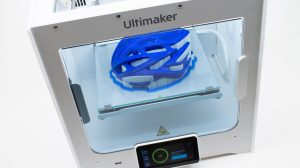
How to print with colorFabb_HT
To get the best possible quality out of any 3D printing material it’s important to match the slicer settings with the material which is used. On this page we’ll run through the most important settings and suggest good starting values for various printers. If your machine isn’t in our list use the general recommended settings.
In the table below you can quickly find values for your machine, scroll a bit further down to read more about each settings.
[table id=10 /]
Heated platform
For printers with glassplate as build surface we recommend high temperatures of 110/120C. For most small to medium sized part this should be sufficient.
For bigger parts with a larger flat surface touching the buildplate you might need more adhesion to keep the part from warping. In this case BuildTak plate can help prevent warping.
Printing temperature
Flow of material in mm3/s = (layerheight*nozzle width)*print speed
When considering normal settings such as 0.2mm layerheight and 50 mm/s speed we recommend for most machines a processing temperature of 260/280C.
At 0.1mm and 50mm/s temperature might be lower towards 250/270C.
Make sure your machine can reliably work at these elevated temperatures, not all 3D printers are able to go beyond 250C / 260C.
Cooling
This will results in better layer adhesion, but also less issues with warping of the material.
We also like the option of only activating layer cooling for the perimeter lines, the infill is not cooled and therefore should maintain best possible layer adhesion.
Bridging
We recommend slower printing on bridges, since there’s no material to support the printed line we don’t want to ‘break the melt’ by moving too fast. Slowing down the speed when bridging helps retain the melt strength and also allows the printed line to cool down in mid-air.
Cooling can be set at 100% to help the cool down of the first printed lines.
If you can still see the melt break when printing a bridge, try and increase the flow or bridge perimeter width.
Retraction
PLA retraction values should be a good starting value for most machines. One can expect slightly higher values of retraction speed and retraction length. For more specific values have a look at our table above.
Coasting is a nice option included in Simplify3D. This is the act of stopping the extrusion just before a travel move is triggered, this helps get rid of the pressure in the hot-end and therefor also making a retraction move more effective.
Minimal layer time
For colorFabb_HT it’s also important to adjust the minimum layer time when you want to print without cooling for best layer adhesion.


5 Comments
I have the same vertical distortion using HT on my Prisa MK3S. Contacted the support for more help, hopefully we can find the issue
Hi
which is stronger for every day use HT or XT or are they similar only that HT can handle higher Temp
Not sure which one to use for my next project (strong part for a childs toy)
I would advice to use _HT only when you need the higher temperature resistance. Although _HT is tougher then _XT, it also comes at the price of slightly more complex printing, more fine tuning needed. _HT is somewhat more prone to warping, _XT is usually perfectly flat at 70/80C on the print platform.
_XT comes in variety of colors whilst _HT is only available in white, black and two gray tones.
_XT is probably a good balance for you.
I have tryed printing with HT and after a complete roll with many problems like warping off the bed,distortion on a vertical print and then the heat test it started to misshape and colapse at 80’c.
I am very disappointed with this especialy after setting my ultimaker 2 extended + to the settings that are advised.
I would like some answers on this.
Many thanks Kev.
Ps what do you say to the heat test as i have spent over £40 on filiment and all a waste of money.
Hi Kev,
We have also contacted you via support@colorfabb.com to learn about more about your tests and receive some extra information.
In our printlab we use 3 Ultimaker 2+ units in our testing of the material and have had good results with them.
They are a standard part of our testing, that is also why we have included them in the settings table listed in this (and other) article.
With some extra information and a gcode file we can recreate your test in our lab and verify and hopefully solve your issues.
If there is indeed something wrong with the material we will of course ship you a new spool straight away to replace the bad material.
But at the moment the issues you are having are unclear to us and we’d like some more information as requested.